There are very few things that are so far reaching across many different disciplines, ranging from biology to engineering, as is the relation of the surface area to the volume of a body. This is not a law, as Newton’s second one, or a theory as Darwin’s evolution theory. But it has consequences in a diverse set of situations. It explains why cells are the size they are, why some animals have a strange morphology, why flour explodes while wheat grains don’t and many other phenomena that we will explore in this article.
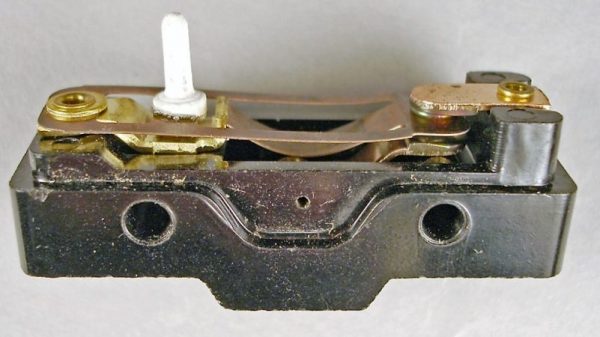
You find them everywhere from 3D printers to jet airliners. They’re the little switches that detect paper jams in your printer, or the big armored switches that sense when the elevator car is on the right floor. They’re microswitches, or more properly miniature snap-action switches, and they’re so common you may never have wondered what’s going on inside them. But the story behind how these switches were invented and the principle of physics at work in the guts of these tiny and useful switches are both pretty interesting.
It was a dark and stormy afternoon, the kind you get on the east side of the country. I was drinking a coffee, sitting in a camping chair in front of my door, and watching like a hawk for the treacherous cable man to show up. This day there would be no escape. There would be no gently rapping the door with a supple sheepskin leather glove before scurrying away for another union mandated coffee break. I was waiting, I was kind of grumpy, and by God today would be the day. Today would be the day that after hours on hold, after three missed appointments, after they lost my records twice; I would get an answer on whether or not they could actually service internet to my apartment. If I was lucky, and the answer was yes, then approximately two to three thousand years later they would run a cable from the telephone pole to my house and I could stop commandeering WiFi from the pizza shop across from me.
It’s important to note that I was in the middle of the city. I wasn’t out in the boonies. Every house on the block but mine had cable. While this is dumb, it begins to make more sense when you dive into the history. Louisville, Kentucky is a strange place. It used to be the gateway to the west. Ships would crawl up its river until they reached the falls. Then porters would charge an exorbitant fee to carry all those goods down to the bottom of the falls where they would be loaded on a ship and be sent ever westward. Resulting in every rich merchant, captain, and manufacturer in the region having a nice house there. Ever wonder why the Derby is in Louisville and the Queen comes to visit sometimes? It probably has something to do with it having the highest concentration of Victorian buildings and mansions outside of New York City.
Python is the Arduino of software projects. It has a critical mass of libraries for anything from facial recognition and neural networks to robotics and remote sensing. And just like Arduino, I have yet to find the killer IDE for Python. Perhaps I just haven’t tried the right one yet, but it could be that I’m just doing Python wrong.
For Years I’ve Been IDLE
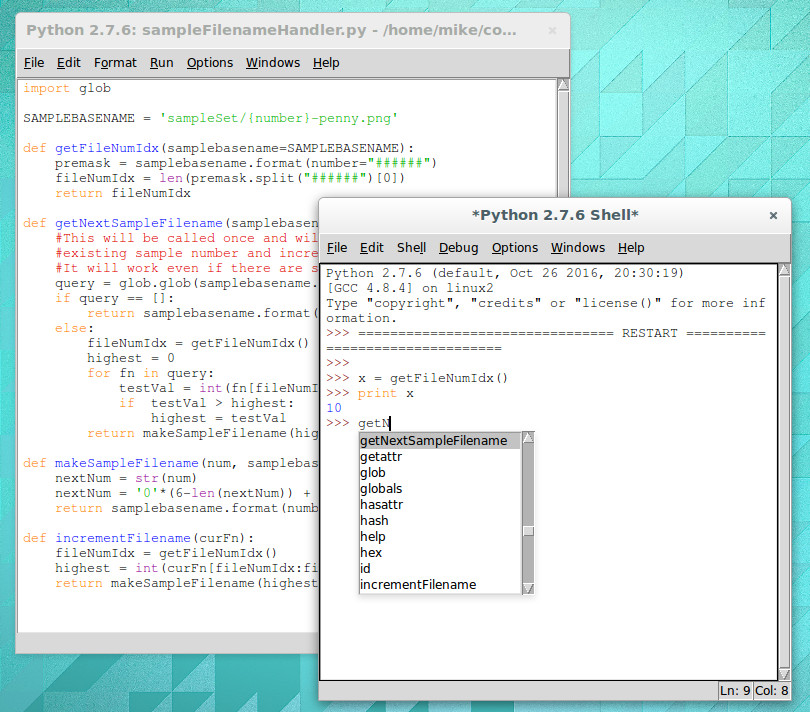
IDLE with interactive shell that has highlighting and code completion
I’m a Linux-only type of a guy so using IDLE for Python is a natural fit. It’s in the repositories for super quick and easy install and there’s basically zero configuration to be done. Generally speaking my preferred development environment is text editor and command line compiler. IDLE is just one step above that. You get a separate window for the shell and each Python file you’re working on. Have IDLE run your code and it saves the file, then launches it in the shell window.
For me, there are two important features of IDLE’s shell. The first is that it keeps an interactive session open after you run your Python code. This means that any globals that your script uses are still available, and that you can experiment with your code by calling functions (and classes, etc) in real time. The second desirable feature is that while using this interactive shell, IDLE supports code completion and docstring support (it gives you hints for what parameters a function accepts/requires).
But simplicity has a tough time scaling. I’m working on larger and larger projects spread over many files and the individual nature of IDLE editor windows and lack of robust navigation has me looking to move forward.
The Contenders
I’ve tried perhaps a half-dozen different Python IDEs now, spending the most time on two of them: Geany and Atom. Both are easy to install on Linux and provide the more advanced features I want for larger projects: better navigation, cross-file code completion (and warnings), variable type and scope indication.
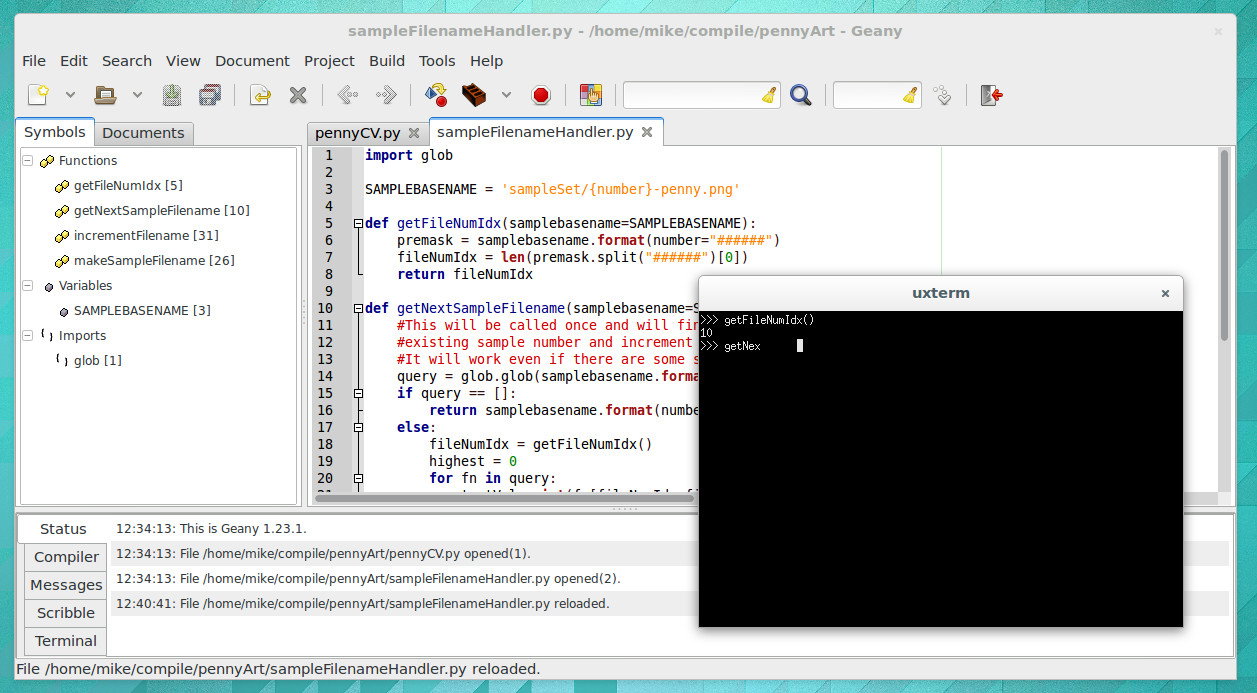
The look of Geany brings to mind an “IDE 1.0” layout style and theme. It’s the familiar three-pane layout that places symbols to the left, code to the right, and status along the bottom. When you run your program it launches in an interactive terminal, which I like, but you lose all IDE features at this point, which I despise. There is no code completion, and no syntax highlighting.
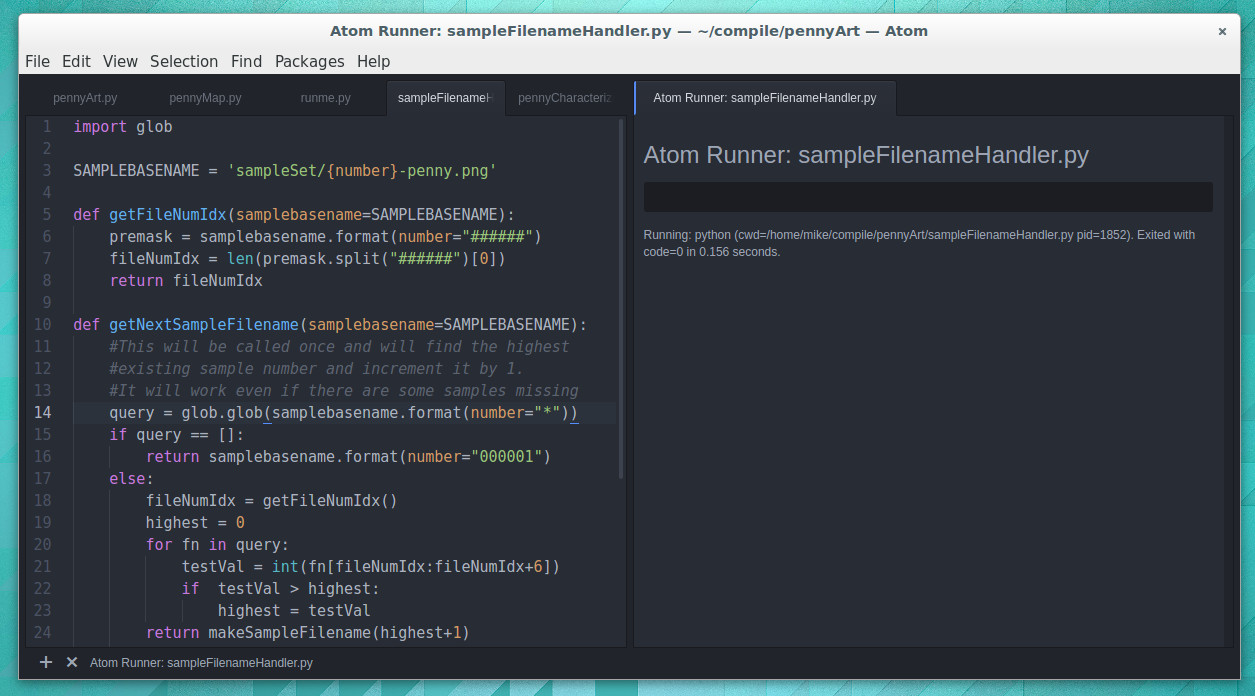
I have been using Atom much more than Geany and have grown to like it enough to stick with it for now. I’d call Atom the “IDE 2.0” layout. It launches with a dark theme and everything is a tab.
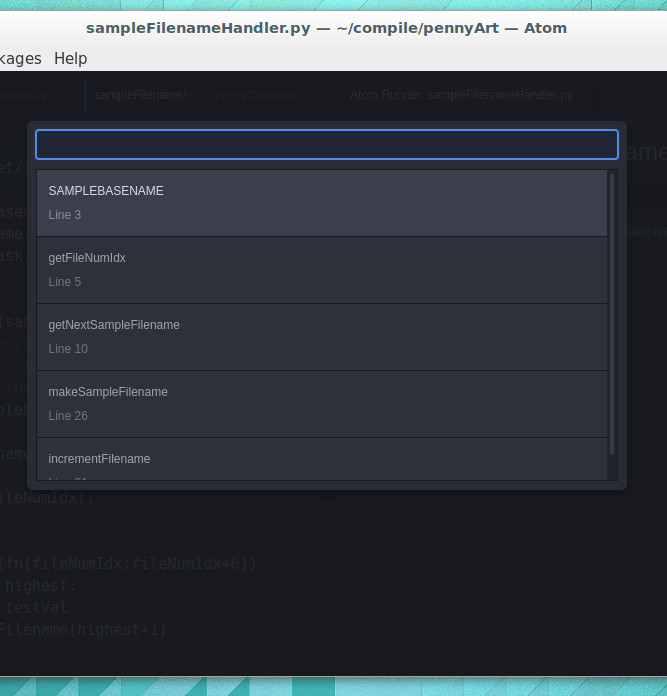
Atom has symbol view that isn’t shown all the time. CTRL-R brings it up and it uses a search style but you can also scroll through all symbols
Atom depends heavily on packages (plugins that anyone may write). The package management is good, and the packages I’ve tried have been superb. I’m using autocomplete-python and tabs-to-spaces, but again I come up short when it comes to running Python files. I’ve tried platformio-ide-terminal, script, and runner plugins. The first brings up a terminal as a bottom pane but doesn’t automatically run the file in that terminal. Script also uses a bottom pane but I can’t get it to run interactively. I’m currently using runner which has an okay display but is not interactive. I’ve resorted to using a “fake” python file in my projects as a workaround for commands and tests I would normally run in the interactive shell.
Tell Us How You Python
It’s entirely possible I’ve just been using Python wrong all these years and that tinkering with your code in an interactive shell is a poor choose of development processes.
What do you prefer for your Python development? Does an interactive shell matter to you? Did you start with IDLE and move to a more mature IDE. Which IDE did you end up with and what kind of compromises did you make during that change. Let us know in the comments below.
There’s a lot to be said in favor of getting kids involved in hacking as young as possible, but there is one thing about working in electronics that I believe is best left as a mystery until at least the teenage years — hide the shrink tube. Teach them to breadboard, have them learn resistor color codes and Ohm’s Law, and even teach them to solder. But don’t you dare let them near the heat shrink tubing. Foolishly reveal that magical stuff to kids, and if there’s a heat source anywhere nearby I guarantee they’ll blow through your entire stock of the expensive stuff the minute you turn your back. Ask me how I know.
I jest, but only partly. There really is something fun about applying heat shrink tubing, and there’s no denying how satisfying a termination can be when it’s hermetically sealed inside that little piece of inexplicably expensive tubing. But how does the stuff even work in the first place?
If you measure a DC voltage, and want to get some idea of how “big” it is over time, it’s pretty easy: just take a number of measurements and take the average. If you’re interested in the average power over the same timeframe, it’s likely to be pretty close (though not identical) to the same answer you’d get if you calculated the power using the average voltage instead of calculating instantaneous power and averaging. DC voltages don’t move around that much.
Try the same trick with an AC voltage, and you get zero, or something nearby. Why? With an AC waveform, the positive voltage excursions cancel out the negative ones. You’d get the same result if the flip were switched off. Clearly, a simple average isn’t capturing what we think of as “size” in an AC waveform; we need a new concept of “size”. Enter root-mean-square (RMS) voltage.
To calculate the RMS voltage, you take a number of voltage readings, square them, add them all together, and then divide by the number of entries in the average before taking the square root: . The rationale behind this strange averaging procedure is that the resulting number can be used in calculating average power for AC waveforms through simple multiplication as you would for DC voltages. If that answer isn’t entirely satisfying to you, read on. Hopefully we’ll help it make a little more sense.
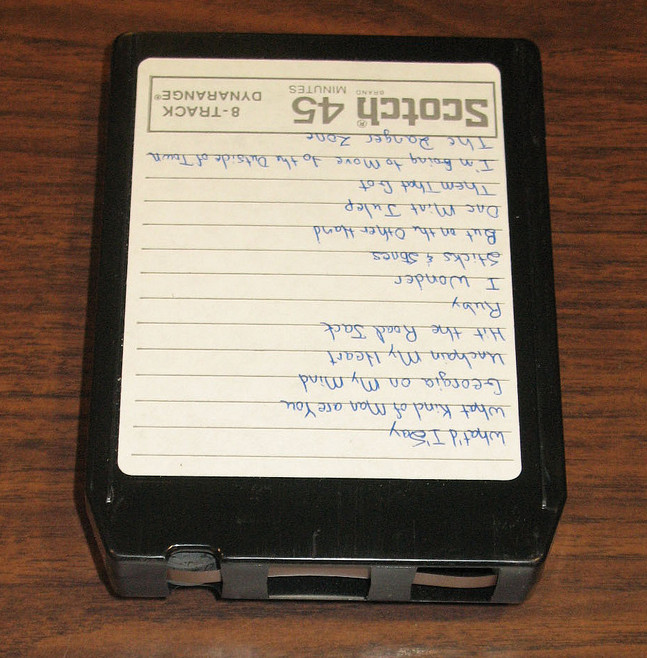
If you are a connoisseur of analogue audio, it’s probable you might have a turntable and a stack of records at home somewhere. If you are of a certain age you may even have a cassette deck, though you’re more likely to have abandoned that format some time in the 1990s. If you are old enough to have been around in the 1960s or 1970s though, you may have owned another analogue audio format. One of several that you might have found in a well-equipped home of that period was the 8-track stereo cartridge, a self-contained tape cassette format that fit four stereo tracks onto a single quarter-inch tape loop as eight parallel tracks, four each of left and right. A triumph of marketing, really, it should more accurately have been called 4-track stereo.
8-track cartridges were developed from earlier tape cartridge formats, largely to satisfy the demands of the automotive industry for interchangeable in-car entertainment. Thus if you owned an 8-track player it was most likely to have been found in your car, but it was not uncommon to find them also incorporated into home hi-fi systems. Thus we come to our subject today. Our retrotechtacular series usually highlights a video showing a bygone technology, but today we’re going to get a little more hands-on.
Some time in the early 1990s, I acquired an 8-track player, a BSR McDonald unit manufactured in the UK and dating from the early 1970s. BSR were much more well-known for their turntables, so this is something of an oddity. Where I found it has disappeared into the mists of time, but it was probably at a radio rally or junk sale. I certainly didn’t buy it because I wanted it to play 8-track tapes, instead I wanted a talking point for my hi-fi, something quirky to set it apart from everyone else’s. So every incarnation of listening enjoyment chez List for the last quarter century has had an 8-track player nestling within it, even if it has never played a tape while in my ownership. Thus we have a unique opportunity for this retro teardown.






 . The rationale behind this strange averaging procedure is that the resulting number can be used in calculating average power for AC waveforms through simple multiplication as you would for DC voltages. If that answer isn’t entirely satisfying to you, read on. Hopefully we’ll help it make a little more sense.