Open Source SNES To USB Converter Lets You Emulate Legally

[Andrew Milkovich] was inspired build his own Super Nintendo cartridge reader based on a device we covered an eternity (in internet years) ago. The device mounts a real cartridge as a USB mass storage device, allowing you to play your games using an emulator directly from the cart.

This uses a Teensy++ 2.0  at its core. [Andrew] had to desolder the EEPROM pins from the SNES cartridge and reverse engineer the pinouts himself, but the end result was a device that could successfully read the cartridge without erasing it, no small accomplishment. The finished cartridge reader is build on some protoboard and we’d like to complement [Andrew] on his jumper routing on the underside of that board.

Of course, the experience of any console is just not the same without the original controller. So [Andrew] went a step further and made his own SNES controller to USB converter. This had the venerable Atmel ATmega328 at its core, and can be used separate from the cartridge reader if desired.

Working In Peace With An Off-Grid Office Shed

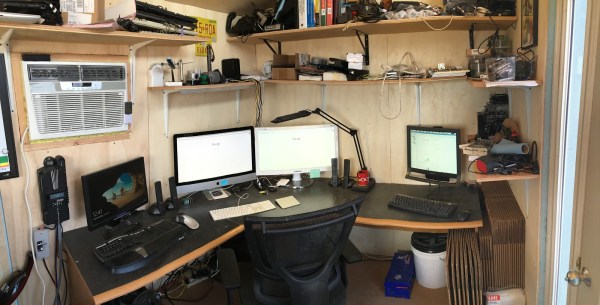
Finding a good work space at home isn’t a trivial task, especially when you’ve got a wife and kid. A lot of us use a spare bedroom, basement, or garage as a space to work on our hobbies (or jobs). But, the lack of true separation from the home can make getting real work done difficult. For many of us, we need to have the mental distance between our living space and our working space in order to actually get stuff done.

This is the problem [Syonyk] had — he needed a quiet place to work that was separated from the rest of his house. To accomplish this, he used a Tuff Shed and set it up to run off-grid. The reason for going off-grid wasn’t purely environmental, it was actually more practical than trying to run power lines from the house. Because of the geology where he lives, burying power lines wasn’t financially feasible.

Continue reading “Working In Peace With An Off-Grid Office Shed”

Atari Archaeology Without Digging Up Landfill Sites

We are fortunate to live in an age of commoditized high-power computer hardware and driver abstraction, in which most up-to-date computers have the ability to do more or less anything that requires keeping up with the attention of a human without breaking a sweat. Processors are very fast, memory is plentiful, and 3D graphics acceleration is both speedy and ubiquitous.

Thirty years ago it was a different matter on the desktop. Even the fastest processors of the day would struggle to perform on their own all the tasks demanded of them by a 1980s teenager who had gained a taste for arcade games. The manufacturers rose to this challenge by surrounding whichever CPU they had chosen with custom co-processors, ASICs that would take away the heavy lifting associated with 2D graphics acceleration, or audio and music synthesis.

One of the 1980s objects of computing desire was the Atari ST, featuring a Motorola 68000 processor, a then-astounding 512k of RAM, a GUI OS, high-res colour graphics, and 3.5″ floppy drive storage. Were you to open up the case of your ST you’d have found those ASICs we mentioned as being responsible for its impressive spec.

Jumping forward three decades, [Christian Zietz] found that there was frustratingly little information on the ST ASIC internal workings. Since a trove of backed-up data became available when Atari closed down he thought it would be worth digging through it to see what he could find. His write-up is a story of detective work in ancient OS and backup software archaeology, but it paid off as he found schematics for not only an ASIC from an unreleased Atari product but for the early ST ASICs he was looking for. He found hundreds of pages of schematics and timing diagrams which will surely take the efforts of many Atari enthusiasts to fully understand, and best of all he thinks there are more to be unlocked.

We’ve covered a lot of Atari stories over the years, but many of them have related to their other products such as the iconic 2600 console. We have brought you news of an open-source ST on an FPGA though, and more recently the restoration of an ST that had had a hard life. The title of this piece refers to the fate of Atari’s huge unsold stocks of 2600 console cartridges, such a disastrous marketing failure that unsold cartridges were taken to a New Mexico landfill site in 1983 and buried. We reported on the 2013 exhumation of these video gaming relics.

A tip of the hat to Hacker News for bringing this to our attention.

Atari ST image, Bill Bertram (CC-BY-2.5) via Wikimedia Commons.

Kinect And Raspberry Pi Add Focus Pulling To DSLR

Prosumer DSLRs have been a boon to the democratization of digital media. Gear that once commanded professional prices is now available to those on more modest budgets. Not only has this unleashed a torrent of online content, it has also started a wave of camera hacks and accessories, like this automatic focus puller based on a Kinect and a Raspberry Pi.

For [Tom Piessens], the Canon EOS 5D has been a solid platform but suffers from a problem. The narrow depth of field possible with DSLRs makes it difficult to maintain focus on subjects that are moving relative to the camera, making follow-focus scenes like this classic hard to reproduce. Aiming for a better system than the stock autofocus, [Tom] grafted a Kinect sensor and a stepper motor actuator to a Raspberry Pi, and used the Kinect’s depth map to drive the focus ring. Parts are laser-cut, including a nice enclosure for the Pi and display that makes the whole thing reasonably portable. The video below shows the focus remaining locked on a selected region of interest. It seems like movement along only one axis is allowed; we’d love to see this system expanded to follow a designated object no matter where it moves in the frame.

If you’re in need of a follow-focus rig but don’t have a geared lens, check out these 3D-printed lens gears. They’d be a great complement to this backwoods focus-puller.

Continue reading “Kinect And Raspberry Pi Add Focus Pulling To DSLR”

Much More Than A Desktop Mill: The DIY VMC Build

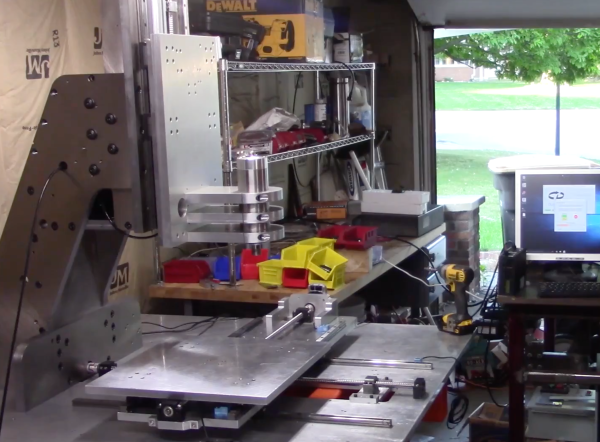
A VMC (vertical machining center) is essentially a CNC vertical milling machine on steroids. Many CNC mills are just manual milling machines that have been converted to CNC control. They work nicely, but have a number of drawbacks when it comes to real world CNC milling: manual tool changes, lack of chip collection, lack of coolant containment, and backlash issues (which a manual machinist normally compensates for).

These problems are solved with a VMC, which will usually have an automatic tool changer, and an enclosure to contain coolant and wash chips down into a collection pan. They are, however, very expensive, very big, and very heavy. Building one from scratch is a massive undertaking, but one which [Chris DePrisco] was brave enough to take on.

Continue reading “Much More Than A Desktop Mill: The DIY VMC Build”

Police Baffled? Send For The Radio Amateurs!

The police force in Evanston, Illinois had a problem on their hands. A mystery transmitter was blocking legal use of radio devices, car key fobs, cellphones, and other transmitters in an area of their city, and since it was also blocking 911 calls they decided to investigate it. Their first call for help went to the FCC who weren’t much use, telling them to talk to the manufacturers of the devices affected.

Eventually they approached the ARRL, the USA’s national amateur radio organisation, who sent along [Kermit Carlson, W9XA] to investigate. He fairly quickly identified the frequencies with the strongest interference and the likely spot from which it originated, and after some investigation it was traced to a recently replaced neon sign power supply. Surprisingly the supply was not replaced with a fault-free unit, its owner merely agreeing to turn it off should any further interference be reported.

The ARRL are highlighting this otherwise fairly unremarkable case to draw attention to the problem of devices appearing on the market with little or no pretence of electromagnetic compatibility compliance. In particular they are critical of the FCC’s lacklustre enforcement response in cases like this one. It’s a significant problem worldwide as huge numbers of very cheap switch-mode mains power supplies have replaced transformers in mains power applications, and in any center of population its effects can be readily seen with an HF radio in the form of a significantly raised RF noise floor. Though we have reported before on the FCC’s investigation of the noise floor problem we’d be inclined to agree with the ARRL that it is effective enforcement of EMC regulations that is key to the solution.

City of Evanston police vehicle picture, [Inventorchris] (CC BY-NC 2.0) via Flickr.

A Refrigerator Cooled By Rubber Bands

Ever noticed that a rubber band gets warmer when it’s stretched? The bands also get cooler when allowed to snap back to relaxed length? [Ben Krasnow] noticed, and he built a rubber band cooled refrigerator to demonstrate the concept. The idea of stretching a rubber band to make it hotter, then releasing it to make it cooler seems a bit counter intuitive. Normally when things get smaller (like a gas being compressed) they get hotter. When pressure is released the gas gets cooler. Rubber bands do the exact opposite. Stretching a rubber band makes it hot. Releasing the stretched band causes it to get cooler.

No, the second law of thermodynamics isn’t in jeopardy. The secret is in the molecular structure of rubber bands. The bands are made of long polymer chains. A relaxed rubber band’s chains are a tangled mess. Stretching the band causes the chains to untangle and line up in an orderly fashion. By stretching the band you are decreasing its entropy. The energy of the molecules in the band don’t change, but entropy does. All the work one does to stheatwheelretch the band has to go somewhere, and that somewhere is heat. This is all an example of entropic force. For a physics model of what’s going on, check out ideal chains. If you’re confused, watch the video. [Ben] does a better job of explaining entropic force visually than we can with text.

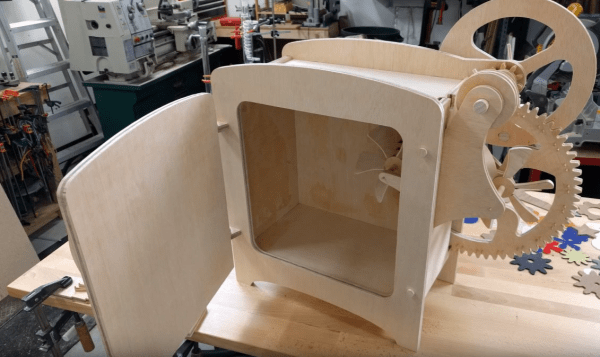
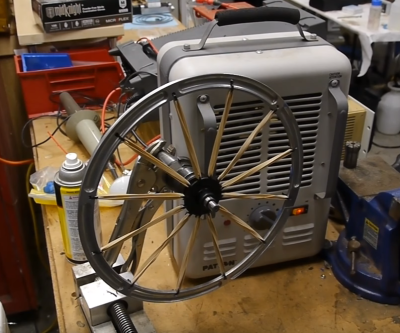
To test this phenomenon out, [Ben] first built a wheel with rubber bands as spokes. Placing the wheel in front of a heater caused it to slowly rotate. [Ben] then reversed the process by building a refrigerator. He modeled his parts in solidworks, then cut parts with his Shaper handheld CNC. The fridge itself consists of an offset wheel of rubber bands. The bands are stretched outside the fridge, and released inside. Two fans help transfer the thermal energy from the bands to the air. The whole thing is hand cranked, so this would make a perfect museum or educational demonstration. Cranking the fridge for 5 minutes did get the air inside a couple of degrees cooler. Rubber is never going to displace standard refrigerants, but this is a great demo of the principles of entropic force.

For more thermodynamic fun, check out [Al Williams] recent article about building a DIY heat pipe.

Continue reading “A Refrigerator Cooled By Rubber Bands”