The field of photonics has seen significant advances during the past decades, to the point where it is now an integral part of high-speed, international communications. For general processing photonics is currently less common, but is the subject of significant research. Unlike most photonic circuits which are formed using patterns etched into semiconductor mask using lithography, purely light-based circuits are a tantalizing possibility. This is the focus of a recent paper (press release, ResearchGate) in Nature Photonics by [Tianwei Wu] and colleagues at the University of Pennsylvania.
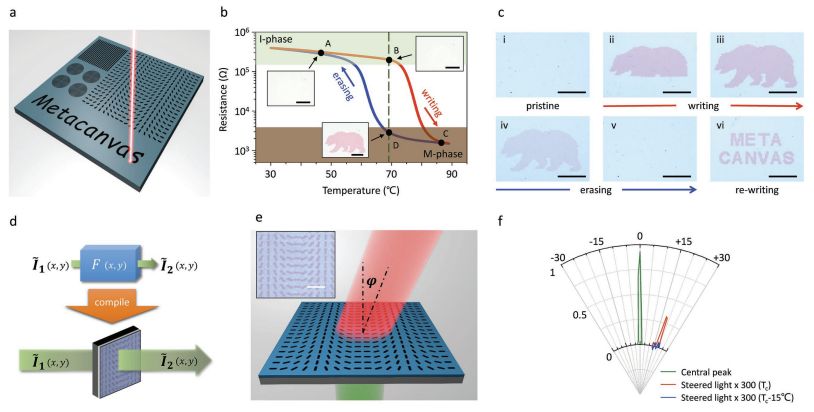
What is somewhat puzzling is that despite the lofty claims of this being ‘the first time’ that such an FPGA-like device has been created for photonics, this is far from the case, as evidenced by e.g. a 2017 paper by [Kaichen Dong] and colleagues (full article PDF) in Advanced Materials. Here the researchers used a slab of vanadium dioxide (VO2) with a laser to heat sections to above 68 °C where the material transitions from an insulating to a metallic phase and remains that way until the temperature is lowered again. The μm-sized features that can be created in this manner allow for a wide range of photonic devices to be created.
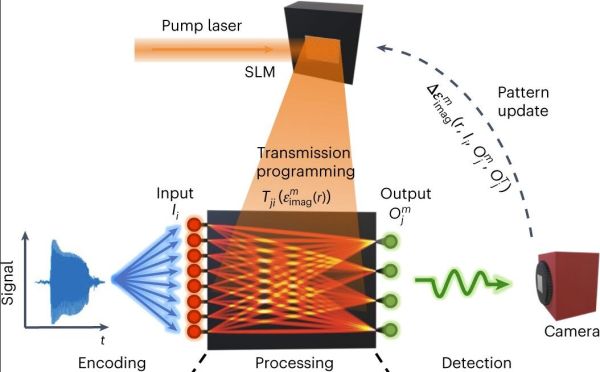
What does appear to be different with the photonic system presented by [Wu] et al. is that it uses a more traditional 2D approach, with a slab of InGaAsP on which the laser pattern is projected. Whether it is more versatile than other approaches remains to be seen, with the use of fully photonic processors in our computers still a long while off, never mind photonics-accelerated machine learning applications.