Even if keeping bees sounds about as wise to you as keeping velociraptors (we all know how that movie went), we have to acknowledge that they are a worthwhile thing to have around. We don’t personally want them around us of course, but we respect those who are willing to keep a hive on their property for the good of the environment. But as it turns out, there are more challenges to keeping bees than not getting stung: you’ve got to keep track of the things too.
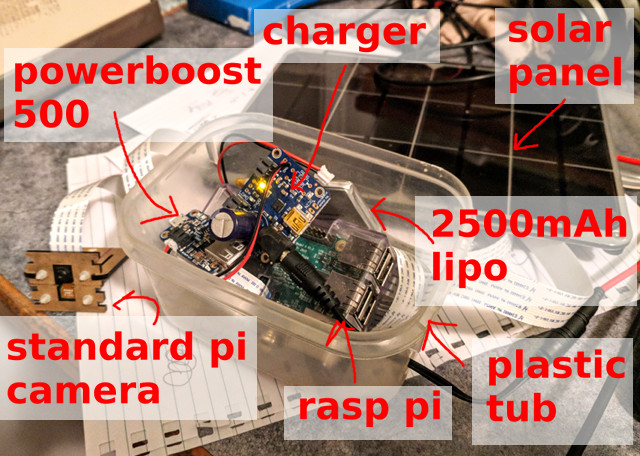 Keeping an accurate record of how many bees are coming and going, and when, is a rather tricky problem. Apparently bees don’t like electromagnetic fields, and will flee if they detect them. So putting electronic measuring devices inside of the hive can be an issue. [Mat Kelcey] decided to try counting his bees with computer vision, and so far the results are very promising.
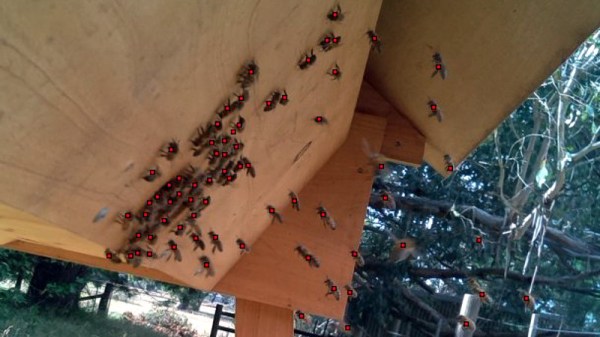
After some training, a Raspberry Pi with a camera can count how many bees are in a given image to within a few percent of the actual number. Getting an accurate count of his bees allows [Mat] to generate fascinating visualizations about his hive’s activity and health. With real-world threats such as colony collapse disorder, this type of hard data can be crucial.
This is a perfect example of a hack which might not pertain to many of us as-is, but still contains a wealth of information which could be applicable to other projects. [Mat] goes into a fantastic amount of detail about the different approaches he tried, what worked, what didn’t, and where he goes from here. So far the only problem he’s having is with the Raspberry Pi: it’s only able to run at one frame per second due to the computational requirements of identifying the bees. But he’s got some ideas to improve the situation.
As it so happens, we’ve covered a few other methods of counting bees in the past, though this is the first one to be entirely vision based. Interestingly, this method is similar to the project to track squirrels in the garden. Albeit without the automatic gun turret part.

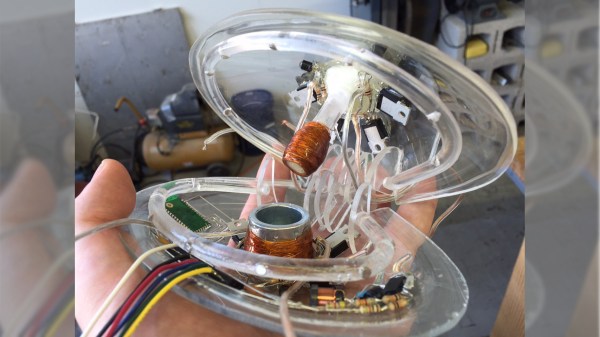
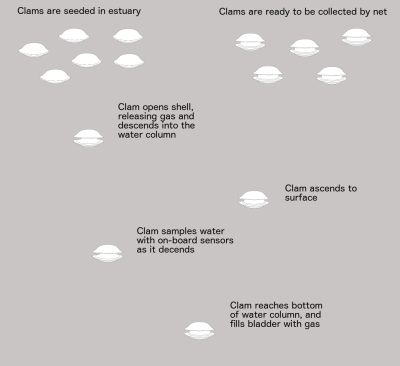 The clams contain the electronics, sensors, and means of descending and ascending within their shells. A bunch of them are dropped overboard on the surface. Their shells open, allowing the gas within to escape and they sink. As they descend they sample the water. When they reach the bottom, gas fills a bladder and they ascend back to the surface with their data where they’re collected in a net.