Hackaday Links Column Banner

Hackaday Links: April 15th, 2018

San Fransisco is awash in electric scooters. Three companies — Lime, Bird, and Spin — have been dumping ‘smart’ electric scooters on the sidewalks of San Fransisco over the last few weeks. The business plan for all these companies is to allow anyone to ride them via an app. $1 unlocks the scooter, and rides are fifteen cents a minute. No one, it appears, is looking at the upside of abandoned, dead electric scooters: they’re a remarkable source of lithium batteries and brushless motors. Hello, my name is Mr. Cyberpunk. My friends and I drive around the city collecting abandoned electric scooters to harvest their batteries and motors. A quick hit from a drill in the middle of the top panel of a Bird scooter disables the cellular modem, but then you don’t get to harvest the Particle dev board. You’re welcome, Mr. Doctorow, for the scene in your next novel.

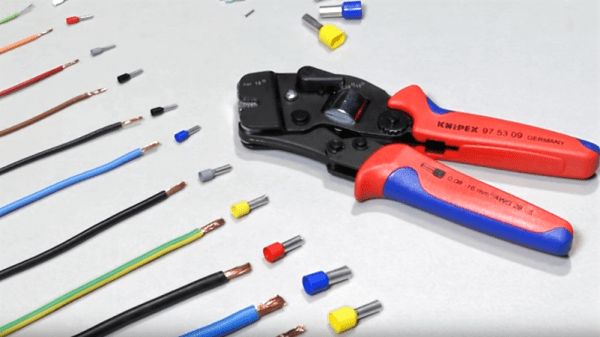
There are a huge number of tips and tricks that are obvious if you already know them, and genius if you don’t. Working with wood? Need to hide a gap? Use sawdust and wood glue to make DIY wood filler. The trick here is using sawdust from whatever you’re trying to hide a gap in, but it’s not a bad idea to keep a few small containers of different sawdusts if you’re working with exotic tropical hardwoods. Titebond III, mango.

Ever since the Bayeux tapestry meme generator of 2003, embroidery has been recognized as a legitimate art form. [Irene Posch] is using traditional embroidery skills to create a computer. Conductive thread exists, but you can’t make a computer out of just wire; you need some sort of switching element. This is a relay computer, with the relays built out of beads, coils of conductive thread, and a tiny flippy bit. This is the best picture you’re going to get of the relay. This is still a work in progress and the density of components means this will probably never meet any reasonable definition of ‘computer’, but it is digital logic, done completely with tools in the embroidery toolset.

You know what’s awesome? Hashtag Badgelife. What is Badgelife? It’s the hardware demoscene of independent electronic conference badges, mostly going down at DEF CON every year. This year, Badgelife is bigger than ever. Want proof? AND!XOR, the folks behind the infamous Bender badge and last year’s Hunter S. Rodriguez badge have unleashed this year’s design. It was a Kickstarter, until it sold out. The DC Furs have launched their pre-order whatever for a badge filled with LEDs and fleas. Most surprisingly, there will now be an official mini-village of Badgelife at this year’s Defcon! This is a hardware demoscene, people, and if you want to be as cool as the guys rocking Amiga homebrew in 1993, you gotta get on board with the badgelife.

Fail Of The Week: Casting A Bolt In A 3D-Printed Mold

Here’s a weird topic as a Fail of the Week. [Pete Prodoehl] set out to make a bolt the wrong way just to see if he could. Good for you [Pete]! This is a great way to learn non-obvious lessons and a wonderful conversation starter which is why we’re featuring it here.

The project starts off great with a model of the bolt being drawn up in OpenSCAD. That’s used to create a void in a block which then becomes two parts with pegs that index the two halves perfectly. Now it’s time to do the casting process and this is where it goes off the rail. [Pete] didn’t have any flexible filament on hand, nor did he have proper mold release compound. Considering those limitations, he still did pretty well, arriving at the plaster bold seen above after a nice coat of red spray paint.

One side of the mold didn’t make it

He lost part of the threads getting the two molds apart, and then needed to sacrifice one half of the mold to extract the thoroughly stuck casting. We’ve seen quite a bit of 3D printed molds here, but they are usually not directly printed. For instance, here’s a beautiful mold for casting metal but it was made using traditional silicon to create molds of the 3D printed prototype.

Thinking back on it, directly 3D printed molds are often sacrificial. This method of pewter casting is a great example. It turns out gorgeous and detailed parts from resin molds that can stand up to the heat but must be destroyed to remove the parts.

So we put it to you: Has anyone out there perfected a method of reusable 3D printed molds? What printing process and materials do you use? How about release agents — we have a guide on resin casting the extols the virtues of release agent but doesn’t have any DIY alternatives. What has worked as a release agent for you? Let us know in the comments below.

Mechanisms: The Spring

Most people probably don’t think about springs until one kinks up or snaps, but most of the world’s springs are pretty crucial. The ones that aren’t go by the name Slinky.

We all use and encounter dozens of different types of springs every day without realizing it. Look inside the world of springs and you’ll find hundreds of variations on the theme of bounce. The principle of the spring is simple enough that it can be extended to almost any shape and size that can be imagined and machined. Because it can take so many forms, the spring as a mechanism has thousands of applications. Look under your car, take apart a retractable pen, open up a stapler, an oven door, or a safety pin, and you’ll find a spring or two. Continue reading “Mechanisms: The Spring”

Up, Up, Up: $2,000 More Seed Funding For Hackaday Prize Entries

Getting a project off the ground often means an up-front investment in parts. Hackaday is upping our efforts to smooth out that obstacle for those who want to Build Something That Matters. Seed funding for the 2018 Hackaday Prize is simple, enter your Open Hardware design, share it far and wide so that a lot of people will show their admiration with a ‘like’ on the project page. If you’re in the Prize competition, you get a dollar for each like to help jump-start the build phase. If you haven’t entered, you get to encourage and reward the projects that inspire you most.

This year has started off like a rocket. We’ve already passed the $4,000 seed funding limit and you still have until a week from Monday to take part in this seed funding. With so much excitement around this first challenge, Supplyframe, Hackaday’s parent company, is raising the pot to a total of $6,000. That means there’s more up for grabs. Enter your project now. If you’ve already done that, polish up your presentation and show it around to your friends and on social media. Entries with the most likes will get a dollar for every like up to $200 max, or until we undoubtedly reach the new limit once again. Don’t delay, it’s time to Build Something that Matters!

Seed funding is a big deal as we found out with Alex Williams, the 2018 Grand Prize Winner. He mentioned that the money really helped him with early build costs, and the interest from the community inspired him to keep up development throughout the contest. Help us give away this extra funding and inspire the next generation of finalists by commenting on and upvoting great entries!

To Ferrule Or Not To Ferrule?

We recently posted about a spectacular 3D-printer fire that was thankfully caught and extinguished before spreading to the hacker’s house or injuring his family. Analyzing the remains of the printer, the hacker determined that the fire was caused when a loose grub screw let the extruder’s heater cartridge fall out and touch the ABS fan shroud. It ran full-on and set things on fire.

A number of us have similar 3D printers, so the comments for this article were understandably lively, but one comment stood out by listing a number of best practices for wiring, including the use of ferrules. In particular, many 3D printers connect the heated bed, which draws a lot of current, with screw terminals to the motherboard. While not the cause of the fire in the original post, melted terminal blocks are a common complaint with many DIY 3D printer kits, and one reason is that simply jamming thick stranded wire into a screw terminal and hoping for the best can result in increased resistance, and heat, at the joint. In such situations, the absolutely right thing to do is to crimp on a ferrule. So let’s talk about that.


Continue reading “To Ferrule Or Not To Ferrule?”

Retrotechtacular: Operation Smash Hit

Judging by the number of compilations that have been put online, one of the not-so-secret vices of the YouTube generation must be the watching of crash videos. Whether it is British drivers chancing their luck on level crossings, Russians losing it at speed on packed snow, or Americans driving tall trucks under low bridges, these films exert a compelling fascination upon the viewing public intent on deriving entertainment from the misfortunes of others. The footage is often peripheral or grainy, having inevitably been captured by a dashcam or a security camera rather than centre-stage on a broadcast quality system with professional operation. You can’t predict when such things will happen.

There was one moment, back in 1984, when predicting a major crash was exactly what you could do. It was a national event, all over the TV screens, and one which was watched by millions. The operators of British nuclear power stations wished to stage a public demonstration of how robust their transport flasks for spent nuclear fuel rods were, so after all the lab tests they could throw at one they placed it on a railway test track and crashed a 100mph express train into it.

Water escaping during drop test.

This was as much a PR stunt as it was a scientific endeavour, and they lost no time in promoting it across all media. The film below the break was part of this effort, and takes us through the manufacture of the flask forged in one piece from huge billets of steel, before showing us the tests to which it was subjected. The toughest of these, a drop-test onto a corner of a fully laden flask, resulted in a small escape of the water contained within it. It was thus decided to conduct the ultimate test to ensure full public confidence in nuclear transport.

The Old Dalby test track is a section of a closed-to-passengers line in the English Midlands that was retained by British Railways as a proving ground for new locomotives. In the ultimate test of rail transport for nuclear waste, a flask was placed on its side across a piece of the track, and a train formed of a withdrawn 1960s locomotive and a short rake of 1950s carriages was accelerated without a driver over several miles to 100mph.

An instant before impact, we see the underside of the derailed car. The flask is between it and the locomotive.

[Nigel Harris] for Rail magazine wrote an almost funerial description of the destruction of locomotive 46009 25 years later in 2009, and as he reported the flask survived with only superficial damage and a tiny loss in pressure. The event was hailed as a success by the nuclear industry, before fading from the public consciousness as nuclear power station operators prefer to remain out of the news.

It is questionable how much the Old Dalby crash was for the cameras and the public, and how much it was for the scientists and engineers. But such destructive tests do serve as a means to gain vital test data that could not be harvested any other way, and have been performed more than once in the aviation industry. Later in the same year a Boeing 720 was crashed for science in the USA, while more recently in 2012 a Boeing 727 was crashed in Mexico.

Crashing an express train into a nuclear flask is something not likely to be seen again, it was a one-off event. But one thing’s for sure, our inability to turn away from watching a train wreck is nothing new. YouTube and ubiquitous cameras certainly make crashes available with a few keystrokes. But from the 1984 cask crash test, to the the spectacle of Crush, Texas back in 1896, the sheer power shown in these crashes seems to have a siren song effect on us.

Continue reading “Retrotechtacular: Operation Smash Hit”

Friday Hack Chat: Talking MQTT With The Community

The Internet of Things is just around the corner, and somehow or another, all these bits of intelligent dust and juice bag squeezers will have to talk to one another. One of the better ways to get IoT bits talking to each other is MQTT, Message Queuing Telemetry Transport, a protocol designed for small code footprints and limited network bandwidth. It gets a lot of IoT hype, but it’s a great alternative to HTTP for your own small projects, so that’s what we’re talking about during this week’s Hack Chat.

MQTT is a machine-to-machine connectivity protocol, very useful in remote locations, where a small code footprint is required, where bandwidth is at a premium, or for turning a lamp on and off from your phone, while sitting in the same room. It’s ideal for mobile applications, and in the twenty or so years since its creation, MQTT has made inroads into all those ‘smart’ devices around your house.

MQTT is based on a very simple publish and subscribe model with ‘topics’ that allow you to configure where messages should be sent. It is an extremely simple protocol, but with MQTT, you can set up a complete home automation system that opens the garage door, turns on a lamp, or pings a few weather sensors.

For this week’s Hack Chat, we’re going to be discussing MQTT with the entire Hackaday.io community. There are dozens of people who have built MQTT-based projects that frequent the Hack Chat, and hundreds more that want to learn. Want to get in on the ground floor of the Internet of Things? This is the Hack Chat you want to check out. It’s a community pow-wow around connected devices.

join-hack-chat

Our Hack Chats are live community events on the Hackaday.io Hack Chat group messaging. This week the crew is going to sit down around the campfire around noon, Pacific time, Friday, April 13th (oooh, spooky). Want to know what time this is happening in your neck of the woods? Have a countdown timer!

Click that speech bubble to the right, and you’ll be taken directly to the Hack Chat group on Hackaday.io.

You don’t have to wait until Friday; join whenever you want and you can see what the community is talking about.