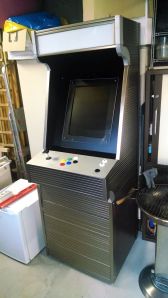
This weeks Hacklet is all about being there when you can’t through the magic of telepresence. More than just teleconferencing, telepresence takes things a step further to put the user in a remote space. That might be a robot platform, VR goggles, or a actuators to interact with the remote environment. It’s also a field filled with opportunities for creative hackers!
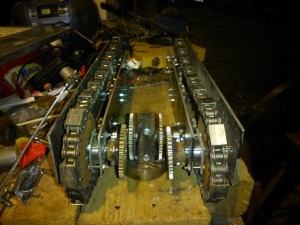 We start with [PJK’s] Subterranean investigation device. [PJK] is exploring a castle for a hidden basement. To get there he has to traverse a tiny passageway with a rubble floor. Nicknamed “Sid The Weedy”, [PJK’s] bot is radio controlled and uses a webcam to send images back to [PJK]. Much like the robots used to explore pyramids, [PJK] has gone with a track drive system. Unlike the pyramid bots, [PJK] is on a budget, so his track system is a modified chain with block treads. [PJK] doesn’t want to get too attached to his robot – he may well lose Sid on his maiden voyage.
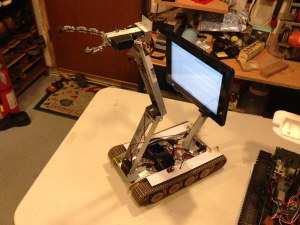 Next up is [JackRC] with his Skype robot. [Jack] is building a relatively low-cost (approx $200 USD) robot using the Skype API. Both his Mark I and Mark II models are based on R/C tanks. Tanks can carry a surprising amount of weight when you remove the turret and cannon. [Jack] added a mounting arm for a tablet and a robot arm for disarming bombs and/or angry children. His craftsmanship skills really show through in the completed ‘bot. Without a size reference, it could pass for a police issue bomb disposal robot!
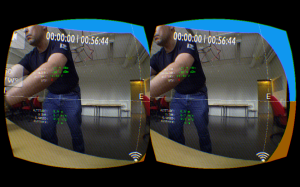 [Gary Firestone] takes us to the skies with his Minimal Latency Oculus Rift FPV. [Gary] is using an Oculus Rift Head Mounted Display (HMD) for First Person View (FPV) piloting. His aircraft is a quadcopter. [Gary’s] video source is a GoPro camera. His quadcopter transmits the video on 5.8GHz using a standard analog video system. On the receiving end, a laptop captures the video, removes the fish eye warp from the GoPro lens, the re-warps the image for the Oculus. His latency is down around 50 – 100ms, which is pretty good for a system capturing analog video.
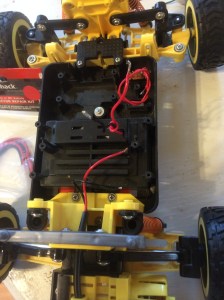 Next [Brad] rolls cross-country with Chipbot: 4G Telepresence Rover Across America. [Brad] and his 5-year-old stepson are converting an R/C truck into a telepresence rover. Chipbot’s electronics have been given a major upgrade. [Brad] added a Raspberry Pi and an Arduino with an SN75441 chip for motor control. Connectivity is via WiFi using a TP-LINK router, or cellular using a 4G modem. Rather than a Raspberry Pi camera, [Brad] chose to go with a Ubiquiti IP camera. The Ubiquiti uses power over ethernet, so he’s added a POE injector. Chipbot is still in development, but as [Brad’s] last update shows, Chipbot is already responding to commands from the interwebs. It’s been about a month since the last Chipbot update, so if you see [Brad] tell him to stop by Hackaday.io and let us how things are progressing!
 Finally, we have [Joe Ferner] with his generically named Telepresence Robot. [Joe] is controlling his android telepresence avatar with Google’s Android Operating System. His on-board computer is a Nexus 7 tablet. A custom board with an STM32 ARM microcontroller allows the Nexus to interface to the robot’s motors and sensors. [Joe] is using a web interface to control his robot. The early demos are promising, as the telepresence bot has already been taken for a drive in Reston, VA by a user in Milwaukee, WI.
That’s a wrap for this episode of The Hacklet. As always, see you next week. Same hack time, same hack channel, bringing you the best of Hackaday.io!
Update – Check out our telepresence list right here!