What Are Those Hieroglyphics On Your Laptop Charger?

Look on the back of your laptop charger and you’ll find a mess of symbols and numbers. We’d bet you’ve looked at them before and gleaned little or no understanding from what they’re telling you.

These symbols are as complicated as the label on the tag of your shirt that have never taught you anything about doing laundry. They’re the marks of standardization and bureaucracy, and dozens of countries basking in the glow of money made from issuing certificates.

The switching power supply is the foundation of many household electronics — obviously not just laptops — and thus they’re a necessity worldwide. If you can make a power supply that’s certified in most countries, your market is enormous and you only have to make a single device, possibly with an interchangeable AC cord for different plug types. And of course, symbols that have meaning in just about any jurisdiction.

In short, these symbols tell you everything important about your power supply. Here’s what they mean.

Continue reading “What Are Those Hieroglyphics On Your Laptop Charger?”

Arcade Style Computer Hotkeys

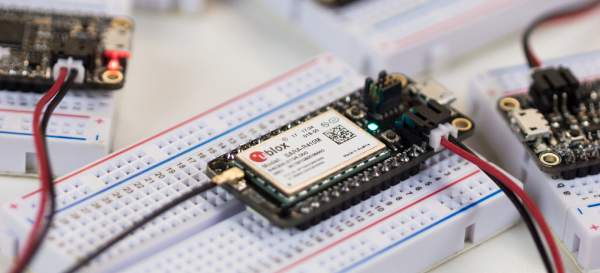
Prolific maker [Sean Hodgins] has taken the wraps off of his latest one-day build, and as usual, it takes the kind of spare parts most people reading Hackaday will have in their parts bins and turns it into something fun and useful. This time around, he takes a bunch of spare arcade-style buttons he had from a previous project and combines them with an Adafruit Trinket (SAMD21 flavor) to make a USB input device for his computer.

[Sean] uses 1/4 inch acrylic to make the case, though he does mention that it could just as easily be 3D printed. But using the acrylic is easy and gives a nice glossy look to the final hardware. With a saw and a drill press you can make some very professional cases out of acrylic, which goes to show that you don’t necessarily need to have a high end 3D printer to create great looking enclosures.

As explained in the video, the Adafruit Trinket is not strictly necessary for this build, it’s just what [Sean] had lying around. Any microcontroller that can present itself to the operating system as a USB Human Interface Device (HID) will work fine for a project like this.

Software wise, a modified Arduino demo program is used to equate the states of the digital pins to pre-defined key combinations to be sent to the computer. In this simple example the key combinations are hard-coded into the Trinket’s source code, but a future enhancement could be adding a method of setting up new key combinations with a configuration tool.

We’ve covered our fair share of non-traditional USB input devices, all operating on largely the same principle. As it turns out, hackers have quite a pension for making oddball input devices.

Continue reading “Arcade Style Computer Hotkeys”

Play A Few Games Of Smash Brothers On The Go With A Portable Wii

How would you approach a build that required you to hack apart a perfectly good console motherboard? With aplomb and a strong finish. [jefflongo] from [BitBuilt.net] — a forum dedicated to making consoles portable — has finished just such a task, unveiling his version of a portable Wii to the world.

While this bears the general appearance of a portable GameCube, it’s what inside that counts. A heavily modified   Wii motherboard — to reduce size — forms this portable’s backbone, and it includes two infrared LEDs on its faceplate for Wii Remotes.  A single player can use the built-in controller, but [jefflongo] has included four GameCube controller ports for maximum multiplayer mayhem. Although he’ll likely plan on taking advantage of the built-in AV Out port to play on a TV and charge port for those extended gaming sessions, four 3400mAh batteries — with an estimated four hour battery life — should keep him satisfied on the go until he can recharge.

While the electronics display an impressive amount of work, but the final piece is a sight to behold. Check out the demo video after the break!

Continue reading “Play A Few Games Of Smash Brothers On The Go With A Portable Wii”

Asgard: The Open Source Air Data Computer

We get a lot of awesome projects sent our way via the tip line. Well, mainly it seems like we get spam, but the emails that aren’t trying to sell us something are invariably awesome. Even so, it’s not often we get a tip that contains the magic phrase “determine Mach number” in its list of features. So to say we were interested in the Asgard Air Data Computer (ADC) is something of an understatement.

Now we’ll admit right up front: we aren’t 100% sure who the target audience for the Asgard is, but it certainly looks impressive. Team member [Erik] wrote into tip line with information about this very impressive project, which is able to perform a number of measurements on incoming air, such as true speed, viscosity, and temperature. The team says it has applications ranging from HVAC to measuring the performance of bicycles. We don’t know who’s going so fast on their bike that they need to measure air speed, but of course the hacker community never ceases to amaze us.

Even if you don’t have a jet fighter that could benefit from a high performance ADC such as Asgard, you have to be impressed by the incredible work the team has done not only designing and building it, but documenting it. From the impeccably designed 3D printed case to the stacked PCB internals, every aspect of Asgard screams professional hardware.

Data collected from Asgard can be stored on the internal micro SD if the device is to be used in stand-alone mode, or you can connect to it over USB or Bluetooth thanks to the HC-05 module. The team has even put together some scripts to merge the Asgard’s generated air data with GPS position information.

We’re all for putting high quality sensors in the hand’s of the community and seeing what they can come up with. The spirit and build quality of this project reminds us of the impressive work [Radu Motisan] has been doing with his distributed air quality sensors.

Continue reading “Asgard: The Open Source Air Data Computer”

This Tiny Motor Is Built Into A PCB

Mounting a motor on a PCB is nothing new, right? But how about making the PCB itself part of the motor? That’s what [Carl Bugeja] has done with his brushless DC motor in a PCB project, and we think it’s pretty cool.

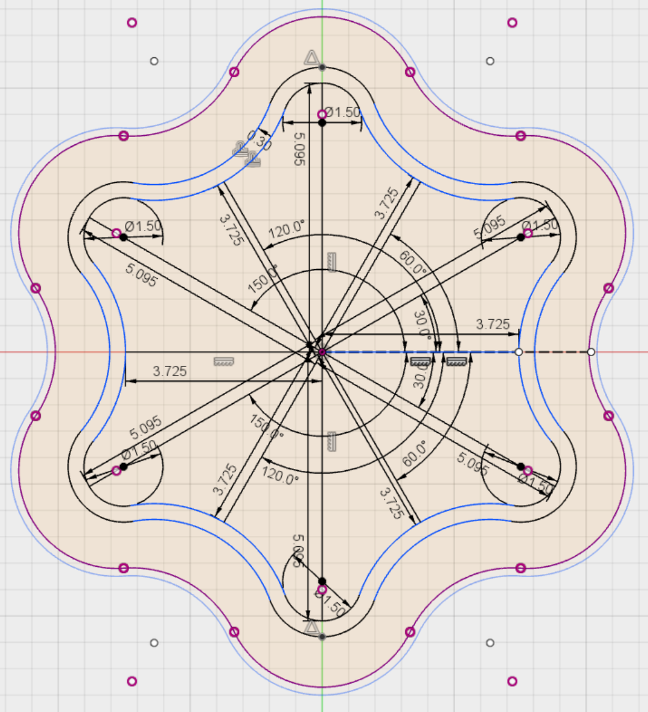
Details on [Carl]’s Hackaday.io page are a bit sparse at this point, but we’ve been in contact with him and he filled us in a little. The PCB contains the stator of the BLDC and acts as a mechanical support for the rotor’s bearing. There are six spiral coils etched into the PCB, each with about 40 turns. The coils are distributed around the axis; connected in a wye configuration, they drive a 3D-printed rotor that has four magnets pressed into it. You can see a brief test in the video below; it seems to suffer from a little axial wobble due to the single bearing, but that could be handled with a hat board supporting an upper bearing.

We see a lot of potential in this design. [Carl] mentions that the lack of cores in the coil limit it to low-torque applications, but it seems feasible to bore out the center of the coils and press-fit a ferrite slug. Adding SMD Hall sensors to the board for feedback would be feasible, too — in fact, an entire ESC and motor on one PCB could be possible as well. [Carl] has promised to keep the project page updated, and we’re looking forward to more on this one.

For a more traditional approach to printed motors, check out this giant 3D-printed BLDC.

Continue reading “This Tiny Motor Is Built Into A PCB”

An ADS-B Antenna Built From Actual Garbage

With the advent of low-cost software defined radio (SDR), anyone who’s interested can surf the airwaves from the FM band all the way up to the gigahertz frequencies used by geosynchronous satellites for about $20 USD. It’s difficult to overstate the impact this has had on the world of radio hacking. It used to be only the Wizened Ham Graybeards could command the airwaves from the front panels of their $1K+ radios, but now even those who identify as software hackers can get their foot in the door for a little more than the cost of a pizza.

But as many new SDR explorers find out, having a receiver is only half the battle: you need an antenna as well. A length of wire stuck in the antenna jack of your SDR will let you pick up some low hanging fruit, but if you’re looking to extend your range or get into the higher frequencies, your antenna needs to be carefully designed and constructed. But as [Akos Czermann] shows on his blog, that doesn’t mean it has to be expensive. He shows how you can construct a very capable ADS-B antenna out of little more than an empty soda can and a bit of wire.

He makes it clear that the idea of using an old soda can as an antenna is not new, another radio hacker who goes by the handle [abcd567] popularized their own version of the “cantenna” some time ago. But [Akos] has made some tweaks to the design to drive the bar even lower, which he has dubbed the “coketenna”.

The primary advantages of his design is that you no longer need to solder anything or even use any special connectors. In fact, you can assemble this antenna with nothing more than a pocket knife.

You start by cutting the can down to around 68 mm in length, and cutting an “X” into the bottom. Then strip a piece of coax, and push it through the X. The plastic-coated center conductor of the coax should emerge through the bottom of the can, while the braided copper insulation will bunch up on the other side. If you want to make it really fancy, [Akos] suggests cutting a plastic drink bottle in half and using that as a cover to keep water out of the “coketenna”.

How well does it work? He reports performance being very similar to his commercial ADS-B antenna which set him back $45 USD. Not bad for some parts of out the trash.

We’ve covered the math of creating an ADS-B antenna in the past if you’d like to know more about the science of how it all works. But if you just want an easy way of picking up some signals, this “coketenna” and an RTL-SDR dongle will get you started in no time.

The (Unnecessary?) Art Of Connector Crimping

The “Completion Backwards Principle” is a method of reasoning through a problem by visualizing the end result and then working your way backwards from that point. The blog post that [Alan Hawse] has recently written about the intricacies of crimping wires for plug connectors is a perfect example of this principle. The end result of his work is the realization that you probably shouldn’t bother crimping your own connectors, but watching him work backwards from that point is still fascinating. It’s also the name of a rock album from the 80’s by The Tubes, but this is not a useful piece of information in regards to electrical wiring.

Of course, sometimes people do silly things. Even though there are pre-crimped wires available online for a pittance, you might still want to do your own. With this in mind, [Alan] has put together an exceptionally detailed and well-research post that gives you all the information you could possibly want to know about crimping what is often erroneously referred to as the “JST connector”.

He starts by showing off some common examples of this connector, which if you’ve ever opened a piece of consumer electronics will be like looking through a High School yearbook. You might not know their names without reading them, but you definitely remember what they look like.

We’re then treated to an array of macro shots showing the scale of the pieces involved. If getting up close and personal with metal bits that are only a few millimeters long is your kind of thing, then you’re really going to love this part.

Finally, the post is wrapped up with a few words about the kind of crimping tools that are available on the market, and then a demonstration of his personal crimping method. While some tools would have you crimp both sets of “wings” at the same time, [Alan] tells us he finds taking them on individually leads to better results in his experience.

If this this little taste has left you hungry for a true feast of hyper-specialized knowledge, be sure to check out the Superconference talk by [Bradley Gawthrop].

Continue reading “The (Unnecessary?) Art Of Connector Crimping”