The Cheapest Crystal Oven

oven

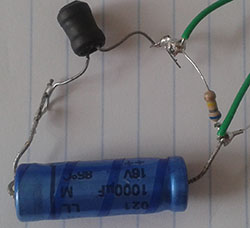
The crystals you’ll find attached to microcontrollers or RTCs are usually accurate to 100 parts per million at most, but that still means if you’re using one of these crystals as a clock’s time base, you could lose or gain a second per day. For more accuracy without an atomic clock, a good solution is an oven controlled crystal oscillator – basically, a temperature controlled crystal. It’s not hard to build one, and as [Roman] demonstrates, can be built with a transistor and a few resistors.

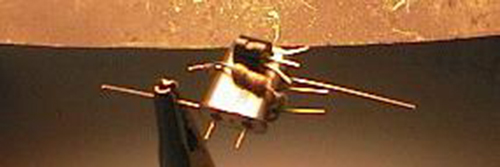
The heating element for this OCXO are just a few resistors placed right on the can of a crystal. A thermistor senses the heat, and with more negative feedback than the Hackaday comments section, takes care of regulating the crystal’s temperature. A trimpot is used for calibrating the temperature, but once everything is working that can be replaced with a fixed resistor.

This deadbugged circuitry is then potted in five minute epoxy. That’s a bit unconventional as far as thermal management goes, but the results speak for themselves: [Roman] can get a clock with this circuit accurate to a few seconds per year.

TI’s New Family Of WiFi Chips

cccc Texas Instruments’ CC3000 WiFi chip is the darling of everyone producing the latest and greatest Internet of Thing, and it’s not much of a surprise: In quantity, these chips are only $10 a piece. That’s a lot less expensive than the WiFi options a year ago. Now, TI is coming out with a few new modules to their WiFi module family, including one that includes an ARM micro.

The CC3000 has found a home in booster packs, breakout boards for the Arduino, and Spark, who are actually some pretty cool dudes.Still, the CC3000 has a few shortcomings; 802.11n isn’t available, and it would be really cool if the CC3000 had a web server on it.

The newest chips add these features and a whole lot more. [Valkyrie] got his hands on a CC3100Boost board and was pleased to find all the files for the webserver can be completely replaced. Here’s your Internet of Things, people. The CC3200 is even better, with a built-in ARM Cortex M4 with ADCs, a ton of GPIOs, an SD card interface, and even a parallel port for a camera. If you’re looking to pull a hardware startup out of your hat, you might want to plan your Kickstarter around this chip.

It’s all very cool stuff, and although the bare chips aren’t available yet, you can get an eval module from TI, with an FCC certified module with the crystals and antenna coming later this year.

Developed On Hackaday: Demonstration Video And Feedback Request

http://www.youtube.com/watch?v=RYaz-s5SXCc

For months our dear Hackaday readers have been following the Mooltipass password keeper’s adventures, today we’re finally publishing a first video of it in action. This is the fruit of many contributors’ labor, a prototype that only came to be because of our motivation for open hardware and our willingness to spend much (all!) of our spare time on an awesome project that might be just good enough to be purchased by others. We’ve come a long way since we started this project back in December.

In the video embedded above, we demonstrate some of our platform’s planned functionalities while others are just waiting to be implemented (our #1 priority: PIN code entering…). A quick look at our official GitHub repository shows what it took to get to where we are now. What’s next?

We need your input so we can figure out the best way to get the Mooltipass in the hands of our readers, as our goal is not to make money. The beta testers batch has just been launched into production and I’ll be traveling to Shenzhen in two weeks to meet our assembler. When materials and fabrication are taken into account we expect each device to cost approximately $80, so please take 3 seconds of your time to answer the poll embedded below: (poll has ended)

An Online Course For FPGA And CPLD Development

FPGA

Over on the University of Reddit there’s a course for learning all about FPGAs and CPLDs. It’s just an introduction to digital logic, but with a teacher capable of building a CPLD motor control board and a video card out of logic chips, you’re bound to learn something.

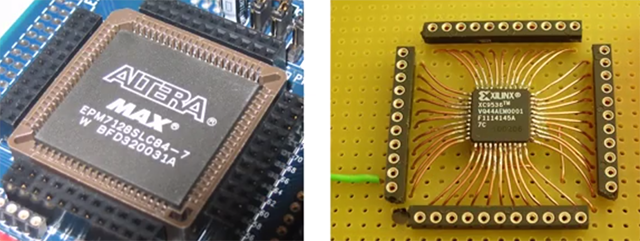
The development board being used for this online course is an Altera EMP3032 CPLD conveniently included in the Introduction to FPGA and CPLD kit used in this course. It’s not a powerful device by any measure; it only has 32 macrocells and about 600 usable gates. You won’t be designing CPUs with this thing, but you will be able to grasp the concept of designing logic with code.

Future lessons include building binary counters, PWM-controlled LEDs, and a handheld LED POV device. In any event, it’s a great way to learn about how programmable logic actually works, and a fairly cheap way to get into the world of FPGAs and CPLDs. Introductory video below.

Continue reading “An Online Course For FPGA And CPLD Development”

Homebrew Programming With Diodes

diode

Diode matrices were one of the first methods of implementing some sort of read only memory for the very first electronic computers, and even today they can be found buried deep in the IPs of ASICs and other devices that need some form of write-once memory. For the longest time, [Rick] has wanted to build a ROM out of a few hundred diodes, and he’s finally accomplished his goal. Even better, his diode matrix circuit is actually functional: it’s a 64-byte ROM for an Atari 2600 containing an extremely simple demo program.

[Rick] connected a ton of 1N60 diodes along a grid, corresponding to the data and address lines to the 2600’s CPU. At each intersection, the data lines were either unconnected, or tied together with a diode. Pulling an address line high or low ([Rick] hasn’t posted a schematic) pulls the data line to the same voltage if a diode is connected. Repeat this eight times for each byte, and you have possibly the most primitive form of read only memory.

As for the demo [Rick] coded up with diodes? It displays a rainbow of colors with a black rectangle that can be moved across the screen with the joystick. Video below.

Continue reading “Homebrew Programming With Diodes”

OLED display, blue LED and Smartcard

Developed On Hackaday: Current Status And Selected Beta Testers

Mooltipass final prototype

The Hackaday community is currently working on an offline password keeper, aka Mooltipass. The concept behind this product is to minimize the number of ways your passwords can be compromised, while generating and storing long and complex random passwords for the different websites you use daily. The Mooltipass is a standalone device connected through USB and is compatible with all major operating systems on PCs, Macs and Smartphones. More details on the encryption and technical details can be found on our github repository readme or by having look at all the articles we previously published on Hackaday.

As you can see from our commit activity these last weeks have been extremely busy for us. We finally have a firmware that uses all the different libraries that our contributors made but also a chrome plugin and extension that can communicate with our Mooltipass. We’re very happy to say that our system is completely driverless. A video will be published on Hackaday next week showing our current prototype in action as some of the contributors are already using it to store their credentials.

We selected 20 beta testers that will be in charge of providing us with valuable feedback during the final stages of firmware / plugin development. Selection was made based on how many passwords they currently have, which OS they were using but also if they were willing to contribute to the prototype production cost. We expect them to receive their prototypes in less than 2 months as the production funds were wired today.

We think we’ve come a long way since the project was announced last december on Hackaday, thanks to you dear readers. You provided us with valuable feedback and in some cases important github push requests. You’ve been there to make sure that we were designing something that could please most of the (non) tech-savy people out there and we thank you for it. So stay tuned as in a week we will be publishing a video of our first prototype in action!

Want to chat with us? You can join the official Mooltipass Google Group or follow us on Hackaday Projects.

Designing The Second Version Of My Business Card

At the end of the month my contract with my current employer (no, not Hackaday) will end. With the interviews starting to line up I therefore thought it’d be a nice opportunity to design the PCB business card you can see in the picture above.

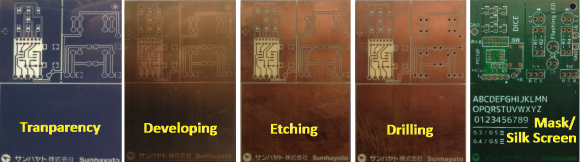
It is made of two PCBs soldered together, the bottom one containing the SMD components while the top one only has holes to let most of them pass through. The design was mainly inspired by the first version we already featured on Hackaday although the microcontroller was changed for the (costly) ATMega32u4 and the top PCB was slightly milled so the LEDs may shine through the FR4. The LEDs are connected in groups of 2 (total of 8 groups) to PWM channels and a hidden flash memory allows the card to be recognized as an external 2MB storage using the LUFA library. All source files may be downloaded on my website.