Don’t Scrape Magnet Wire, Do This Instead

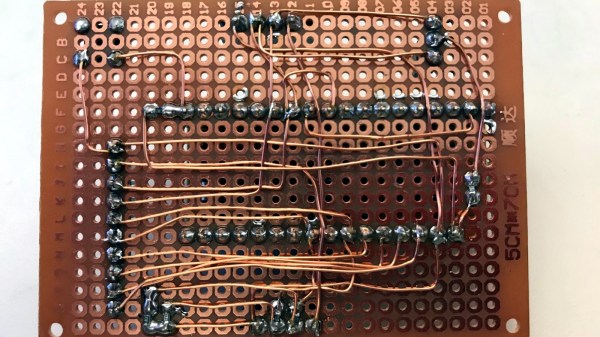
[Tom] doesn’t much like breadboarding. He prefers to wire up prototypes with perfboard and solder point-to-point with enameled magnet wire. That may sound troublesome to some of you, but [Tom] has come up with a few tips to make prototyping with perfboard and magnet wire easier and more effective, and the biggest tip is about how to manage stripping all that magnet wire.

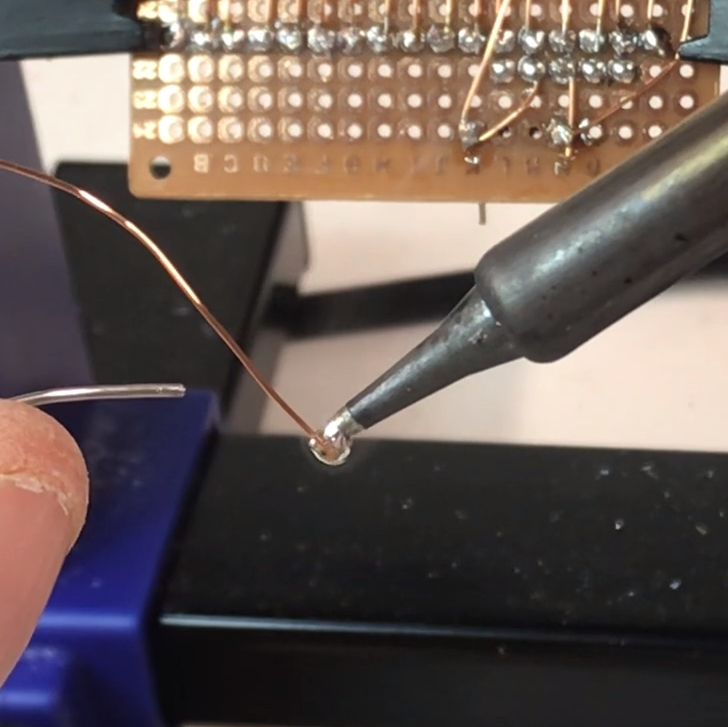
Push the tip of the magnet wire a small distance into the molten solder and hold it there for a few moments. The solder will bubble away the enamel and tin the copper underneath in the process.

Magnet wire is a thin, solid-core conductor that has a clear coating of enamel. This enamel acts as an electrical insulator. The usual way to strip away the enamel and reveal the shiny copper underneath is to scrape it off, but that would get tiresome when working with a lot of connections. [Tom] prefers to “boil it away” with a blob of molten solder on an iron’s tip.

Begin by melting a small amount of solder on the iron, then push the tip of the magnet wire a small distance into the molten solder and hold it there for a few moments. The enamel will bubble away and the solder will tin the copper underneath in the process. The trick is to use fresh solder, and to clean the tip in between applications. You can see him demonstrate this around the 1:00 mark in the video embedded below.

Once the tip of the magnet wire is tinned, it can be soldered as needed. Magnet wire bends well and holds its shape nicely, so routing it and cutting to size isn’t too difficult. [Tom] also suggests a good hands-free PCB holder, and points out that 0603 sized SMT resistors fit nicely between a perfboard’s 0.1″ pads.

Perfboard (and veroboard) have been standbys of prototyping for a long time, but there are still attempts at improving them, usually by allowing one to combine through-hole and surface-mount devices on the same board, but you can see [Tom] demonstrate using magnet wire on plain old perfboard in the video below.

Continue reading “Don’t Scrape Magnet Wire, Do This Instead”

Blister Pack With Jet Fighter Toy Is A Business Card

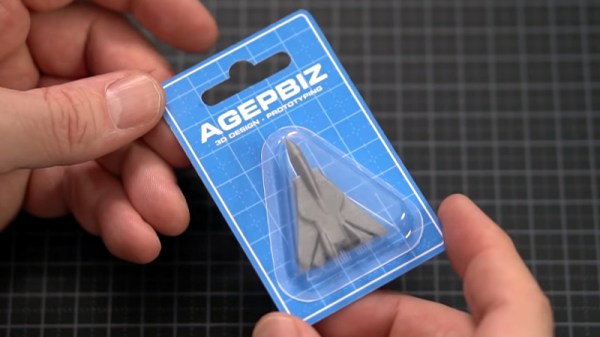
In the world of business cards, it seems that for some people a white rectangle of card just doesn’t cut it any more. A card isn’t simply a means to display your contact details, instead it can be a way to show off your work and demonstrate to the world your capabilities. For [agepbiz] those are the skills of a 3D design specialist, so what better way to proceed than by distributing a 3D-printed example of his work? How to render that into a business card? Put it in a retail-style blister pack, of course. Take a look at the video below the break.

It’s an interesting process to follow, becauseĀ  there are certainly readers who will have toyed with the idea of selling their work, and this makes an attractive way to display a small assembly while still keeping it safe from damage. The toy – a small 3D-printed jet fighter with working swing wings that’s a masterpiece in itself – is laid on a backing card and a custom blister is glued over it. The manufacture of the printed backing card with a CNC card cutter is shown, followed by that of the blister with a custom SLA-printed mould being used to vacuum-form a sheet of clear plastic. Surprisingly the whole is assembled with just a glue stick, we’d have expected something with a bit more grab. The result is a professional-looking blister packed product of the type you wouldn’t bat an eyelid over if you saw it in a shop, and one of those things that it’s very useful to have some insight into how one might be made..

It’s possible this card might be a little bulky to slip in your wallet, but it’s hardly the only novelty card we’ve brought you over the years. Some of our most recent favourites run Linux or play Tetris.

Continue reading “Blister Pack With Jet Fighter Toy Is A Business Card”

Magnets Make Prototyping E-Textiles A Snap

How do you prototype e-textiles? Any way you can that doesn’t drive you insane or waste precious conductive thread. We can’t imagine an easier way to breadboard wearables than this appropriately-named ThreadBoard.

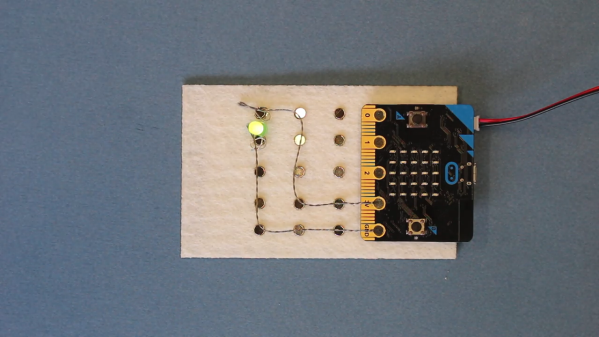
If you’ve never played around with e-textiles, they can be quite fiddly to prototype. Of course, copper wires are floppy too, but at least they will take a shape if you bend them. Conductive thread just wants lay there, limp and unfurled, mocking your frazzled state with its frizzed ends. The magic of ThreadBoard is in the field of magnetic tie points that snap the threads into place wherever you drape them.

The board itself is made of stiff felt, and the holes can be laser-cut or punched to fit your disc magnets. These attractive tie-points are held in place with duct tape on the back side of the felt, though classic double-stick tape would work, too. We would love to see somebody make a much bigger board with power and ground rails, or even make a wearable ThreadBoard on a shirt.

Even though [chrishillcs] is demonstrating with a micro:bit, any big-holed board should work, and he plans to expand in the future. For now, bury the needle and power past the break to watch [chris] build a circuit and light an LED faster than you can say neodymium.

The fiddly fun of e-textiles doesn’t end with prototyping — implementing the final product is arguably much harder. If you need absolutely parallel lines without a lot of hassle, put a cording foot on your sewing machine.

Continue reading “Magnets Make Prototyping E-Textiles A Snap”

Flashing Sonoff Devices With Tasmota Gets Easier

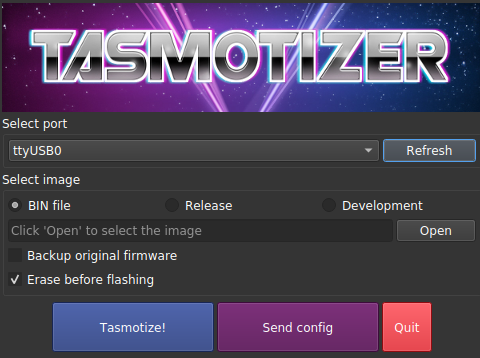
Tasmota is an alternative firmware for ESP boardsĀ  that provides a wealth of handy features, and [Mat] has written up a guide to flashing with far greater ease by using Tasmotizer. Among other things, it makes it simple to return your ESP-based devices, like various Sonoff offerings, to factory settings, so hack away!

Tasmotizer is a front end that also makes common tasks like backing up existing firmware and setting configuration options like, WiFi credentials, effortless. Of course, one can’t really discuss Tasmotizer without bringing up Tasmota, the alternative firmware for a variety of ESP-based devices, so they should be considered together.

Hacks based on Sonoff devices are popular home automation projects, and [Mat] has also written all about what it was like to convert an old-style theromostat into a NEST-like device for about $5 by using Tasmota. A video on using Tasmotizer is embedded below, so give it a watch to get a head start on using it to hack some Sonoff devices.

Continue reading “Flashing Sonoff Devices With Tasmota Gets Easier”

Gear Up Your Gear Knowledge With Gears

Gears are fairly straightforward way to couple rotational motion, and the physics topics required to understand them are encountered in an entry level physics classroom, not a university degree. But to really dig down to the root of how gears transfer motion may be somewhat more complex than it seems. [Bartosz Ciechanowski] put together an astonishingly good interactive teaching tool on gears, covering the fundamentals of motion up through multi-stage gear trains.

Illustrating the distance traveled at different points on the disc

The post starts at the beginning – not “how to calculate a gear ratio” – but how does rotational motion work at all. The illustrations help give the reader an intuitive sense for how the rate of rotation is measured and what that measurement actually represents in the real world. From there [Bartosz] builds up to describing how two discs touching edge to edge transfer motion and the relationship of their size on that process. After explaining torque he has the fundamentals in place to describe why gears have teeth, and why they work at all.

Well written explanatory copy aside, the real joy in this post is the interactivity. Each concept is illustrated, and each illustration is interactive. Images are accompanied by a slider which lets you adjust what’s shown, either changing the speed of a rotating gear or advancing the motion of two teeth interlocking. We found that being able to move through time this way really helped form an intuitive understanding of the concepts being discussed. This feels like the dream of interactive multimedia textbooks come to life.

Cheap Strain Relief By Casting Hot Glue In A 3D Print

[Daniel Roibert] found a way to add cheap strain relief to JST-XH connectors, better known to hobby aircraft folks as the charging and balance connectors on lithium-polymer battery packs. His solution is to cast them in hot glue, with the help of 3D printed molds. His project provides molds fitted for connectors with anywhere from two to eight conductors, so just pick the appropriate one and get printing. [Daniel] says to print the mold pieces in PETG, so that they can hold up to the temperature of melted glue.

The 3D models aren’t particularly intuitive to look at, but an instructional video makes everything clear. First coat the inside surfaces of the mold with a release agent (something like silicone oil should do the trick) and then a small amount of hot glue goes in the bottom. Next the connector is laid down on top of the glue, more glue is applied, and the top of the mold is pressed in. The small hole in the top isn’t for filling with glue, it’s to let excess escape as the mold is closed. After things cool completely, just pop apart the mold (little cutouts for a screwdriver tip make this easy) and trim any excess. That’s all there is to it.

One last thing: among the downloads you may notice one additional model. That one is provided in split parts, so that one can make a mold of an arbitrary width just by stretching the middle parts as needed, then merging them together. After all, sometimes the STL file is just not quite right and if sharing CAD files is not an option for whatever reason, providing STLs that can be more easily tweaked is a welcome courtesy. You can watch a short video showing how the whole thing works, below.

Continue reading “Cheap Strain Relief By Casting Hot Glue In A 3D Print”

Converted Car Lets Toddlers Tool Around

A few years ago, a professor at the University of Delaware started a project called Go Baby Go. It’s designed to bring fun and affordable mobility to small children with disabilities. The idea is to modify Power Wheels cars to make them easier for disabled kids to operate, and to teach as many people as possible how to do it in the process. The [South Eugene Robotics Team] is taking this a step further by replacing the steering wheel with a joystick that controls two motors with an Arduino Nano.

In the first instance you replace the foot pedal with a push button. The plans also call for a PVC frame, a high-backed seat, and a seat belt to make it safer. The end result is a fun ride the kid can control themselves that functions a lot like a power wheelchair, but is much more affordable. It has the added bonus of being a fun conversation piece for the other kids instead of a weird scary thing.

They also replace the front wheels with 5″ casters, because being able to spin around in circles is awesome. Their project shows how to do the entire conversion in great detail, starting with a standard ride-on car that comes with some assembly required. Motor past the break to check out a short demo with an extremely happy child tooling around in a fire truck.

If these kids get too wild, they’re gonna need traction control for these things.

Continue reading “Converted Car Lets Toddlers Tool Around”