Measuring equipment such as SPL (Sound Pressure Level) decibel meters may seem daunting, but this article by [Shawon M. Shahryiar] shows that making your own need only have two essential ingredients: a microphone and a microcontroller. Obviously the microphone is for measuring the sound pressure level, and its output is then fed into the ADC of the microcontroller which does some math before sending the result to a display.
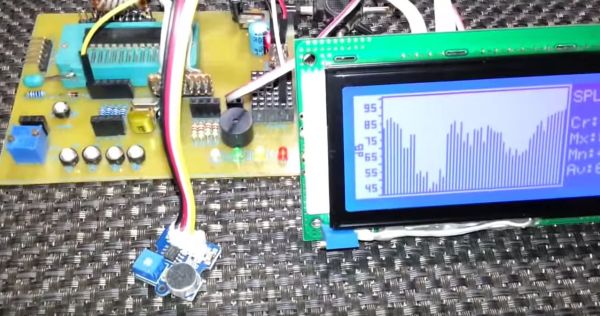
[Shawon] runs through all of the theory behind the calculations that have to be performed, before showing the C code that runs on the PIC18F242 8-bit MCU targeted by the prototype setup. The display is a graphical LCD type, capable of displaying the text with values as well as bar graphs indicating the measured levels. For the measurements themselves, the RMS value is taken of 16 ADC samples while the algorithm takes into account the specifications of the Seeed-sourced microphone module, specifically its average 50 dB sensitivity rating.
Although a full schematic is not provided, the essentials are all there for anyone to build their own SPL dB meter using virtually any microphone and MCU with built-in ADC. As the article also notes, opting for a higher quality microphone will yield better result and of course a faster MCU will offer more options, including FFT processing. Since the code itself is fairly basic, it should be easy enough to port it to an ARM-based MCU, which would allow one to use for example a TFT LCD.
Take a peek after the break for a video of the article’s SPL dB meter in action.
Continue reading “Make Your Own SPL DB Meter With A Microphone And MCU”