Laptop Chargers Team Up To Get The Juice Flowing

There’s perhaps nothing harder to throw away than a good power supply. Whether it’s the classic “wall wart” whose mate has long since been misplaced or a beefy ATX you pulled out of a trashed computer, it always seems like there should be something you could do with these little wonders of modern power conversion. So into the parts bin it goes, where it will stay evermore. But not for the [TheRainHarvester], who figured out that the secret to putting a drawer full of old laptop chargers to use was combing them like hacker Voltron.

Using three old IBM laptop chargers, he’s able to produce up to 48 volts DC at a healthy 4.5 amps. His cobbled together power supply even features an variable output, albeit with some mighty coarse adjustment. As each charger is individually rated for 16V, he can unplug one of the adapters to get 32V.

In the video after the break [TheRainHarvester] walks viewers through the construction of his simple adapter, which could easily be made with salvaged parts. Built on a trace-free piece of fiber board, the adapter consists of the three barrel jacks for the chargers and a trio of beefy Schottky diodes.

The nature of the barrel jacks (which short a pin once the plug is removed) along with the diodes allows [TheRainHarvester] to combine the output of the three adapters in series without running the risk of damaging them if for example one is left plugged into the adapter but not the wall. He’s also looking to add some status LEDs to show which chargers are powered on.

Unfortunately, [TheRainHarvester] realized a bit too late that what he thought was an inert piece of board actually had a ground plane, so he’s going to have to come up with a new way to tie the whole thing together on the next version which he says is coming now that he knows the concept seems workable.

In the meantime, if you’re thinking of hacking something together with the wealth of old laptop chargers we know are kicking around the lab, you might want to take a look at our primer for understanding all those hieroglyphs on the back of the thing.

Continue reading “Laptop Chargers Team Up To Get The Juice Flowing”

Gorgeous Bartop Arcade Build Is A Cut Above

At this point we’ve seen a good number of desktop-sized arcade cabinets, and while they’ve naturally all been impressive in their own ways, they do tend to follow a pretty familiar formula. Cut the side panels out of MDF (or just buy a frame kit), stick a Raspberry Pi and an old LCD monitor in there, and then figure out how to control the thing. Maybe a couple strategically placed stickers and blinking LEDs to add a few extra horsepower, but nothing too surprising.

[Andy Riley] had seen plenty of builds like that, and he wasn’t having any of it. With the heart of an old laptop and bones made of IKEA cutting boards, his build is proof positive that there’s always more than one way to approach a problem that most would consider “solved” already. From the start, he set out to design and build a miniature arcade cabinet that didn’t look and feel like all the other ones he’d seen floating around online, and we think you’ll agree he delivered in a big way.

Powering the arcade with an old laptop is really a brilliant idea, especially since you can pick up older models for a song now that they’re considered nearly disposable by many users. As long as it doesn’t have a cracked display, you’ll get a nice sized LCD panel and potentially a rather powerful computer to drive it. Certainly the graphical capabilities of even the crustiest of used laptops will run circles around the Raspberry Pi, and of course it opens the possibility of playing contemporary PC games. As [Andy] shows in his detailed write-up, using a laptop does take more custom work than settling for the Pi, but we think the advantages make a compelling case for putting in the effort.

Of course, that’s only half the equation. Arguably the most impressive aspect of this build is the cabinet itself, which is made out of a couple IKEA bamboo cutting boards. [Andy] used his not inconsiderable woodworking skills, in addition to some pretty serious power tools, to turn the affordable kitchen accessories into a furniture-grade piece that really stands out from the norm. Even if you aren’t normally too keen on working with dead trees, his step-by-step explanations and pictures are a fascinating look at true craftsman at work.

If you’re more concerned with playing Galaga than the finer points of varnish application, you can always just turbocharge the old iCade and be done with it. But we think there’s something to be said for an arcade cabinet that could legitimately pass as a family heirloom.

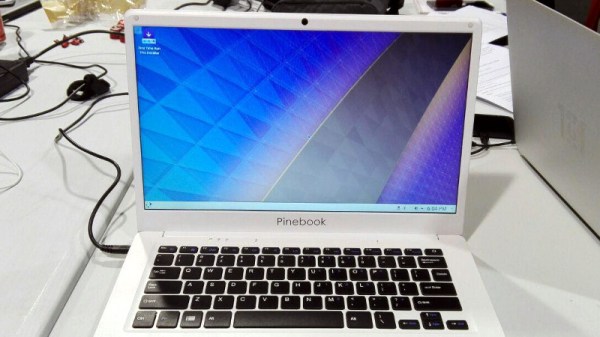
$99 Pinebook Gets KDE Neon Port

If you’re the kind of person who likes small and cheap Linux devices, you’re definitely alive in the perfect moment in history. It seems as if every few months we’ve got another tiny Linux board competing for our pocket change, all desperate to try to dethrone the Raspberry Pi which has already set the price bar exceptionally high (or low, as the case may be). We’ve even started to see these Linux boards work their way into appropriately cheap laptops, though so far none have really made that great of an impression.

But thanks to the efforts of Blue Systems and Pine64, the situation might be improving: they’ve worked together on a build of KDE Neon for the $99 Pinebook. The fact that they’ve gotten Plasma, KDE’s modern desktop environment, running on the rather mediocre hardware at all is an accomplishment by itself. But they’ve also set out tailor the entire system for the Pinebook, from the kernel and graphics drivers all the way up to Qt and Plasma tweaks.

In a blog post announcing the release candidate of the OS, Neon developer [Jonathan Riddell] says that these top-to-bottom improvements show that you can turn a super cheap Linux laptop into a practical computer if you’re willing to really get in there and optimize it. He also says the project has been something of a two-way street, in that improvements made for the Pinebook build have also been applied to upstream development.

The last time we looked at the Pinebook, we came away cautiously optimistic. It wasn’t great, but it was about as good as you could possibly expect given the price. If more developers are willing to go out on a limb and start optimizing their software for the device, it might become a very promising platform for low-cost mobile hacking.

Installing LibreBoot The (Very) Lazy Way

Recently I was given a somewhat crusty looking ThinkPad T400 that seemed like it would make a good knock around machine to have on the bench, if it wasn’t for the fact the person who gave it to me had forgotten (or perhaps never knew) the BIOS password. Cleaning the machine up, putting more RAM in it, and swapping the wheezing hard drive for an SSD would be a relatively cheap way to wring a few more years of life from the machine, but not if I couldn’t change the boot order in BIOS.

Alright, that’s not entirely true. I could have installed an OS on the SSD from my desktop and then put it into the T400, but there was something else at play. The locked BIOS gave me the perfect excuse to install LibreBoot on it, which is one of those projects I’ve had in the back of my mind for years now. Replacing the BIOS with something entirely different would solve the password issue, but there was only one problem: the instructions for flashing LibreBoot onto the T400 are intimidating to say the least.

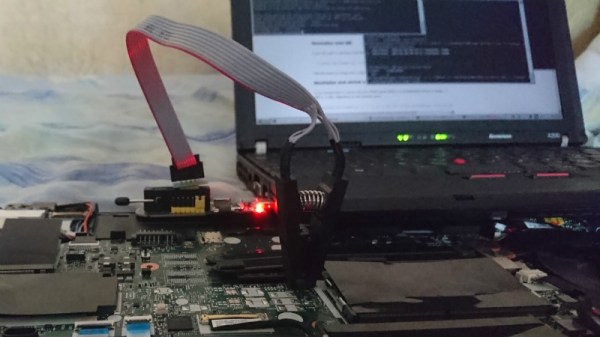
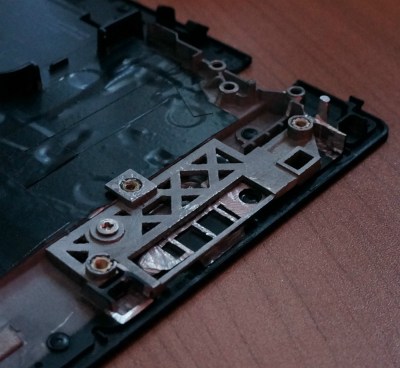
You’re supposed to take the entire machine apart, down to pulling the CPU cooler off and removing the display. All so you can flip the motherboard over to access a flash chip between the CPU and RAM that’s normally covered by a piece of the laptop’s frame. Oh how I hated that diabolical chunk of magnesium which kept me from my silicon quarry. Flashing the chip would take a few minutes, but YouTube videos and first hand accounts from forums told me it could take hours to disassemble the computer and then put it back together after the fact.

Deep into that darkness I peered, long I stood there, wondering, fearing, doubting. Then a thought came to me: maybe I could just cut the thing. If it was a success, it would save me hours of work. If it failed, well, at least the computer didn’t cost me anything. Time to roll the dice.

Continue reading “Installing LibreBoot The (Very) Lazy Way”

Chromebook Trades Camera For WiFi Freedom

There are a number of companies now providing turn-key computers that meet the Free Software Foundation’s criteria for their “Respects Your Freedom” certification. This means, in a general sense, that the computer is guaranteed not to spy on you or otherwise do anything else you didn’t explicitly ask it to. Unfortunately these machines often have a hefty premium tacked on, making it an unpleasant decision between privacy and performance.

Freedom-loving hacker [SolidHal] writes in to tell us about his quest to create a FSF-compliant laptop without breaking the bank. Based on a cheap Asus C201 Chromebook, his custom machine checks off all the appropriate boxes. The operating system was easy enough with an install of Debian, and the bootloader was rid of any Intel Management Engine shenanigans with a healthy dose of Libreboot. But there was one problem: the permanently installed WiFi hardware that required proprietary firmware. To remedy the issue, he decided to install an internal USB Wi-Fi adapter that has the FSF seal of approval.

As the Chromebook obviously doesn’t have an internal USB port, this was easier said than done. But as [SolidHal] is not the kind of guy who would want his laptop taking pictures of him in the first place, he had the idea to take the internal USB connection used by the integrated webcam and use that. He pulled the webcam out, studied the wiring, and determined which wires corresponded to the normal USB pinout.

The FSF approved ThinkPenguin Wi-Fi adapter he chose is exceptionally small, so it was easy enough to tuck it inside some empty space inside of the Chromebook. [SolidHal] just needed to solder it to the old webcam connection, and wrap it up in Kapton tape to prevent any possible shorts. The signal probably isn’t great considering the antenna is stuck inside the machine with all the noisy components, but it’s a trade-off for having a fully free and open source driver. But as already established, sometimes these are the kind of tough choices you have to make when walking in the righteous footsteps of Saint Ignucius.

Internal laptop modifications like this one remind us of the Ye Olden Days of Hackaday, when Eee PC modifications were all the rage and we still ran black and white pictures “taped” to the screen. Ah, the memories.

Talking To Laptop Batteries With The ESP8266

It’s not something you often give a lot of thought to, but the modern consumer laptop battery is a pretty advanced piece of technology. Not only does it pack several dozen watt-hours of energy into a relatively small and lightweight package, but it features integrated diagnostic capability to make sure all those temperamental lithium cells are kept in check. Widely available and extremely cheap thanks to the economies of scale (unless you try to get them from the OEM, anyway), they’re a very compelling option for powering your projects.

Of course, it also helps if, like [teliot] you have a bunch of the things lying around. For reasons we won’t get into, he’s got a whole mess of Acer AL12x32 battery packs which he wanted to use for something other than collecting dust. He had the idea of hooking one up to a solar panel and using it as a power supply for some ESP8266 projects but wanted to be able to talk to the battery for status and diagnostic information. After studying the Smart Battery System (SBS) protocol the batteries use, he was able to come up with some code that lets him pull 37 separate fields of information from the pack’s onboard electronics using his ESP8266.

Battery consumption over time

It took some fiddling with a multimeter to figure out which pin did what on the eight pin interface of the battery. Two of the pins need to be shorted to enable the dual 12 VDC pins to kick in. Technically that’s all you really need to do if you want to utilize the battery in a low-tech sort of way. But to actually get some information from the battery, [teliot] had to identify the two pins which are for the System Management Bus (SMBus) interface where the SBS data lives.

Once he knew which pins to talk to the battery on, the rest was fairly easy. SBS is well documented, and the SMBus interface is very similar to I2C. Like all the cool kids are doing these days, his code publishes the battery info to MQTT where he can plot it and get finely grained info on the performance of his solar power system.

This isn’t the first time we’ve seen a hacker wrangle laptop batteries through SMBus, but it’s always nice to get multiple perspectives on a topic. If you plan on making this kind of thing part of your standard bag of tricks, you might even want to take the time to build a dedicated SMBus scanner.

[via /r/esp8266]

A Plywood Laptop For Your Raspberry Pi

[Rory Johnson] writes in to tell us about PlyTop Shell, a Creative Commons licensed design for a laser cut wooden laptop that he’s been working on since 2016. It’s designed to accommodate the Raspberry Pi (or other similarly sized SBCs), and aims to provide the builder with a completely customizable mobile computer. He’s got a limited run of the PlyTop up for sale currently, but if you’ve got the necessary equipment, you can start building yours while you wait for that new Pi 3B+ to arrive.

Originally [Rory] was working on a 3D printed design, but quickly ran into problems. The vast majority of 3D printers don’t have nearly the build volume to print out a laptop case in one shot, so the design needed to be broken up into multiple smaller pieces and then grafted together into the final case. Not only did this take a long time and a lot of material, but the final result had the rather unfortunate appearance of a plastic quilt.

Eventually he got hooked up with a maker collective in Minneapolis that had a laser cutter, and the PlyTop was born. There’s still a 3D printed component in the design that goes in the screen hinge, but the rest of the PlyTop is cut out of a three 2′ x 4′ sheets of 1/8″ Baltic birch plywood. As you might expect, plenty of fasteners are required, but [Rory] has a complete Bill of Materials (complete with purchase links) for everything you’ll need to turn the cut pieces into a fully fledged laptop. He’s considering selling kits in the future, but is still working on the logistics.

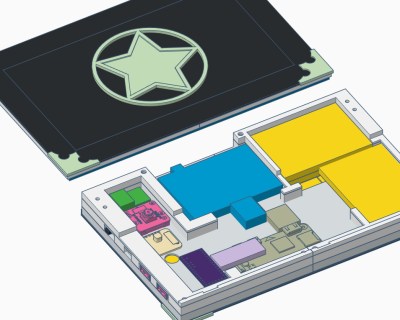
In keeping with the idea of complete flexibility, there’s no defined layout for the internals of the PlyTop. Rather, there’s an array of star-shaped openings on the bottom plate that allow the builder to connect hardware components up in whatever way works for them. [Rory] actually suggests just holding everything down with zip ties to allow for ease of tinkering.

He’s also come up with a list of suggested hardware for the keyboard, touchpad, and display; but those are really just suggestions. The design is open enough that it shouldn’t take much work to adapt to whatever gear you’ve got laying around.

Of course, this isn’t the first open source laptop we’ve seen here at Hackaday. It isn’t even the first wooden one. But we love the lines of the PlyTop and the focus on complete customization.

Continue reading “A Plywood Laptop For Your Raspberry Pi”