The Myst fans in the audience will love this project because it displays the 25-hour timekeeping system of the D’ni. The hardware hackers will lean a little closer to their screen because it does so with custom made 25-segment LEDs, and the precision obsessed will start breathing heavily when they hear it maintains an accuracy of 0.001 seconds. As for which of those camps creator [Mike Ando] most identifies with, we can’t say. But we definitely respect his style.
We’ll spare you the in-depth description of the base-25 number system apparently used in the Myst franchise. If you’re interested enough you can click on through to the project’s Hackaday.io page and learn how to actually read the clock. Presumably you’ll then come back here and leave your comment in Klingon.
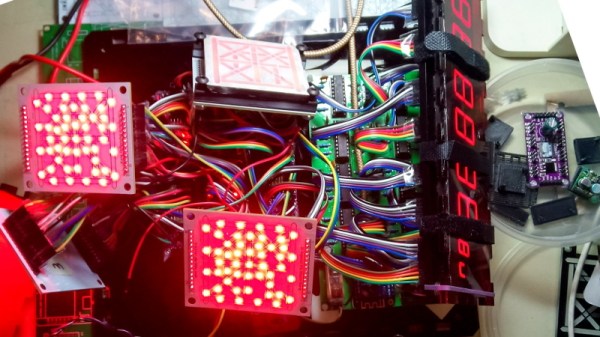
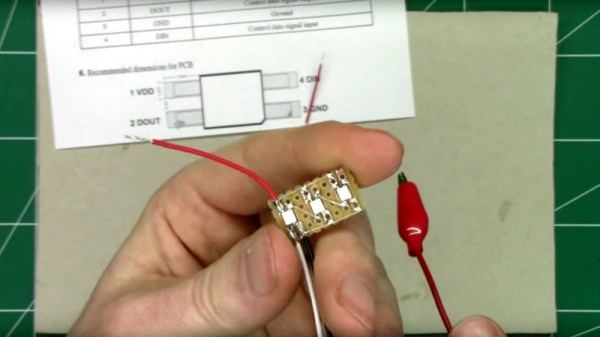
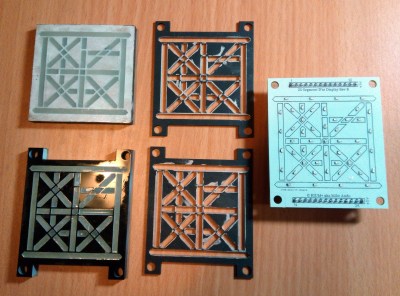 Let’s instead jump right to the part that really gets us excited, those custom displays. To create them, [Mike] cut the face out of black acrylic with a laser, and filled each void with a mixture of clear resin and very fine gypsum plaster. Getting the mix right can be a little finicky as the plaster can clump up, but the end result diffuses the light nicely. The acrylic front panel and a couple of cardboard “gaskets” to keep the light from leaking onto adjacent segments is then stacked on top of a PCB with corresponding 0603 SMD LEDs.
Beyond the soul-crushing number of wires required to hook everything up internally, the rest of the project is relatively straightforward. It uses a WeMos D1 Mini to connect to the WiFi network and pull the current time down from the geographically closest NTP server every couple of hours. Rather than putting a temperature controlled oscillator on the board, [Mike] has decided to pin his accuracy on a constantly on Internet connection and aggressive synchronizations.
From impressive curved bar graph modules to displays segmented with household items, we’ve seen our fair share of custom indicators. But we have to admit that building 25-segment LED displays for the alphabet of a fictional interstellar species sets the bar pretty high.
Continue reading “Clock Uses Custom LED Displays To Keep Myst Time” →