Custom Calculator Rolls D20 So You Don’t Have To

There are a number of sticking points that can keep new players away from complex tabletop games such as Dungeons & Dragons. Some people are intimidated by the math involved, and of course others just can’t find enough friends who are willing to sit down and play D&D with them in 2019. While this gadget created by [Caleb Everett] won’t help you get more open minded friends, it will take some of the mental gymnastics out of adding up dice rolls.

In its current form the device saves you from the hassle of not only having to roll various combinations of physical dice, but adding up all the faces after the fact as well. In the future [Caleb] plans on adding more advanced software features which will allow for tricks not possible with real dice, such as increasing the likelihood of rolling numbers which haven’t been seen in awhile. Now that the hardware is put together, he’s free to dig into the software side of things and really get creative.

Inside the 3D printed case of his calculator there’s a Adafruit Feather M0 Express, a 128 x 32 OLED display, and a 2200 mAh lithium ion battery that lets him go mobile. The keys, which are Cherry MX clones, are wired directly to the digital pins of the Feather board as [Caleb] found that easier to wrap his head around than doing a matrix. This ended up working out as he had enough pins, but does stifle future expansion a bit.

Even if you aren’t into the sort of tabletop gaming which would benefit from an automatic dice roller and tabulator, we think [Caleb] has come up with a very neat form factor for similar pocket sized gadgets. It reminds us of the Handlink from Quantum Leap; before the prop department swapped it out for a jumble of gummy bears later on in the series, anyway. Since he’s shared the link to the OnShape project, you can even tweak the design a bit without having to suffer through modifying the STLs.

Many of the electronic dice we’ve seen in the past have tried to emulate the size and appearance of traditional dice, so it’s interesting to see this approach which goes in the opposite direction entirely. Critics might say that at some point you’d be better off just using a software application for your smartphone, but we’re not in the business of complaining when people produce interesting pieces of hardware.

Octavo Systems Shows Off With Deadbug Linux Computer

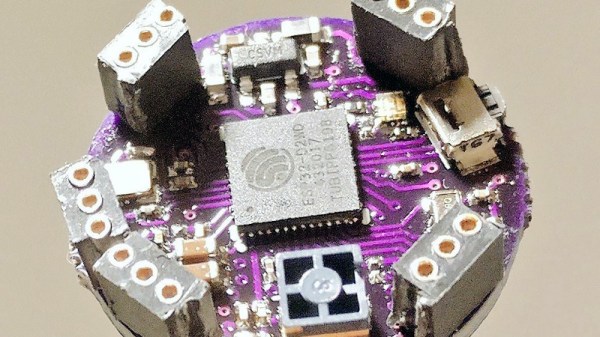
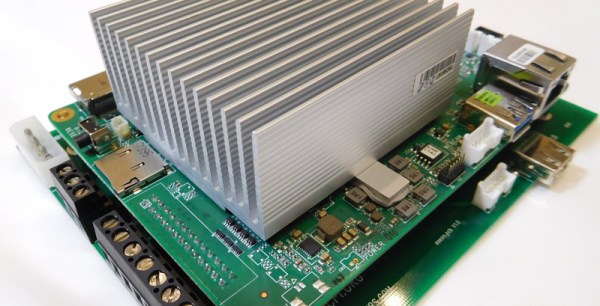
Once upon a time, small Linux-capable single board computers were novelties, but not anymore. Today we have a wide selection of them, many built around modules we could buy for our own projects. Some of the chipset suppliers behind these boards compete on cost, others find a niche to differentiate their product. Octavo Systems is one of the latter offering system-in-package (SiP) modules that are specifically designed for easy integration. They described how simple it would be to build a minimal computer using their SC335x C-SiP, and to drive the point home they brought a deadbug implementation to Embedded World 2019. [Short video after the break.]

Most of us encounter Octavo modules as the heart of a BeagleBoard. Their increasing integration made tiny wonders like PocketBeagle possible. But bringing out all those pins for use still required a four-layer circuit board. Octavo’s pitch for hardware professionals center around how easy integration saves time for faster time to market, and fortunately for us easy integration also translates to a more accessible device for our projects. It’s one thing to publish a document describing a hypothetical single-layer PCB for an Octavo module, it’s quite something else to show that concept in action with no PCB at all.

Of course, this little machine only has access to a fraction of the module’s functionality, and it is certainly overkill if the objective is just to blink a few LEDs. If so, we’d just use 555 timers! But it does show how simple a bare bones “Hello World” machine can be built, removing intimidation factor and invite more people to come play.

One of the three top winners in our circuit sculpture contest was a wireframe Z80 computer. There’s quite a jump from a Z80 to an Octavo SC335x, but we’ve already seen one effort by [Zach] over Supercon 2018 weekend to build a deadbug computer with an Octavo module. It won’t be long before someone one-ups this minimalist LED blinker with something more sophisticated and we can’t wait to see it. Continue reading “Octavo Systems Shows Off With Deadbug Linux Computer”

NES On RISC-V

RISC architecture might change the world, but it runs an NES emulator right now. That’s thanks to MaixPy, the new MicroPython for the K210, the recently released RISC-V microcontroller that’s making waves in the community. [Robot Zero One] has the tutorial and [Other Dave] of EEVBlog has a video of the thing in action.

The Sipeed K210 came to the English-speaking world in the form of a weird pre-order thing on Taobao last October promising a dual-core RISC-V CPU for just a few bucks. Seeed, the same people who brought the ESP8266 into mass distribution quickly latched on and started selling modules last February. Now, Seeed is looking at a Raspberry Pi hat using a Sipeed module, and the future for RISC-V microcontrollers is looking great. Now someone just needs to write some software. That’s exactly what the engineers at Sipeed did, and somewhere in one of the released binaries there’s an NES emulator.

The parallel to the question of if something can run Doom is if something can run an NES emulator, so with the release of MicroPython support for the K210, the obvious thing to do is to release an NES emulator. The hardware required is a Maix M1w Dock, available from Seeed and Banggood.

The new support for MicroPython is great, and an NES emulator is amazing, but this should really come as no surprise. From our first hands on with the first Open Source microcontroller two years ago, RISC-V was obviously faster. Now it’s cheap, and we can’t wait to see what’ll come next.

Continue reading “NES On RISC-V”

ESP8266 Gets Its Game On With Open Source Engine

This is likely not to come as much of a shock to you, but the ESP8266 is pretty popular. At this point, we’re more surprised when a project that hits the tip line doesn’t utilize this incredibly cheap WiFi-enabled microcontroller. If you’re making a gadget that needs to connect to the Internet, there’s a good chance some member of the ESP family is going to be a good choice. But is it a one-trick MCU?

ESP Little Game Engine Logo

Well, judging by software frameworks like the “Little Game Engine” created by [Igor], it looks like the ESP is expanding its reach into offline projects as well. While it might not turn the ESP8266 into a next-gen gaming powerhouse, we’ve got to admit that the demos shown off so far are pretty impressive. When paired with a couple of buttons and a TFT display such as the ILI9341, the ESP could make for a particularly pocket-friendly game system.

The game engine that [Igor] has developed provides the programmer with a virtual screen resolution of 128×128, a background layer, and 32 sprites which offer built-in tricks like collision detection and rotation. All while running at a respectable 20 frames per second. This environment is ideal for the sort of 2D scrolling games that dominated the 8 and 16-bit era of gaming, and as seen in the video after the break, it can even pull off a fairly decent clone of “Flappy Bird”.

In addition, [Igor] created an online emulator and compiler which allows you to develop games using his engine right in your web browser. You can load up a selection of example programs and execute them to see what the engine is capable of, then try your hand at developing your own game before ever having to put the hardware together. Incidentally, the performance of this online development environment is fantastic; with even the fairly complex “Flappy Bird” example code compiling and starting in the emulator nearly instantaneously.

This isn’t the first handheld game we’ve seen powered by the ESP8266, but it would be fair to say this one is a generational leap over its predecessors. Of course, if you really want to start throwing around some pixels, you might want to make the leap to the ESP32; which is the heart of the incredibly awesome (and tiny) PocketSprite.

Continue reading “ESP8266 Gets Its Game On With Open Source Engine”

RGB Word Clock Doesn’t Skimp On The Features

Like most pieces of technology, word clocks seem to be getting better and better every year. As hackers get their hands on better microcontrollers and more capable LED controllers, these builds not only look more polished, but get improved features and functions. Luckily for us, the rise of these advanced modular components means they’re getting easier to build too. For an example of these parallel traits, look no further than VERBIS by [Andrei Erdei].

This colorful word clock is powered by an ESP8266, a 8×8 RGB LED matrix, and a WS2812 RGB LED controller module. [Andrei] used the diminutive ESP-01 which can plug right into the LED controller, and just needs a 3.3 VDC regulator board to complete the very compact electronics package.

To keep the LEDs from interfering with each other, [Andrei] has designed a 3D printed grid which fits over the matrix board. On top of that goes a piece of paper that has the letters printed on it. He mentions that he was able to get good results printing this “stencil” out on an inkjet printer by simply running the same piece of paper through a few times; picking up more black ink each time it went through. Judging by the sharp characters seen in the video after the break, the trick worked well.

With his hardware put together, [Andrei] turned his attention to the software. We really think the project shines here, as his clock not only supports NTP for automatically setting the time over the Internet, but offers a full web interface to control various functions such as the LED colors. You can even change the NTP server and network configuration right from the UI, which is a nice touch compared to just hard coding the values into the code. Even if you don’t use the same hardware, the open source control software is definitely something you should look into if you’re building your own word clock.

We recently covered another easy to build word clock that used an LED matrix and not a whole lot else, but it was quite tiny. This build is a much more reasonable size for a desk, but you’ll probably need to break out the laser cutter if you want to get much bigger.

Continue reading “RGB Word Clock Doesn’t Skimp On The Features”

The Heat Is On With This ESP8266 Controlled Sauna

We’ll be perfectly honest: sitting inside a heated box sounds just a bit too much like torture for our tastes. But if we did somehow find ourselves in possession of a fancy new sauna, we’d more than likely follow in the footsteps of [Al Betschart] and make the thing controllable with the ESP8266. After all, if you’re going to be cooked alive, you might as well do it on your own terms.

The sauna itself was purchased as a kit, and included an electric heater controlled by a thermostat. As explained in his detailed documentation, [Al] integrated a Sonoff TH16 into the original heater circuit so he could control power to the coils remotely. The TH16 also includes support for a thermal sensor, which allowed him to get a reading on the sauna’s internal temperature. The new electronics were mounted in a weather-proof box on the back of the sauna, complete with an external WiFi antenna to help get a good signal back to the house.

At this point the project could technically be done if all you wanted was remote control, but [Al] wanted to create a replacement firmware for the Sonoff that was specifically geared towards the sauna. So he came up with some code that uses MQTT to connect the heater to his home automation system, and allows configuring things like the maximum temperature and how long the sauna will run before turning itself off.

Interestingly, the company who makes these saunas thought the work [Al] did to integrate their product into his home automation system was so impressive they actually interviewed him about it and put it up on their site for others who might be inspired by his work. We’ve covered a lot of hacks to consumer devices here at Hackaday, and it’s exceedingly rare for a company to be so supportive of customers fiddling around with their products (especially in a case like this where there’s a real chance of burning your house down), so credit where credit is due.

The last time we brought you a sauna hack it was quite literally in a van down by the river, so the addition of an ESP8266 certainly brings this more into our comfort zone. Figuratively, if not literally.

[Thanks to Jon for the tip.]

Jaromir Sukuba: The Supercon 2018 Badge Firmware

If you missed it, the Hackaday Supercon 2018 badge was a complete retro-minicomputer with a screen, keyboard, memory, speaker, and expansion ports that would make a TRS-80 blush. Only instead of taking up half of your desk, everyone at the conference had one around their neck, when they weren’t soldering to it, that is.

The killer feature of the badge was its accessibility and hackability — and a large part of that was due to the onboard BASIC interpreter. And that’s where Jaromir comes in. Once Voja Antonic had finalized the design of the badge hardware for our conference in Belgrade in the spring of 2018, as Jaromir puts it, “all we needed was a little bit of programming”. That would of course take three months. The badge was battle-tested in Belgrade, and various feature requests, speed ups, and bugfixes were implemented (during the con!) by Jaromir and others.

Firmware work proceeded over the summer. Ziggurat29 helped out greatly by finding ways to speed up the badge’s BASIC interpreter (that story is told on his UBASIC and the Need for Speed project page) and rolled into the code base by Jaromir. More bugs were fixed, keywords were added, and the three-month project grew to more like nine. The result: the badge was in great shape for the Supercon in the fall.

Jaromir’s talk about the badge is supremely short, so if you’re interested in hacking a retrocomputer into a PIC, or if you’ve got a badge and you still want to dig deeper into it, you should really give it a look. We don’t think that anyone fully exploited the CP/M machine emulator that lies inside — there’s tons of software written for that machine that is just begging to be run after all these years — but we’re pretty sure nearly everyone got at least into the basement in Zork. Dive in!

Continue reading “Jaromir Sukuba: The Supercon 2018 Badge Firmware”