Photogrammetry is a great way to produce accurate 3D models of real objects. A turntable is often a common tool used in this work as it helps image an object from all angles. [Peter Lin] wanted a way to run the photogrammetry process with minimal human intervention, and set about building an automated turntable setup.
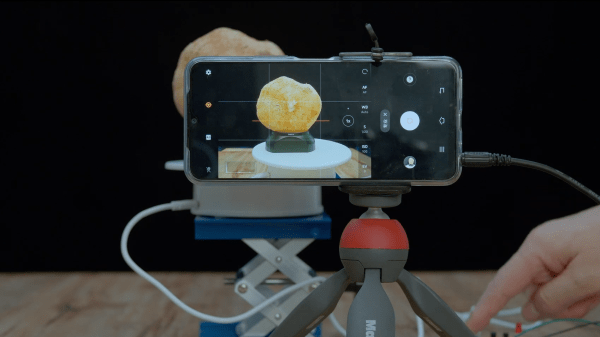
The build relies on a smartphone to take images of the physical object. The phone is triggered to take photos by an ESP8266, which fires the shutter via the phone’s audio socket. The microcontroller then turns the turntable on for a short period of time after each shot, rotating it by a set angle.
The build still requires objects to be repositioned in various orientations on the turntable now and then, in order to capture the top and bottom areas that would otherwise be obscured. However, the grunt work of taking the photos and rotating the objects is now entirely automated.
It’s a useful build for anyone that finds themselves regularly imaging objects to create 3D models. The results of [Peter]’s rig look great, and as a bonus come with life-like textures ready to go. We’ve seen some other great photogrammetry builds before, too. Video after the break.
Continue reading “Automatic Turntable Makes Photogrammetry A Cinch”