A macro keypad making music.

Meet The Marvelous Macro Music Maker

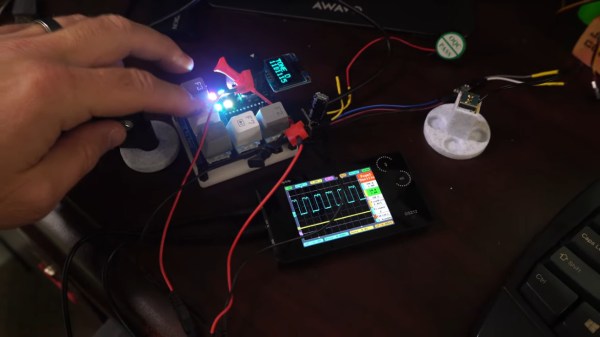
Do you kind of want a macropad, but aren’t sure that you would use it? Hackaday alum [Jeremy Cook] is now making and selling the JC Pro Macro on Tindie, which is exactly what it sounds like — a Pro Micro-based macro keypad with an OLED screen and a rotary encoder. In the video below, [Jeremy] shows how he made it into a music maker by adding a speaker and a small solenoid that does percussion, all while retaining the original macro pad functionality.

[Jeremy]’s original idea for a drum was to have a servo seesawing a chopstick back and forth on the table as one might nervously twiddle a pencil. That didn’t work out so well, so he switched to the solenoid and printed a thing to hold it upright, and we absolutely love it. The drum is controlled with the rotary encoder: push to turn the beat on or off and crank it to change the BPM.

To make it easier to connect up the solenoid and speaker, [Jeremy] had a little I²C helper board fabricated. There’s one SVG connection and another with power and ground swapped in the event it is needed. If you’re interested in the JC Pro Macro, you can pick it up in various forms over on Tindie. Of course, you might want to wait for version 2, which is coming to Kickstarter in October.

There are many ways to make a macro keyboard. Here’s one that also takes gesture input.

Continue reading “Meet The Marvelous Macro Music Maker”

Optical Theremin Makes Eerie Audio With Few Parts

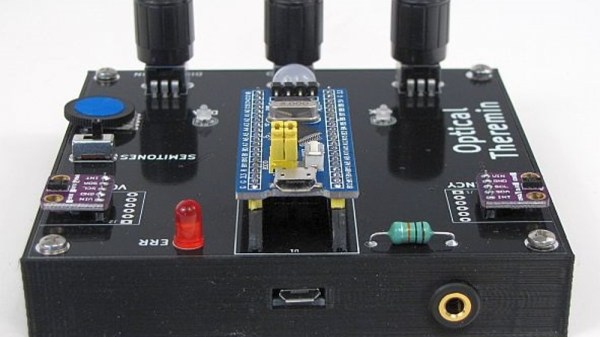
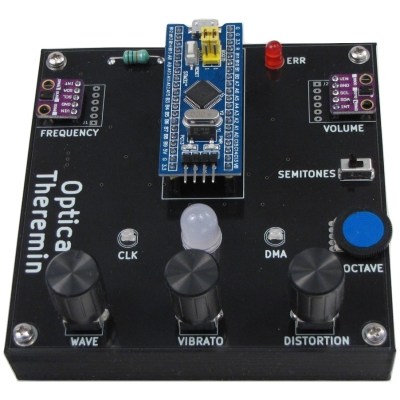
[Fearless Night]’s optical theremin project takes advantage of the kind of highly-integrated parts that are available to the modern hacker and hobbyist in all the right ways. The result is a compact instrument with software that can be modified using the Arduino IDE to take it places the original Theremin design could never go.

The design is based on a ‘Blue Pill’ STM32 MCU development board and two Avago APDS-9960 gesture sensor breakout boards, along with a few other supporting components. Where the original Theremin sensed hand proximity using two antenna-like capacitive sensors to control note frequency and volume, this design relies on two optical sensors to do the same job.

[Fearless Night] provides downloads for the schematic, code, parts list, and even 3D models for the enclosure. PCB files are also included for a convenient assembly, but since the component count is fairly low, a patient hacker should be able to get away with soldering it up by hand without much trouble.

This project creates the audio using the STM32’s Direct Digital Synthesis (DDS) capability and a simple low-pass filter, and has several ways to fine-tune the output. What’s DDS? Our own Elliot Williams explains it in terms of audio output for microcontrollers, and if you’d like a more comprehensive overview, Bil Herd will happily tell you all about it.

Harp Uses Frikin’ Lasers

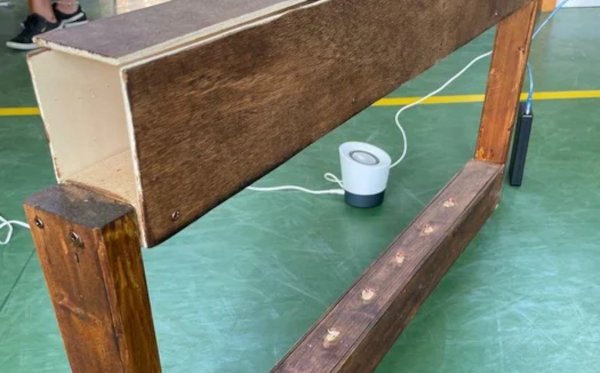
We aren’t sure if you really need lasers to build [HoPE’s] laser harp. It is little more than some photocells and has an Arduino generate tones based on the signals. Still, you need to excite the photocells somehow, and lasers are cheap enough these days.

Mechanically, the device is a pretty large wooden structure. There are six lasers aligned to six light sensors. Each sensor is read by an analog input pin on an Arduino armed with a music-generation shield. We’ve seen plenty of these in the past, but the simplicity of this one is engaging.

Continue reading “Harp Uses Frikin’ Lasers”

vektorkollektor-deploy-familyInPark

Vektor Kollektor Inspector

With the world opening up again, [Niklas Roy] and [Kati Hyyppä] have been busy making a public and collaborative project. Meet the Vektor Kollektor, a portable drawing machine experience, complete with a chip-tune soundtrack. It’s great to see public art meet the maker community with zero pretension and a whole lot of fun!

The build started with an HP7475A pen plotter from the 80s, one that was DOA (or was fried during initial testing). [Niklas] and [Kati] kept the mechanism but rebuilt the controls allowing for easy integration with an Arduino Nano and to be powered with a motorcycle battery.

The magic seems to be less in the junk-bin build (which is great) and more in the way this team extended the project. Using a joystick with arcade buttons as an input, they carted Vektor Kollektor to public parks and streets where they invited others to make art. The Kollekted drawings are available on a gallery website in a very cool animated form, freely available for download, on t-shirts, 3D prints, and on coffee mugs because, why not?

Some select drawings are even spray-painted on walls using a large plotter, and we really hope [Niklas Roy] and [Kati Hyyppä] share details on that build soon. Of course this comes hot on the heels of the workshop window cyborg we saw from these two hardware artists.

Continue reading “Vektor Kollektor Inspector”

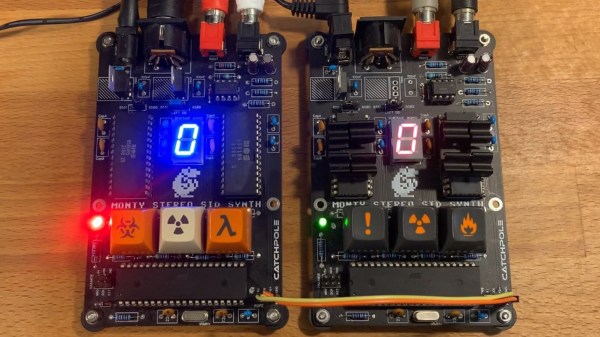
Two circuit boards with bright seven segment displays

Retro Stereo SID Synth Looks And Sounds Sensational

Over the years, plenty of work has gone into emulating the Commodore 64 6581 SID chip, but as [SlipperySeal] puts it, nothing beats the real thing. His take on the MIDI SID-based synth not only sounds fantastic, but looks the business.

The 6581 SID arguably blessed the Commodore 64 with some of the best sound capabilities of any home computer in the 8-bit era (make sure to ‘sound off’ in the comments if you disagree). The 6581 was a three-voice analog synth with a dizzying array of settings. This was at a time when most home computers could just about manage a ‘beep’ of varying lengths and frequencies.

When you mix MIDI with the capabilities of the SID, you get something like [SlipperySeal]’s awesome looking synth, known as ‘Monty’. While the road to this point unfortunately resulted in several blown-up SID chips, the sacrifice seems to have paid off.

Realizing the limitations of having ‘just’ three voices, Monty is designed to use two SID chips in parallel, for a total of six voices in pleasing stereo sound. MIDI commands are transferred to the dual SIDs by way of an ATmega1284p microcontroller. The SID is well understood by this point, and [SlipperySeal] goes into great detail explaining the fundamentals of SID programming over on GitHub.

This isn’t the first MIDI synth that is based around the C64 SID chip, but [SlipperySeal] made sure that his stood out from the crowd. The seven-segment display centered on the board makes for a delightfully simple visualizer, an effect that looks even better when running two Monty boards at once, each responding to alternate MIDI channels (check out the video below). Naturally, we’re also fans of projects that include ominous, cryptic keyswitches.

Continue reading “Retro Stereo SID Synth Looks And Sounds Sensational”

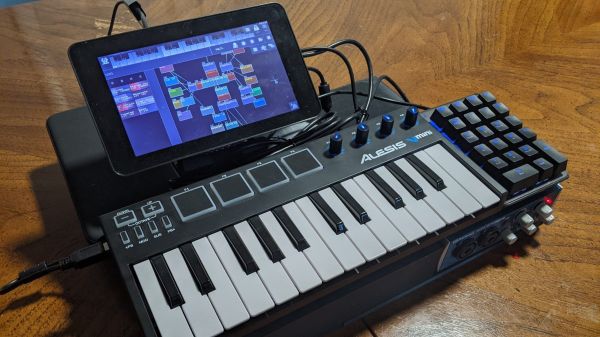
A musical cyberdeck

Musical Cyberdeck Is Part Synth, Part MIDI Controller, And All Cool

When a new project type starts to get a lot of exposure, it’s typically not long before we see people forking the basic concept and striking out in a new direction. It happened with POV displays, it happened with Nixie clocks, and now, it seems to be happening with cyberdecks. And that’s something we can get behind, especially with cyberdecks built to suit a specialized task, like this musical cyberdeck/synth.

Like many musicians, [Benjamin Caccia] felt like he needed a tool to help while performing with his band “Big Time Kill.” He mainly needed to trigger track playbacks on the fly, but also wanted something to act as a mega-effects pedal and standalone synth. And while most of that could be done with an iPad, it wouldn’t look as cool as a cyberdeck. The build centers around a Raspberry Pi 4 and a 7″ LCD display. Those sit on top of a 25-key USB MIDI keyboard and a small mixer. Alongside the keyboard is a USB keypad, which has custom mappings to allow fast access to buried menu functions in the cyberdeck’s Patchbox OS. Everythign was tied together on a 3D-printed frame; the video below shows it in action, and that it sounds as good as it looks.

We think [Benjamin]’s cyberdeck came out great. Need to see some other specialized cyberdecks? Why not take a look at this battle-ready cyberdeck, one that aims to be distraction-free, or a cyberdeck for patrolling the radioactive wastelands.

Continue reading “Musical Cyberdeck Is Part Synth, Part MIDI Controller, And All Cool”

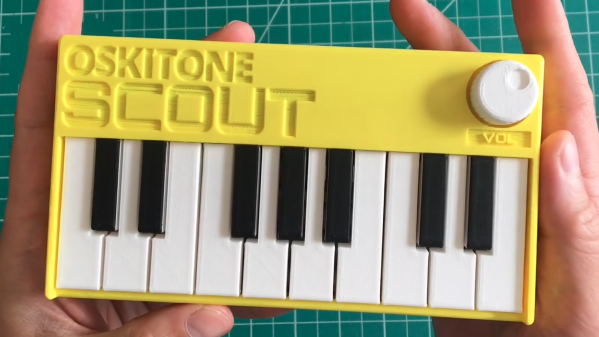
Small synth held in two hands

3D Printed Synth Kit Shares Product Design Insights

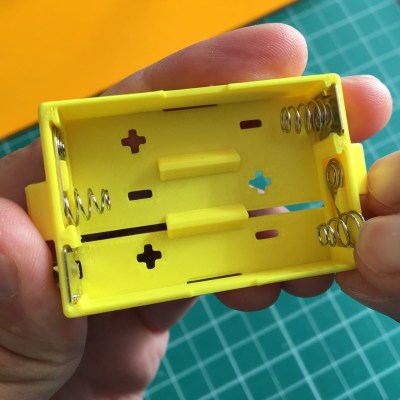
We’ve always been delighted with the thoughtful and detailed write-ups that accompany each of [Tommy]’s synth products, and the background of his newest instrument, the Scout, is no exception. The Scout is specifically designed to be beginner-friendly, hackable, and uses 3D printed parts and components as much as possible. But there is much more to effectively using 3D printing as a production method than simply churning out parts. Everything needed to be carefully designed and tested, including the 3D printed battery holder, which we happen to think is a great idea.

3d printed battery holder, showing inserted spring contacts
3D printed battery holder, with spring contacts inserted by hand.

[Tommy] also spends some time explaining how he decided which features and design elements to include and which to leave out, contrasting the Scout with his POLY555 synth. Since the Scout is designed to be affordable and beginner-friendly, too many features can in fact be a drawback. Component costs go up, assembly becomes less straightforward, and more complex parts means additional failure points when 3D printing.

[Tommy] opted to keep the Scout tightly focused, but since it’s entirely open-sourced with a hackable design, adding features is made as easy as can be. [Tommy] designed the PCB in KiCad and used OpenSCAD for everything else. The Scout uses the ATmega328, and can be easily modified using the Arduino IDE.

STL files can be downloaded here and all source files are on the project’s GitHub repository, which also contains detailed assembly and modification guides. Watch it in action in the video, embedded below.

Continue reading “3D Printed Synth Kit Shares Product Design Insights”