This Old Mouse: Building A USB Adapter For A Vintage Depraz Mouse

When [John Floren] obtained a vintage Depraz mouse, he started out being content to just have such a great piece of history in his possession. But if you’re like him, you know it’s not enough to just have something. What would it be like to use it?

To find out, [John] embarked on a mission to build a USB adapter for his not so new peripheral.
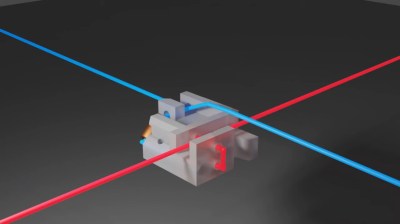
Originally used in very early terminals with a Unix GUI, the Depraz mouse utilizes an unusual male DE9 connector rather than the more familiar female DB9 used in RS232 serial mice. Further deviating from the norm, he found that the quadrature encoders were connected directly to the DE9 connector.

Armed with an Arduino Pro Mini Micro and some buggy sample code, he got to work. The aforementioned buggy code was scrapped and a fresh sketch for the Arduino Pro Mini Micro gave the Depraz mouse the USB interface it lacked. [John] also found that he wasn’t the first hardware hacker to have modified the mouse for their use. Be sure to read to the end the article to find out about the vintage surprise lurking in the mouse shell itself! A demonstration of the mouse in action can be seen in the video below the break.

Looking for a fun mouse hack? Perhaps you’d like to use your more modern USB mouse on a retro computer, or try your hand at recreating an early Apple mouse for use in modern computers.

Continue reading “This Old Mouse: Building A USB Adapter For A Vintage Depraz Mouse”

Kinesis + Teensy = QMK Advantage Over Your Keyboard

Back in 2013, [Michael Stapelberg] created what is lovingly referred to as the Stapelberg controller: a replacement keyboard controller for the original Kinesis Advantage, the decades-old darling of the ergonomic clacking world. Whether you’re building a new keeb, you’ve got a broken Kinesis, or you simply want to run QMK on the thing and don’t mind getting your hands dirty, there’s a new Stapelberg controller on the block. It’s called the kinT, for Kinesis + Teensy.

[Michael] built kinT in response to the Advantage 2, which came along in 2017 and changed the way the thumb clusters connect to the main board from a soldered cable to an FPC connector. Whereas the original Stapelberg controller was built in Eagle, this one was done in KiCad and is open-source, along with the firmware. You can use a Teensy 4 with this board but if you don’t have one, don’t worry — kinT is backwards-compatible with pretty much every Teensy, and it will even work on the original Advantage.

Are you on the fence about going full ergo? Check out my in-depth review of the original Kinesis Advantage I got that’s almost 20 years old and still clacking along like new. But don’t wait for a repetitive stress injury to go full ergo. Trust me.

This Is A 3D Ink Jet Printer

We spend a lot of time thinking of how to create 3D objects, but what about being able to print full color graphics on the objects we create? This isn’t just multicolor, this is full-color! Here’s one elegant solution that uses ink jets to print full color images on 3D terrain models.

Admittedly we are very late to the party on this one as the technology was spotted on season 22, episode 7 of How It’s Made that aired way back in 2013. The segment shows terrain models — think of the physical contour map under glass that you might see at a National Park or at the main lodge of a ski resort. It’s easy enough to envision how the elevation is carved out of foam by a CNC. But the application of color printing to those surfaces is what caught our eye this time around. It’s a custom rig that a company called Solid Terrain Modeling built for this purpose. Since the height at any point on the work material is already known from the milling process, four ink heads (black, cyan, magenta, yellow) have been added to individual Z-axis actuators, applying a raster image as they traverse the surface.

Part of what makes this work is the post-processing steps that follow milling. The model is very carefully cleared of debris before being sprayed with primer. Another coat of an undetermined material (“a specialty coating to receive the ink”) gets the piece ready for the ink. The final step after printing is a protective clear coat. In the How It’s Made episode, buildings and other structures are then 3D-printed and added.

It seems like the trick is to get the heads to have as small of a footprint as possible for clearance when printing in sloped areas. We’re not experts in all the available consumer ink-jet printers out there, but finding a setup where the heads are separated from the reservoirs would be key. Watching this segment made us so excited to think of the person/people who got to hack this rig together as part of their job.

Looking for other ways to abuse ink jet parts? [Sprite_TM] came up with a way to make them handheld so you print on anything from latte foam to your buddy’s forearm. There’s no better name for that than the Magic Paintbrush.

Continue reading “This Is A 3D Ink Jet Printer”

Wooden Keyboard With Scrabble Tiles Goes The Extra Mile

[Steve M. Potter] loves and respects a good, solid keyboard as much as we do and wanted to build an heirloom-level battleship to grace their home office. Well, you couldn’t ask for a better donor keeb. [Steve] used a Unicomp, the modern Model M. The cases on them are nowhere near as nice as a real model M, but hey, where else are you going to find a keyboard with new buckling spring switches? You’re not. (If anyone has a line on new buckling spring switches by themselves, please let us know.)

Although it has those wonderful buckling spring switches, this body is made of solid cherry. After dialing in the general shape of the case, [Steve] carefully routed out all the key cluster holes using a plunge router. This appears to have been the easy part, because making the keycaps looks terribly tedious.

The alphas a number row are all made from 3/4″ maple dowel rod cut down into cylinder nuggets and topped with Scrabble tiles. The F keys and modifiers are cut out of square poplar rod with bird’s eye maple veneer for a unique look. We particularly like the colored F keys — they look like candy or whisky stones, and just happen to be in resistor color code order. But our favorite part has to be the Caps Lock light. We’ll never understand why in situ lock lights went out of fashion.

Like the look of this keyboard but don’t have this much time to invest? Macropads look good in wood, too.

[riskable]'s clacky magnetic switches

Mag-Lev Switches Are The Future Of Clacking

While there’s probably a Cherry MX clone born every year or so, it’s not often that such a radically different type of switch comes along. These “Void” switches are Hall-effect magnetic levitation numbers devised by keyboard connoisseur and designer [riskable]. Can you imagine how satisfying it is to clack on switches that actuate with magnets? They have adjustable tactility and travel thanks to even more tiny magnets. But you won’t be able to get these in a group buy or anything. If you want some of these babies, [riskable] says you’ll have to print and assemble ’em yourself.

These attractive switches don’t have a Cherry MX footprint, either, so you’ll need some of [riskable]’s AKUs, or Analog Keyboard Units (YouTube) to actually use them. [riskable] predicts that unlike the switches, the AKUs will likely be available to buy at some point in the future. (Okay good, because we really would love to know what these feel like in a keyboard!)

So, how do they work? As explained in the first video embedded below, there is one magnet in the slider and another in the housing. These two are attracted to each other, so actuating the switch separates them, which is where the Hall effect comes in. A third magnet in the keycap acts as the levitator to help return the switch to open position. The tactility of these switches is determined by the thickness of the plastic between the two lovebird magnets, so you could totally dial that in to whatever you want, in addition to all the other customization that 3D printing affords.

Tour and Teardown

The inimitable [Chyrosran22] featured these mag-nificent switches in one of his teardown videos, which is embedded below. One of the things [riskable] sent was a tactility sampler that ranges from an unimaginably tactile 0.0 mm of plastic in between them to not quite 2 mm.

In case you’re wondering, the video is remarkably safe-for-work, which is surprising given the content creator’s propensity for long strings of creative and hyphenated curses. We suppose [Chyrosran22] saves that stuff for the bad keyboards, then.

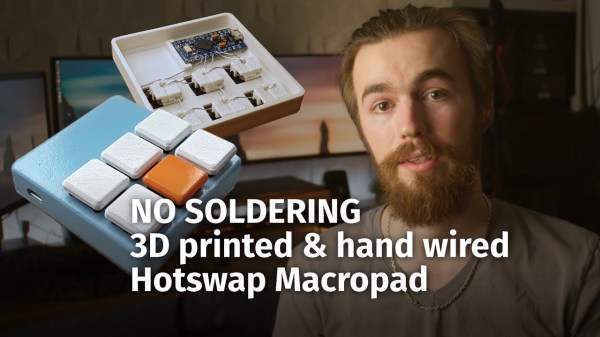
Stick around after the rightfully glowing review for [riskable]’s tour of a hand-wired analog macro pad using these switches. When you have a few extra minutes, check out the video build journey of these switches on [riskable]’s YouTube channel.

So, would these switches make the clickiest keyboard ever? Maybe, but consider this striking solenoid setup.

Continue reading “Mag-Lev Switches Are The Future Of Clacking”

Streaming Video From A Mouse

The first optical mice had to be used on a specially printed mousepad with a printed grid that the four-quadrant infrared sensor could detect. Later, mice swapped the infrared sensor for an optoelectric module (essentially a tiny, very low-resolution camera) and a powerful image processing. [8051enthusiast] was lying in bed one day when they decided to crack the firmware in their gaming mouse and eventually start streaming frames from the camera inside.

Step one was to analyze the protocol between the mouse and the host machine. Booting up a Windows VM and Wireshark allowed him to capture all the control transfers to the USB controller. Since it was a “programmable” gaming mouse that allowed a user to set macros, [8051enthusiast] could use the control transfers that would normally query that macro that had been set to return the memory at an arbitrary location. A little bit of tinkering later, and he now had a dump of the firmware. Looking at the most abundant bytes, it seems to match a profile similar to the Intel 8051. In a fascinating blur of reverse engineering, he traced the main structure of the program back from the function that sets the LED colors for the scroll wheel (which is dependent on the current DPI setting). Unfortunately, the firmware prevented the same macro mechanism from writing to arbitrary locations.

Looking through the code, a good old buffer overflow exploit seemed possible, but it caused the system to reset via watchdog. So he took another approach, invoking recovery mode and loading an entirely new firmware on the device, which a set_report control transfer can invoke.

Next, he moved onto the ADNS-9800 optical sensor (pictured in the top image provided by JACK Enterprises), which had a large encrypted blob in the firmware. Some poking around and deduction lead to a guess that the optical sensor was another 8051 system. With some clever reasoning and sheer determination, [8051enthusiast] was able to crack the XOR stream cipher encryption with a program that showed him versions of the disassembled assembly and allowed him to pick the one that was the most likely. With the firmware decrypted, he was able to see the encryption code and confirm his deducted algorithm.

With the sensor now cracked open, it was onto the 30 x 30 240 fps video stream. The sensor communicates over SPI, and the USB controller has to bit-bang the connection as it doesn’t have the hardware. Putting two custom firmware images on with a few extra functions was easy enough, but the 7 fps was somewhat lacking. The first optimization was loop unrolling and removing some sleeps in the firmware, which bought it up to 34 fps. By measuring the cycle counts of individual instructions, he was able to find some alternatives such as a mov instead of a setb that took one less cycle. Going from a 17 cycle loop to an 11 cycle loop and some other optimizations gave him 54 fps. Not content to stop there, he modified the ADNS-9800 firmware to continuously sample rather than waiting for the USB controller to finish processing. While this yielded 100 fps, there was still more to do: image compression. At a whopping 230 fps, [8051enthusiast] decided to call it done.

However, there was one last thing he wanted to do: control the mouse with the video stream. Writing some image processing into his Python-based program that received the image files allowed him to use the mouse, however impractically.

All in all, it’s an incredible journey by [8051enthusiast], and we would highly recommend reading the whole journey yourself. This isn’t the first time he’s modified the firmware of 8051-based devices, such as modifying the firmware of the WiFi chipset in his laptop.

[Thanks to JACK Enterprises over at Tindie for the use of the image of an ADNS9000].


Illustrated Kristina with an IBM Model M keyboard floating between her hands.

Keebin’ With Kristina: The One With The Mad Model M

Hand-Wired Hell Help

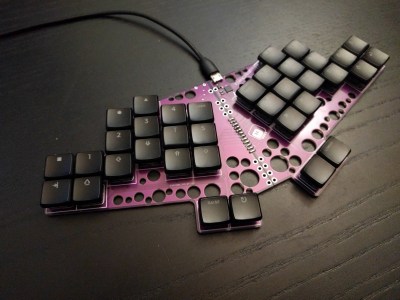
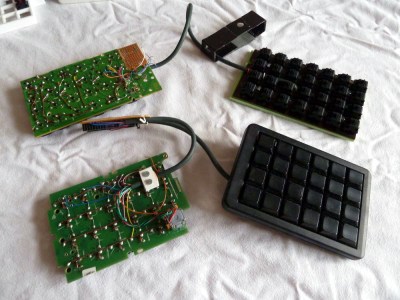
Do you dream of building a curvy ergonomic keyboard or macro pad, even though the idea of hand wiring gives you nightmares? You can make it a bit less troublesome with a tiny PCB for each key switch, as long as you have a reflow oven or you’re okay with a bit of surface-mount soldering for the diode, LED, and capacitor.

As a bonus, these should make switches a bit more secure against movement, and you could probably even get away with using hot swap sockets if you wanted. [Pedro Barbero] has the Gerber files available if you want to get some fabbed. We sort of wish we had used these on our dactyl, though the case is awfully tight and they might not fit.

Ultra-Mechanical Keyboard Angles with Lifter Motors

Lots of people prefer an angled keyboard, but plenty of new keebs, especially mechanical ones, just don’t offer that at all. Well, the wait for an adjustable 75% is over, at least. Okay, that’s not exactly true. The wait for a group buy to begin for an adjustable 75% is almost over.

Nestled in between the arrow cluster and the menu key of the Besides Studios M-One is a rocker switch that angles the keyboard from 3° to 7° slowly but surely, like an adjustable bed. This is going to be a bare-bones group buy, meaning that it won’t come with any switches, stabs, or keycaps, but that doesn’t mean it will be cheap at $299. [BadSeed Tech] got an early prototype and built it out with Gateron Ink Black V2 switches in the video below in order to give it a proper spin.

Continue reading “Keebin’ With Kristina: The One With The Mad Model M”