Crankshaft: Open Source Car Computer

Modern cars and head units are pretty fancy gadget-wise. But what if your car still has an 8-track? No problem. Just pick up a Raspberry Pi 3 and a seven-inch touchscreen, and use Crankshaft to turn it into an Android Auto setup.

The open source project is based on OpenAuto which, in turn, leverages aasdk. The advantage to Crankshaft is it is a plug-and-play distribution. However, if you prefer, you can build it all yourself from GitHub.

Continue reading “Crankshaft: Open Source Car Computer”

Tiny Quad Core Module Available Soon

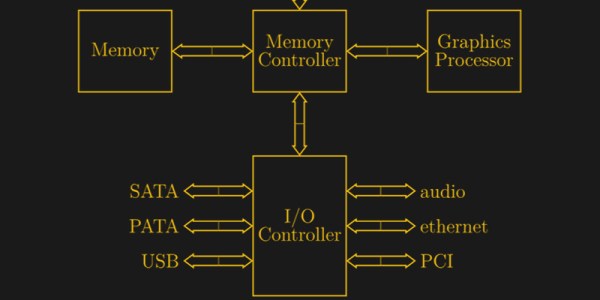
We get a lot of new product announcements here at Hackaday, and we run across even more. As excited as a manufacturer might be about their latest Raspberry Pi killer or cheaper Arduino clone, we usually don’t have much to say about new products unless there is something really interesting about them. Our attention was piqued though when we saw the Neutis N5. Shipping in April, the device packs a quad-core ARM processor running at 1.3 GHz with 8 GB of flash memory and 512 MB of RAM, has an extended temperature range, WiFi (802.11N), and Bluetooth (including BLE). There’s also a crypto chip, and all this is packed into a tiny package. Really tiny. Less than 41×30 mm square and less than 4.5 mm thick. There’s a Debian-based distribution and a development board. Oh and the really interesting thing is the price, which is $49 in single quantities.

Some of the I/O ports are multiplexed, but there are plenty of options including audio, Ethernet, HDMI, USB, and more. They clearly mean for these to be put into products. The module claims UL and CE certification, each unit has a unique serial number, and there is a gang programming capability.

Continue reading “Tiny Quad Core Module Available Soon”

A Jukebox For The 21st-Century Kit Blends Raspberry Pi, Sonos, QR Codes

When [Chris Campbell]’s children wanted to play an album in the background over dinner, switching the outputs on his family’s Sonos sound system was perhaps too involved for their budding mastery of technology. This got him thinking about using kid-friendly inputs so they could explore his music collection. Blending QR codes, some LEGO, and a bit of arts and crafts, a kid-friendly QR code reader media controller comes out!

Working with a Raspberry Pi 3 Model B and a cheap camera, [Campbell] whipped up some code to handle producing and reading the QR codes — though he’s running the media server on another computer to maintain fast response times. Once [Campbell] had his QR codes, he printed them out and got his kids involved in cutting and gluing the double-sided cards. Additional cards access different functions — starting a playlist queue, switching output channels, and full album playback, among others. Cue spontaneous dance-parties!

Continue reading “A Jukebox For The 21st-Century Kit Blends Raspberry Pi, Sonos, QR Codes”

Pulling Music Out Of Thin Air With A Raspberry Pi

Pianos are great instruments, but being rather heavy and requiring a fair amount of space they are certainly not known for their convenience. Sure, there are more portable varieties available, but they rarely resemble the elegance and classiness of a grand piano. One option is of course to build a downscaled version yourself — and since you’re already customizing the instrument, why stop at the way you play it. [2fishy] didn’t stop there either and ended up with a wooden, space friendly, light controlled piano housing a Raspberry Pi.

Inspired by the concept of a laser harp, [2fishy] followed the same principle but chose a simpler and safer alternative by using LEDs instead. For each playable tone, a LED is mounted opposite a light dependent resistor, creating an array of switches that is then connected to the Raspberry Pi’s GPIO pins. A Python script is handling the rest, polling the GPIO states and — with a little help from pygame, triggering MIDI playback whenever the light stream is interrupted.

There are enough LED/LDR pairs to play one full octave and have some additional control inputs for menu and octave shifting. This concept will naturally require some adjustments to your playing — you can get an idea of it in the demonstration video after the break. And if this design is still not the right size for you, or if you prefer to play in total darkness, this similar MIDI instrument using ultrasonic distance sensors could be of interest.

Continue reading “Pulling Music Out Of Thin Air With A Raspberry Pi”

Cloning The Echo Show With A Fabric Wrapped Pi

After seeing an Echo Show in the flesh plastic, [anonteapot] was inspired to create his own take on Amazon’s latest on-ramp to their ecosystem. He had the Raspberry Pi and a touch screen, but not much else. He doesn’t even have a dedicated work area at home, much less something as exotic as a 3D printer to run off a custom case. For this decidedly low-tech build, all that was required tool-wise was a razor blade knife and a screwdriver.

The majority of the device, which he refers to as the PiShow, is made of hand-cut pieces of MDF. In fact, the whole build relied on his ability to neatly cut pieces of MDF with hand tools on his bedroom floor. We wouldn’t suggest such a setup as a general rule, but respect for pushing ahead without so much as a table to work on.

To connect the pieces of MDF, he used angle brackets from the hardware store. These were originally 90 degrees, but he bent them by hand to achieve the angles seen in the final device. He notes that there was no specific angles he was aiming for when putting the box together; he simply wanted something that looked cool and was large enough internally to hold his electronics.

Covering the PiShow is some jersey material that [anonteapot] bought at a local fabric store. It has a little stretch to it so he was able to pull it tight over the MDF frame and keep the wrinkles out. As a general rule we don’t see many projects here at Hackaday that are wrapped in fabric, but we’ve got to admit, it makes for a nice final look.

The trickiest part of the build ended up being the side panels. While the rest of the frame was relatively simple, the sides needed to precisely conform to some fairly complex geometry. Luckily the side panels aren’t actually holding any weight, so he decided to just cut them out of cardboard. There’s a bit of a gap at the top, but he’s going to try and rectify that with a visit from his glue gun soon.

Internally things are sort of just hanging around inside the case, but since this device is never going to move off of the nightstand, it probably doesn’t need to be terribly secure. In truth, getting all the hardware mounted up cleanly with the construction methods available to [anonteapot] would have been a bit tricky anyway.

This is the first time we’ve seen somebody take a swing at replicating the Echo Show, usually we just see people trying to cram the Echo Dot into something else. If the software side is more your thing, be sure to check out this excellent guide on Alexa Skills development by our very own [Al Williams].

Pi Zero Gives Telescope Hands Free Focus

It seems like [Jason Bowling] never gets tired of finding new ways to combine the Raspberry Pi with his love of the cosmos. This time he’s come up with a very straightforward way of focusing his Celestron 127SLT with everyone’s favorite Linux SBC. He found the focus mechanism on the scope to be a bit fiddly, and operating it by hand was becoming a chore. With the Pi Zero and a stepper motor, he’s now able to focus the telescope with more accuracy and repeatability than clumsy human fingers will be able to replicate.

On this particular type of telescope, the focus knob is a small knob on the back of the scope (rather than on the eyepiece), which just so happens to be the perfect size to slide a 15mm bore pulley over. With a pulley on the focus knob, he just needed to mount a stepper motor with matching toothed pulley next to it and find a small enough belt to link them together. Through the magic of Amazon and McMaster-Carr he was able to find all the parts without having to make anything himself, beyond the bent piece of aluminum he’s using as a stepper mount.

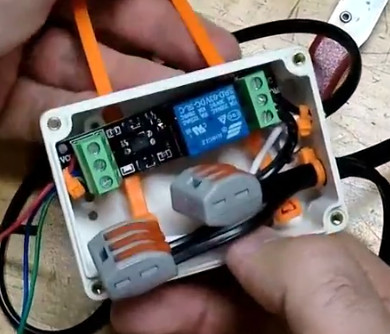
To control the stepper, [Jason] is using an EasyDriver connected up to the Pi’s GPIO, which along with a 5V regulator (which appears to be a UBEC from the RC world) is held in a tidy weather proof box mounted to the telescope’s tripod. The regulator is necessary because the whole setup is powered by a 12V portable “jump start” battery pack for portability. Handy when you’re stargazing in the middle of a field somewhere.

[Jason] promises a future blog post where he details how he used Flask to create a web-based control for the hardware, which we’ll be keeping an eye out for. In the meantime, he reports that his automated focus system is working perfectly and keeps the image stable in the eyepiece even while moving (something he was never able to do by hand).

Last year this same scope had a Raspberry Pi camera mounted to it to deliver some very impressive pictures without breaking the bank. We’re interested in seeing how [Jason] ties these systems together going forward.

Plastic Model Emulates The First Untethered Spacewalk

Here’s something really wonderful. [Dave Akerman] wrote up the results of his attempt to use a high-altitude balloon to try to re-create a famous image of NASA’s Bruce McCandless floating freely in space with the Earth in the background. [Dave] did this in celebration of the 34th anniversary of the first untethered spacewalk, even going so far as to launch on the same day as the original event in 1984. He had excellent results, with plenty of video and images recorded by his payload.

80’s “Astronaut with MMU” model kit.

Adhering to the actual day of the spacewalk wasn’t the only hurdle [Dave] jumped to make this happen. He tracked down an old and rare “Astronaut with MMU” (Mobile Maneuvering Unit) plastic model kit made by Revell USA and proceeded to build it and arrange for it to remain in view of the cameras. Raspberry Pi Zero Ws with cameras, LoRA hardware, action cameras, and a UBlox GPS unit all make an appearance in the balloon’s payload.

Sadly, [Bruce McCandless] passed away in late 2017, but this project is a wonderful reminder of that first untethered spacewalk. Details on the build and the payload, as well as the tracking system, are covered here on [Dave]’s blog. Videos of the launch and the inevitable balloon burst are embedded below, but more is available in the summary write-up.

Continue reading “Plastic Model Emulates The First Untethered Spacewalk”