Multifunction Raspberry Pi Chiptune Player

General Instrument’s AY-3-8910 is a chip associated with video game music and is popular with arcade games and pinball machines. The chip tunes produced by this IC are iconic and are reminiscent of a great era for electronics. [Deater] has done an amazing job at creating a harmony between the old and new with his Raspberry Pi AY-3-8910 project.

[Deater] already showed us an earlier version of the project on a breadboard however after having made some PCBs and an enclosure the result is even more impressive. The system consists of not one but two AY-3-8910 for stereo sound that feed a MAX98306 breakout for amplification. A Raspberry Pi 2 sends six channels worth of data via 74HC595 shift registers driven by SPI. There is a surplus of displays ranging from a matrix to bar graph and even 14-segment displays. The entire PCB is recognized as a hat courtesy an EEPROM which sits alongside a DS1307 RTC breakout board. The enclosure is simple but very effective at showing the internals as well as the PCB art.

The software that [Deater] provides, extends the functionality of the project beyond the chiptunes player. There is a program to use the devices as an alarm clock, CPU meter, electronic organ and even a playable version of Tetris as seen in the demo video below. The blog post is very informative and shows progress in a chronological fashion with pictures of the design at various stages of development. [Deater] provides a full set of instructions as well as the schematic along with code posted on GitHub.

If you have a soft spot for the Arduino you may want to check out the 8-bit version of a chip tune player and if you are craving some old hardware peripheral information, do check out the computer curiosities from the Iron Curtain periodContinue reading “Multifunction Raspberry Pi Chiptune Player”

Raspberry Pi Malware Mines BitCoin

According to Russian security site [Dr.Web], there’s a new malware called Linux.MulDrop.14 striking Raspberry Pi computers. In a separate posting, the site examines two different Pi-based trojans including Linux.MulDrop.14. That trojan uses your Pi to mine BitCoins some form of cryptocurrency. The other trojan sets up a proxy server.

According to the site:

Linux Trojan that is a bash script containing a mining program, which is compressed with gzip and encrypted with base64. Once launched, the script shuts down several processes and installs libraries required for its operation. It also installs zmap and sshpass.

It changes the password of the user “pi” to “\$6\$U1Nu9qCp\$FhPuo8s5PsQlH6lwUdTwFcAUPNzmr0pWCdNJj.p6l4Mzi8S867YLmc7BspmEH95POvxPQ3PzP029yT1L3yi6K1”.

In addition, the malware searches for network machines with open port 22 and tries to log in using the default Raspberry Pi credentials to spread itself.

Embedded systems are a particularly inviting target for hackers. Sometimes it is for the value of the physical system they monitor or control. In others, it is just the compute power which can be used for denial of service attacks on others, spam, or — in the case — BitCoin mining. We wonder how large does your Raspberry Pi botnet needs to be to compete in the mining realm?

We hope you haven’t kept the default passwords on your Pi. In fact, we hope you’ve taken our previous advice and set up two factor authentication. You can do other things too, like change the ssh port, run fail2ban, or implement port knocking. Of course, if you use Samba to share Windows files and printers, you ought to read about that vulnerability, as well.

Self-Driving RC Cars With TensorFlow; Raspberry Pi Or MacBook Onboard

You might think that you do not have what it takes to build a self-driving car, but you’re wrong. The mistake you’ve made is assuming that you’ll be controlling a two-ton death machine. Instead, you can give it a shot without the danger and on a relatively light budget. [Otavio] and [Will] got into self-driving vehicles using radio controlled (RC) cars.

[Otavio] slapped a MacBook Pro on an RC car to do the heavy lifting and called it carputer. The computer reads Hall effect sensor data from the motor to establish distance traveled (this can be used to calculate speed) and watches the stream from a webcam perched on the chassis. These two sources are fed into a neural network using TensorFlow. You train the system by driving the vehicle manually through the course a few times and then let it drive itself.

In the video interview below, you get a look at the car and [Otavio] gives commentary on how the system works as we see playback of a few races, including the Sparkfun 2016 Autonomous Vehicle Competition. I apologize for the poor audio, they lost the booth lottery and were next door to an incredibly noisy robot band (video proof) so we were basically shouting at each other. But I think you’ll agree it’s worth it to get a look at the races. Continue reading “Self-Driving RC Cars With TensorFlow; Raspberry Pi Or MacBook Onboard”

Sun Ray Thin Client Becomes Raspberry Pi Workstation

One of the great predictions of desktop computing from the mid 1990s was that we would all move to so-called thin clients, stripped-out desktop computers containing only processor, display driver, and peripheral interfaces, that would call up their applications not from a local hard disk but from a remote server. It was one that was never fulfilled in quite the way its proponents envisaged, but a business thin client hardware market did emerge for the likes of Citrix sharing of Windows applications. In a sense we have reached the same point through cloud-based in-browser applications such as Google Apps or Office 365, though even with newer thin client hardware such as the Chromebook these are still largely used on more traditional machines.

Even though thin clients never took the world by storm, it is still not unusual to encounter the hardware once it has outlived its usefulness. A surplus Sun Ray 270 all-in-one thin client came [Evan Allen]’s way, and to make something useful from it he converted it into a Raspberry Pi workstation.

The Sun Ray 270 has a MIPS processor board integrated into a 17 inch monitor. [Evan] was fortunate enough to find a generic HDMI controller board for its LCD panel, so was able to dispense with the MIPS board entirely and couple the controller with an automatic HDMI switch. This allows him to use the device both as a Raspberry Pi and as a monitor.

This may not rank among the most epic hacks ever, but it has delivered [Evan] a useful computer and it’s reminding the rest of us that these thin clients can be repurposed. So if one lands on your bench, look at it with fresh eyes.

Of course, if you have a Pi in a thin client, you could always take it full circle and use it to run a thin client.

Game Boy Mod Uses Raspberry Pi Compute Module 3

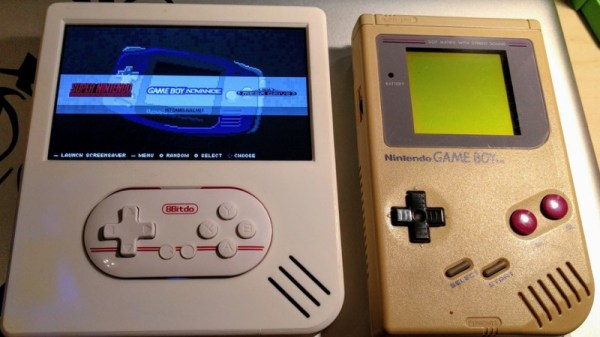
[inches] wanted the power of a Raspberry Pi 3 in a form factor closer to the Pi Zero for a Game Boy mod. This led him to design a custom PCB to interface with one of the less popular items in the Raspberry Pi line: the Compute Module 3. A hardware comparison between the three platforms is available here.

After correcting some minor issues, it booted correctly on the first try. The final result is slightly larger than a Raspberry Pi Zero, but significantly smaller than the Raspberry Pi 3, and fits perfectly inside the Game Boy for a clean build.

The Raspberry Pi Zero remains difficult to source in some parts of the world and can cost nearly as much as the more powerful CM3 (e.g. in Southeast Asia). If you’re comfortable making a breakout board and benefit from the added computing power, it’s a reasonable option when it needs to be small.

Worth noting is that the Raspberry Pi Foundation does sell an open-source development kit for the CM3 that has been used in some projects, but the retail cost is relatively high compared to a Raspberry Pi 3. Smaller but less feature-rich breakout boards like the one by [inches] make the CM3 more accessible.

Thanks to [Lou Hannoe] for the tip.

Hackerspace Jukebox!

Depending on whom you talk to, music can be an integral part of getting work done. At the Hackheim hackerspace in Trondheim, Norway, [Nikolai Ovesen] thought that the previous system of playing music over Bluetooth took away from the collaborative, interactive spirit of the space. Solution: a weekend build of a Raspberry Pi-powered jukebox.

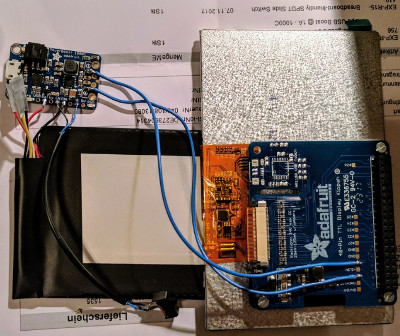
The jukebox is simply laser-cut from plywood and bolted together. Inside, the touchscreen is mounted using double-sided tape, with the Raspberry Pi 3 and buck converter mounted on its rear with motherboard spacers. An IBM ThinkPad power cable was re-purposed and modified so it supplies the amp, as well as the Pi and touchscreen through the buck converter.

Once everything was connected, tested, and fired up, a bit of clever software working around had to be done in order to get Golang working, along with setting up the touchscreen and amp. Hackers interact with the jukebox using the Mopidy music server and its Mopify(Spotify) plugin — but they can also request songs through a bot in the Hackheim Slack channel.

Continue reading “Hackerspace Jukebox!”

ZeroBot Is As Simple As It Gets

Usually at Hackaday we like to post projects that are of interest because of their complexity. That’s especially true for robots — the more motors and sensors the better. But, occasionally we come across a project that’s beautiful because of its simplicity. That’s the case with [Max Kern]’s ZeroBot, recently posted over on Hackaday.io.

The ZeroBot breaks the essence of a robot down to just the essentials: a Raspberry Pi Zero W for the brains, a driver and two motors for movement, a battery for power, and a camera to see. The chassis is made completely of parts that are easily 3D-printable. The Zero W creates a WiFi access point that users can connect to on a computer or smart phone, and subsequently provides FPV control.

This project is reminiscent of the starter robot kits many of us began our hacking lives with, and it’s a great teaching tool for kids. Print the parts and you can have the robot built-in an afternoon, while still being fun enough to actually play with when you’re done. After the physical robot is built, the possibilities for programming and controlling it are endless.

Continue reading “ZeroBot Is As Simple As It Gets”