Modernizing Puerto Rico’s Grid

After two massive hurricanes impacted Puerto Rico three months ago, the island was left with extensive damage to its electrical infrastructure. Part of the problem was that the infrastructure was woefully inadequate to withstand a hurricane impact at all. It is possible to harden buildings and infrastructure against extreme weather, and a new plan to restore Puerto Rico’s power grid will address many of these changes that, frankly, should have been made long ago.

Among the upgrades to the power distribution system are improvements to SCADA systems. SCADA allows for remote monitoring and control of substations, switchgear, and other equipment which minimizes the need for crews to investigate problems and improves reliability. SCADA can also be used for automation on a large scale, in addition to the installation of other autonomous equipment meant to isolate faults and restore power quickly. The grid will get physical upgrades as well, including equipment like poles, wire, and substations that are designed and installed to a more rigorous standard in order to make them more wind- and flood-tolerant. Additional infrastructure will be placed underground as well, and a more aggressive tree trimming program will be put in place.

The plan also calls for some 21st-century improvements as well, including the implementation of “micro grids”. These micro grids reduce the power system’s reliance on centralized power plants by placing small generation facilities (generators, rooftop solar, etc) in critical areas, like at hospitals. Micro grids can also be used in remote areas to improve reliability where it is often impractical or uneconomical to service.

While hurricanes are inevitable in certain parts of the world, the damage that they cause is often exacerbated by poor design and bad planning. Especially in the mysterious world of power generation and distribution, a robust infrastructure is extremely important for the health, safety, and well-being of the people who rely on it. Hopefully these steps will improve Puerto Rico’s situation, especially since this won’t be the last time a major storm impacts the island.

3D Printing Belts For Vintage Hardware

It may be hard for some of the younger readers to believe, but there was a time when hardware was full of little rubber belts. Tape decks, VCRs, even some computers: they all had rotating parts that needed to transfer power to other components, and belts were a cheap and quiet way to do it. Unfortunately, now decades later we realize that these little belts are often the Achilles heel of classic hardware, getting brittle and breaking long before the rest of the components are ready to give up the fight.

Which is exactly what [FozzTexx] found when trying to revive his newly purchased Commodore PET 2001. The belt inside of the cassette drive had become hard and fallen to pieces, and rather than hunt around for a replacement, [FozzTexx] reasoned he might be able to print one out of a flexible 3D printer filament like NinjaFlex. Besides, this wasn’t the only piece of vintage tech in his house that needed a belt replacement, so he figured it would be a worthwhile experiment.

As the original belt was little more than dust, [FozzTexx] had to design his replacement from scratch. He started by cleverly replicating the path the belt would need to take with string, and then measuring the inside diameter of the string circle with his calipers. [FozzTexx] then reduced the diameter by 5% to take into account the stretching of the new belt.

The profile of the belt was square, which made modeling and 3D printing much easier. [FozzTexx] just subtracted a smaller circle from a larger one in 2D, and then extruded that circle into the third dimension by 1.18 mm to match the height of the original part. Careful measurement paid off, and the newly printed NinjaFlex belt had his Commodore loading and saving programs on the first try.

We’ve covered the difficulty in sourcing replacement belts for old hardware previously, so it will be interesting to see if others are able to make use of the research [FozzTexx] has done here. Of course, longevity concerns are always brought up when NinjaFlex is used, so hopefully [FozzTexx] keeps us updated.

Using An Arduino To Re-Create A Computer’s Keyboard Decoder

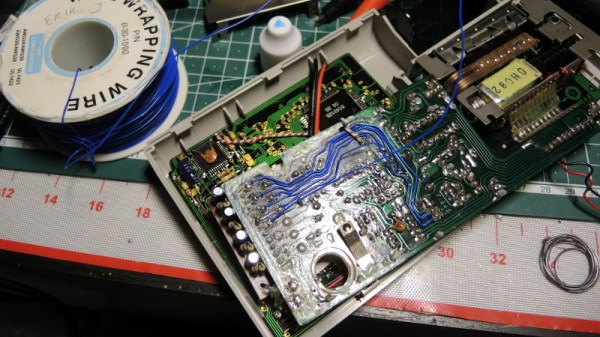
[Max Breedon] found an old Apple IIe clone twenty years ago. He recently dug this Epson AP-200 out of the salvage heap and quickly discovered that the keyboard decoder chip was fried. The old chip was way too obscure to source a replacement — and soon this post will be the top Google result for the string, ‘C35224E’ — so he busted out his trusty UNO and created a replacement keyboard decoder.

Unlike the Apple II, where all the keyboard decoding happens on the keyboard, this clone used a dedicated chip on the main board. Although it’s a rare part that’s virtually ungoogleable, this chip’s architecture and pinout can be figured out by testing out every trace for continuity. After locating what looked like four data pins, he had the Arduino send signals onto the clone to see what characters popped up. That didn’t work, but it led him to idea that two of the wires were clock and data, and after a bit of experimenting figured out that the third pin was a latch enable of some sort that sent the character.

So, [Max] created an Arduino rig to do the same thing. The Arduino uses a shift register to interact with the keyboard’s 8×10 matrix, and the sketch translates any serial data it receives into the keypresses the clone is expecting. After prototyping with the UNO, [Max] hardwired an Arduino Nano (as well as the shift register) into a daughter board with pins extending into the old chip’s sockets. A permanent solution!

In addition to a weird keyboard controller that has been lost to the sands of time, this Apple IIe clone features a few more parts that are downright weird. There are two chips that are found in a few other Apple clones labeled STK 65301 and STK 65371, used as ASICs, MMUs, or a 20-IC expression of Wozzian brilliance condensed into custom silicon. There’s another weird chip in this clone, a 27c32 ROM loaded up with repetitive bits. There is no obvious 6502 code or strings in this ROM, so if anyone has an idea what this chip does, send [Max] a note.

3D Printed Gear Serves Seven Months Hard Labor

Even the staunchest 3D printing supporter would have to concede that in general, the greatest strength of 3D printing is not in the production of final parts, but in prototyping. Sure you can make functional prints, as the pages of this site will attest; but few would argue that you wouldn’t be better off getting your design cut out of metal or injection molded if you planned on putting the part into service over the long term. Especially if the part was to be subjected to rough service in an industrial setting.

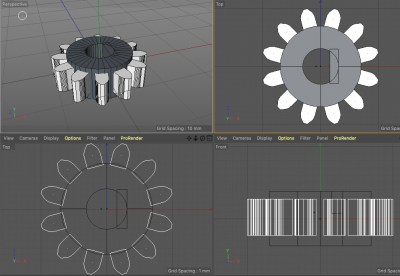
While that’s valid advice, it certainly isn’t the definitive word on the issue. Just because a part is printed in plastic on a desktop 3D printer doesn’t necessarily mean it can’t be put into real service, at least for as long as it takes to get proper replacement parts. A recent success story from [bloomautomatic] serves as a perfect example, when one of the gears in his MIG welder split, he decided to try and print up a replacement in PLA while he waited for the nylon gear to get shipped out to him. Fast forward seven months and approximately 80,000 welds later, and [bloomautomatic] reports it’s finally time to install those replacement gears he ordered.

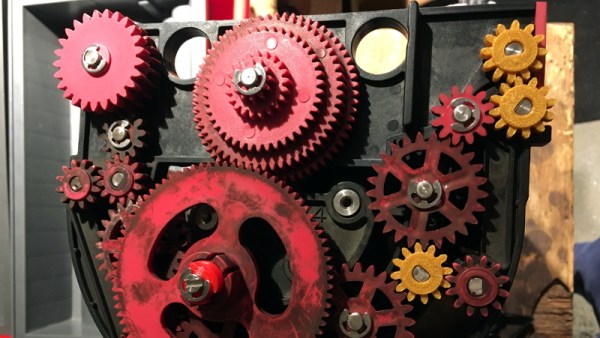
In the pictures [bloomautomatic] posted you can see the printed gear finally wore down to the point the teeth were essentially gone where they meshed with their metal counterparts. To those wondering why the gear was plastic to begin with, [bloomautomatic] explains that it’s intended to be a sacrificial gear that will give way instead of destroying the entire gearbox in the event of a jam. According to the original post he made when he installed the replacement gear, the part was printed in Folgertech PLA on a Monoprice Select Mini. There’s no mention of infill percentage, but with such a small part most slicers would likely have made it essentially solid to begin with.

While surviving seven tortuous months inside of the welder is no small feat, we wonder if hardier PLA formulationstreatment of the part post-printing, or even casting it in a different material couldn’t have turned this temporary part into a permanent replacement.

Xerox Alto CRTs Needed A Tiny Lightbulb To Function

In the real world, components don’t work like we imagine they do. Wires have resistance, resistors have inductance, and capacitors have resistance. However, some designers like to take advantage of those imperfections, something our old friend [Ken Shirriff] noted when he was restoring the CRT of a Xerox Alto.

[Ken] tried to connect a Xerox monitor to the Alto and — since it was almost as old as the Alto — he wasn’t surprised that it didn’t work. What did surprise him, though, is that when he turned the monitor off, a perfect picture appeared for just a split second as the unit powered off. What could that mean?

Keep in mind this is a CRT device. So a perfect picture means you have vertical and horizontal sweep all at the right frequency. It also means you have high voltage and drive on the electron guns. If you are too young to remember all that, [Ken] covers the details in his post.

He found that the CRT grid voltage wasn’t present during operation. The voltage derived from the high voltage supply but, mysteriously, the high voltage was fine. There was a small lightbulb in the grid voltage circuit. A 28V device about like a flashlight bulb. It measured open and that turned out to be due to a broken lead. Repairing the broken lead to the bulb put the monitor back in operation.

On paper, a light bulb lights up when you put current through it. In real life, it is a bit more complicated. An incandescent filament starts off as almost a dead short and draws a lot of current for a very brief time. As the current flows, the filament gets hot and the resistance goes up. That reduces the current draw. This effect — known as inrush current — is the scourge of designers trying to turn on light bulbs with transistors or other electronic switches.

However, the unknown Xerox power supply designer used that effect as a current limiter. The short 600V pulses would hardly notice the light bulb but if too much current or time elapsed, the resistance of the bulb would rise preventing too much current from flowing for too long. With the bulb open, the negative brightness grid provided an impassible barrier to the electrons. Apparently, the brightness grid lost power a bit earlier than the rest of the circuit and with it out of the way — or perhaps, partially out of the way — the picture was fine until the rest of the circuit also lost power.

We looked at [Ken’s] efforts on this machine earlier this year. Light bulbs, by the way, aren’t the only thing that changes resistance in response to some stimulus. You might enjoy the 1972 commercial from Xerox touting the Alto’s ability to do advanced tasks like e-mail and printing.

Continue reading “Xerox Alto CRTs Needed A Tiny Lightbulb To Function”

Get Down To The Die Level With This Internal Chip Repair

Usually, repairing a device entails replacing a defective IC with a new one. But if you’ve got young eyes and haven’t had caffeine in a week, you can also repair a defective chip package rather than replace it.

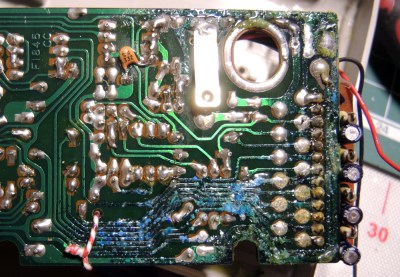
There’s no description of the incident that resulted in the pins of the QFP chip being ablated, but it looks like a physical insult like a tool dropped on the pins. [rasminoj]’s repair consisted of carefully grinding away the epoxy cap to expose the internal traces leading away from the die and soldering a flexible cable with the same pitch between the die and the PCB pads.

This isn’t just about [rasminoj]’s next-level soldering skills, although we’ll admit you’ve got to be pretty handy with a Hakko to get the results shown here. What we’re impressed with is the wherewithal to attempt a repair that requires digging into the chip casing in the first place. Most service techs would order a new board, or at best solder in a new chip. But given that the chip sports a Fanuc logo, our bet is that it’s a custom chip that would be unreasonably expensive to replace, if it’s even still in production. Where there’s a skill, there’s a way.

Need more die-level repairs? Check out this iPhone CPU repair, or this repair on a laser-decapped chip.

[via r/electronics]

Space Technology And Audio Tape To Store Art

[Blaine Murphy] has set out to store an archive of visual art on cassette tape. To do so he encodes images via Slow-Scan Television (SSTV), an analogue technology from the late 50s which encodes images in for radio transmission. If you are thinking ‘space race’ you are spot on, the first images of the far side of the moon reached us via SSTV and were transmitted by the soviet Luna 3 spacecraft.

Yes, this happened

Encoding images with 5os technology is only one part of this ongoing project. Storage and playback are handled by a 90s tape deck and the display unit is a contemporary Android phone. Combining several generations in one build comes with its own set of challenges, such as getting a working audio connection between the phone and the tape deck or repairing old consumer electronics. His project logs on this topic are solid contenders for ‘Fail Of The Week’ posts. For instance, making his own belts for the cassette deck was fascinating but a dead end.

The technological breadth of the project makes it more interesting with every turn. Set some time aside this weekend for an entertaining read.

Just a couple of years back ham radio operators had the opportunity to decode SSTV beamed down from the ISS when they commemorated [Yuri Gagarin’s] birthday. Now if the mechanical part of this project is what caught your interest, you’ll also want to look back on this MIDI sampler which used multiple cassette players.