Handmade Robot Brings Stop Motion To Life

Stop motion animation is often called a lost art, as doing it (or at least, doing it well) is incredibly difficult and time consuming. Every detail on the screen, no matter how minute, has to be placed by human hands hundreds of times so that it looks smooth when played back at normal speed. The unique look of stop motion is desirable enough that it still does get produced, but it’s far less common than hand drawn or even computer animation.

If you ever wanted to know just how much work goes into producing even a few minutes of stop motion animation, look no farther than the fascinating work of [Special Krio]. He not only documented the incredible attention to detail required to produce high quality animation with this method, but also the creation of his custom robotic character.

Characters in stop motion animation often have multiple interchangeable heads to enable switching between different expressions. But with his robotic character, [Special Krio] only has to worry about the environments, and allow his mechanized star do the “acting”. This saves time, which can be used for things such as making 45 individual resin “drops” to animate pouring a cup of tea (seriously, go look).

To build his character, [Special Krio] first modeled her out of terracotta to get the exact look he wanted. He then used a DIY 3D laser scanner to create a digital model, which in turn he used to help design internal structures and components which he 3D printed on an Ultimaker. The terracotta original was used once again when it was time to make molds for the character’s skin, which was done with RTV rubber. Then it was just the small matter of painting all the details and making her clothes. All told, the few minutes of video after the break took years to produce.

This isn’t the first time we’ve seen 3D printing used to create stop motion animation, but the final product here is really in a league of its own.

[Thanks to Antonio for the tip.]

Continue reading “Handmade Robot Brings Stop Motion To Life”

R/C Rocket-Beest Burns Up Fuses Out There Alone

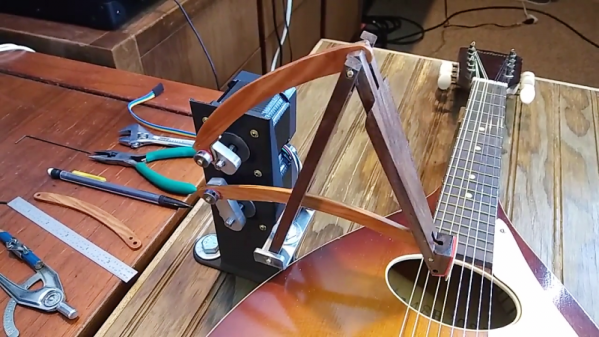
We’re beginning to think the “S” in [Jeremy S Cook] stands for strandbeest. He’ll be the talk of the 4th of July picnic once he brings out his latest build—a weaponized, remote-controlled strandbeest that shoots bottle rockets. There are a bank of money shots up on Imgur.

This ‘beest is the natural next step after his remote-controlled walker, which we featured a month or so ago. Like that one, the locomotion comes from a pair of micro gear motors that are controlled by an Arduino Nano over Bluetooth. The pyrotechnics begin when nitinol wire cleverly strung across two lever nuts is triggered. All the electronics are housed inside a 3D-printed box that [Jeremy] designed to sit in the middle of the legs. We love the face plate he added later in the build, because those gumdrop LED eyes are sweet.

Can you believe that this vehicle of destruction began as a pile of innocent, pasta-colored pieces of kit? We dig the camouflaged battleship paint job, ’cause it really toughens up the whole aesthetic. And really, that’s probably what you want if you’re driving around a spindly beast that can just shoot rockets whenever. Let’s light this candle after the break, shall we?

Continue reading “R/C Rocket-Beest Burns Up Fuses Out There Alone”

When The Going Gets Tough, These Wheels Transform To Tracks

When we want to build something to go where wheels could not, the typical solution is to use tracks. But the greater mobility comes with trade-offs: one example being tracked vehicles can’t go as fast as a wheeled counterpart. Information released by DARPA’s ground experimental vehicle technology (GXV-T) program showed what might come out of asking “why can’t we switch to tracks just when we need them?”

This ambitious goal to literally reinvent the wheel was tackled by Carnegie Mellon’s National Robotics Engineering Center. They delivered the “Reconfigurable Wheel-Track” (RWT) that can either roll like a wheel or travel on its tracks. A HMMWV serves as an appropriate demonstration chassis, where two or all four of its wheels were replaced by RWTs. In the video (embedded below) it is seen quickly transforming from one mode to another while moving. An obviously desirable feature that looks challenging to implement. This might not be as dramatic of a transformation as a walking robot that can roll up into a wheel but it has the advantage of being more immediately feasible for human-scale vehicles.

The RWT is not the only terrain mobility project in this DARPA announcement but this specific idea is one we would love to see scaled downed to become a 3D-printable robot module. And though our Hackaday Prize Robotics Module Challenge has already concluded, there are more challenges still to come. The other umbrella of GXV-T is “crew augmentation” giving operators better idea of what’s going around them. The projects there might inspire something you can submit to our upcoming Human-Computer Interface Challenge, check them out!

Continue reading “When The Going Gets Tough, These Wheels Transform To Tracks”

A LIDAR Scanner Build In Glorious Detail

LIDAR is a very exciting technology that is only just now starting to become accessible to the DIY market. Think radar, but with lasers. There’s a few different modules starting to pop up for just a few hundred dollars. But what is one to do with a LIDAR module? Well, [David] decided to build a room scanner with his Garmin LIDAR Lite, and it’s a wonderful sight to behold.

The scanner consists of a rotating platform, which is driven by a stepper motor. The platform then contains a second motor which runs a tilt axis, upon which the LIDAR is mounted. By aiming the LIDAR in various directions, and recording the detected range, it’s possible to build a point cloud representation of the surrounding area.

The build uses a couple of STM32 chips to do motor control and interface with the LIDAR, but where this build really shines is the mechanical side of things. [David] goes into serious detail about the machining of the parts that make up the rotating system, and there’s plenty of cool bits and pieces like slip rings to make it all work. There’s even some home casting going on here! Be warned, though: there’s some rather juicy close-ups of lathes in action, so put the kids to bed before watching this one all the way through.

We love to see a well-executed build, and even more so when we get to watch the intricate details of how it came together. If you’re still looking for some more inspiration, we’ve seen other LIDAR room scanners before, too.

After The Sun Set On San Mateo, LED Takes Over Hackaday’s BAMF Meetup

After this Spring’s Bay Area Maker Faire closed down for Saturday night and kicked everybody out, the fun moved on to O’Neill’s Irish Pub where Hackaday and Tindie held our fifth annual meetup for fellow Maker Faire attendees. How do we find like-minded hackers in a crowded bar? It’s easy: look for tables lit by LEDs and say hello. It was impossible to see everything people had brought, but here are a few interesting samples.

Continue reading “After The Sun Set On San Mateo, LED Takes Over Hackaday’s BAMF Meetup”

Controlling Robotics Visually

The world — and the Hackaday Prize — is filled with educational robots. These are small, wheeled robots loaded up with sensors, actuators, a few motor drivers, and some sort of system that is easy to program. The idea behind these educational robots is to give students an easy-to-use platform to test out code, learn inverse kinematics, and realize odometry is a lot harder than you think it is. Give these kids some time and patience, and you’ll have a fleet of Battlebots at the end of the semester, if the teacher is cool.

But there’s a problem with all educational robots. The programming. For someone just starting out in robotics club, being able to code isn’t a guarantee. You need an easy to use programming interface. This project for the Hackaday Prize gives all students a great visual programming interface. It’s basically like the first generation of Lego Mindstorms, only you don’t need a weird IR tower attached to a serial port.

Of course you can’t program a robot without a board, and this project brings it in spades. The brain for this platform is built on an ARM microcontroller, has Bluetooth, supports up to six DC motors, twelve analog inputs, PWM and serial ports, and all the ports are color-coded for kids who can’t read so good.

This is a visual programming environment, though, and with that, you get a fancy IDE filled with loops that wrap around commands, IO access that’s in easy to read blocks, and control software that gives students a dashboard filled with buttons and odometers and the video feed from the camera. It’s a great Hackaday Prize entry, and an excellent way to introduce kids to robotics.

ROPS Will Be The Board X86 Robot Builders Are Waiting For

If your robot has outgrown a Raspberry Pi and only the raw computing power of an x86 motherboard will suffice, you are likely to encounter a problem with its interfaces. The days of ISA cards are long gone, and a modern PC is not designed to easily talk to noisy robot hardware. Accessible ports such as USB can have interfaces connected to them, but suffer from significant latency in the process.

A solution comes from ROPS, or Robot on a PCI-e Stick, a card that puts an FPGA on a blazing-fast PCI-e card that provides useful real-world interfaces such as CAN and RS485 and a pile of I/O lines as well as an IMU, barometer, and GPS. If you think you may have seen it before then you’d be right, it was one of the first-round winners of the Open Hardware Design Challenge. They’re very much still at the stage of having an FPGA dev board and working out the software so there aren’t any ROPS boards to look at yet, but this is a project that’s going somewhere, and definitely one to watch.