Mastering Ball Screws

Most inexpensive 3D printers use a type of lead screw to move some part of the printer in the vertical direction. A motor turns a threaded rod and that causes a nut to go up or down. The printer part rides on the nut. This works well, but it is slower than other drive mechanisms (which is why you don’t often see them on the horizontal parts of a printer). Some cheap printers use common threaded rod, which is convenient, but prone to bad behavior since the rods are not always straight, the threads are subject to backlash, and the tolerances are not always the best.

More sophisticated printers use ACME threaded rod or trapezoidal threaded rods. These are made for this type of service and have thread designs that minimize things like backlash. They typically are made to more exacting standards, too. Making the nut softer than the rod (for example, brass or Delrin) is another common optimization.

However, when lead screws aren’t good enough, mechanical designers turn to ball screws. In principle, these are very similar to lead screws but instead of a nut, there is a race containing ball bearings that moves up and down the screw. The ball bearings lead to less friction.

Misumi recently posted a few blog articles about ball screws. Some of the information is basic, but it also covers preloading and friction. Plus they are promising future articles to expand on the topic. If you prefer to watch a video, you might enjoy the one below.

Continue reading “Mastering Ball Screws”

Robotic Farming, Aussie Style

Australian roboticists from the Queensland University of Technology have developed a prototype agricultural robot that uses machine vision to identify both weed and crop plants before either uprooting or poisoning the weeds or applying fertiliser to the crop.

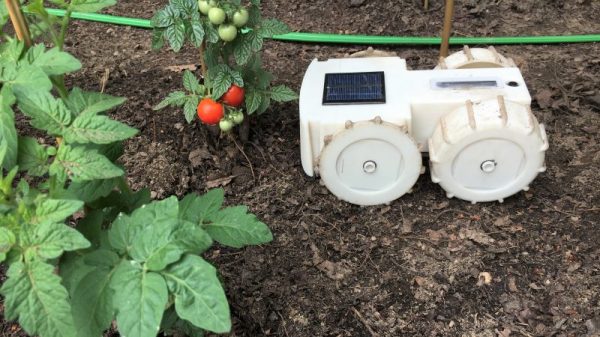
The machine is a wide platform designed to straddle a strip of the field upon which it is working, with electric wheel motors for propulsion. It is solar-powered, and it is envisaged that a farm could have several of them continuously at work.

At a superficial level there is nothing new in the robot, its propulsion, or even the plant husbandry and weeding equipment. The really clever technology lies in the identification and classification of the plants it will encounter. It is on the success or failure of this in real farm environments that the robot’s future will hinge. The university’s next step will be to take it on-farm, and the ABC report linked above has a wonderfully pithy quote from a farmer on the subject. You can see the machine in action in the video below the break.

Farming robots have a significant following among the hardware hacker community, but it is possible that the machine-vision and plant-identifying abilities of this one would be beyond most hackers. However it is still an interesting project to watch, marking as it does a determined attempt to take the robot out of the lab and into real farm settings.

Continue reading “Robotic Farming, Aussie Style”

Don’t Make Your Battlebot Out Of A Pumpkin

It’s that time of year again. The nights are getting longer and the leaves are turning. The crisp fall air makes one’s thoughts turn to BattleBots: pumpkin-skinned BattleBots.

pumpkin-combat-robot-1azglafagdsmkv-shot0005
Kids these days can’t even draw without a computer

If you’re asking yourself, “could a laser-cut plywood bot, sheathed in a pumpkin, stand up against an all-metal monster”, you haven’t seen BattleBots before. Besides the hilarious footage (see video embedded below), a lot of the build is documented, from making a CAD model of a pumpkin to laser-cutting the frame, to “testing” the bot just minutes before the competition. (That has to be a good idea!)

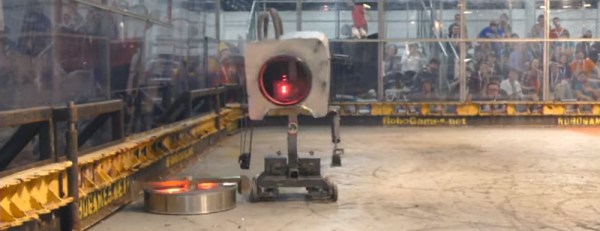
The footage of the pumpkinbot’s rival, Chomp, is equally cool. We love that the hammer weapon is accelerated so quickly that Chomp actually lifts in the air, just as Newton would have predicted. We’re not sure if the fire weapon is good for anything but show, and facing plywood pumpkinbots, but we love the effect.

Continue reading “Don’t Make Your Battlebot Out Of A Pumpkin”

Heatmap of vacuum cleaning robot

A Glimpse Into The Mind Of A Robot Vacuum Cleaner

What’s going through the mind of those your autonomous vacuum cleaning robots as they traverse a room? There are different ways to find out such as covering the floor with dirt and seeing what remains afterwards (a less desirable approach) or mounting an LED to the top and taking a long exposure photo. [Saulius] decided to do it by videoing his robot with a fisheye lens from near the ceiling and then making a heatmap of the result. Not being satisfied with just a finished photo, he made a video showing the path taken as the room is being traversed, giving us a glimpse of the algorithm itself.

Looking down on the room and robot

The robot he used was the Vorwerk VR200 which he’d borrowed for testing. In preparation he cleared the room and strategically placed a few obstacles, some of which he knew the robot wouldn’t get between. He started the camera and let the robot do its thing. The resulting video file was then loaded into some quickly written Python code that uses the OpenCV library to do background subtraction, normalizing, grayscaling, and then heatmapping. The individual frames were then rendered into an animated gif and the video which you can see below.

Continue reading “A Glimpse Into The Mind Of A Robot Vacuum Cleaner”

A Robot Arm From The Cupboard

Building a simple robot arm is a lot more straightforward than it used to be.  If you have a laser cutter, or a bit of cash and don’t mind waiting for postage, there are inexpensive kits like the MeArm. If you have a 3D printer, there are any number of 3D-printed designs for you to tackle. What if you need to satisfy your urge to build a robot arm really quickly, and you don’t have a laser cutter or 3D printer? You’ve got a pile of servos from that remote-control project, how can you make the rest?

If you are [roboteurs], you raid the stationery cupboard, and create an arm using rubber bands, paper clips, and binder clips. The binder clips grip the servo arms and hold the whole thing together, the rubber bands provide extra attachment , and the paper clips are bent to form the jaws. It’s not the prettiest or perhaps the most capable of arms, but it undeniably is an arm, and we’d doubt it could be done any more cheaply.

In this particular case, the arm serves as a demonstration piece for [roboteurs]’ Printabots Maker Kit for people without a 3D printer. It uses their controller board, but there is no reason why it could not be used with any other board capable of driving servos.

We’ve covered innumerable robot arms over the years, This one may be the cheapest, but another contender might be this cardboard arm. None of them, however, are as cool as this steam-powered Armatron toy.

TensorFlow Robot Recognizes Objects

Children can do lots of things that robots and computers have trouble with. Climbing stairs, for example, is a tough thing for a robot. Recognizing objects is another area where humans are generally much better than robots. Kids can recognize blocks, shapes, colors, and extrapolate combinations and transformations.

Google’s open-source TensorFlow software can help. It is a machine learning system used in Google’s own speech recognition, search, and other products. It is also used in quite a few non-Google projects. [Lukas Biewald] recently built a robot around some stock pieces (including a Raspberry Pi) and enlisted TensorFlow to allow the robot to recognize objects. You can see a video of the device, below.

Continue reading “TensorFlow Robot Recognizes Objects”

Simulate Your Robot Before You Build It

[Nurgak] shows how one can use some of the great robotic tools out there to simulate a robot before you even build it. To drive this point home he builds the tutorial off of the easily 3D printable and buildable Robopoly platform.

The robot runs on Robot Operating System at its core. ROS is interesting because of its decentralized and input/output agnostic messaging system. For example, if you leave everything alone but swap out the motor output from actual motors to a simulator, you can see how the robot would respond to any arbitrary input.

[Nurgak] uses another piece of software called V-REP to demonstrate this. V-REP is a simulation suite for robotics and has a few ROS nodes built in. So in order to make a simulated line-following robot, [Nurgak] tells V-REP to send a simulated camera image to the decision making node of the robot in ROS. It then sends the movement messages back to V-REP which drives the pretend robot around.

He runs through a few more examples, proving that it’s entirely possible to become if not a roboticist, at least a really good AI programmer without ever dropping the big money on parts to build a robot.