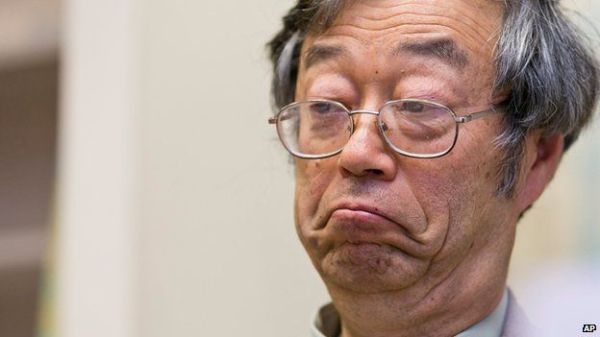
Raspberry Pi Art Frame Using OpenFrame

Digital picture frames were a fad awhile back, and you can still pick them up at the local big box store. [Ishac Bertran] and [Jonathan Wohl] decided to go open source with digital frames and create the openframe project. The open-source project uses a Raspberry Pi with WiFi and either an HDMI monitor or a monitor that the Pi can drive (e.g., a VGA with an HDMI adapter).

You are probably thinking: Why not just let the Pi display images? The benefit of openframe is you can remotely manage your frames at the openframe.io site. You can push images, websites (like Hackaday.com) or shaders out to any of your frames. You can also draw on public streams of artwork posted by other users.

Continue reading “Raspberry Pi Art Frame Using OpenFrame”

The Raspberry Pi 3 does Eddystone!

Turn Your RPi 3 Into A BLE Beacon

With the launch of the Raspberry Pi 3, Bluetooth Low Energy (BLE) is now at our disposal. With BLE, there are a few technologies for implementing one-way beacons that broadcast data. Apple has been pushing iBeacon since 2013, and Google just launched their Eddystone solution last year.

If you’re looking to target Google’s Eddystone on your RPi 3, [Yamir] has you covered. He’s put together a guide on setting up an Eddystone-URL beacon within Raspbian. This type of beacon just broadcasts a URL. Users within range will get a notification that the URL is available, and can navigate through to it. Eddystone-URL works on both iOS and Android.

The process for setting this up is pretty simple. The hciconfig and hcitool commands do all the work. [Yamir] was even nice enough to make a calculator tool that generates the hcitool command for your own URL. While is hack is a simple one, it’s a nice five-minute project. It’s also handy for broadcasting the URL of your Raspberry Pi if it’s running a web server as part of a more intricate hack.

Open Source OBD-II Adapter

Automotive diagnostics have come a long way since the “idiot lights” of the 1980s. The current version of the on-board diagnostics (OBD) protocol provides real time data as well as fault diagnostics, thanks to the numerous sensors connected to the data network in the modern vehicle. While the hardware interface is fairly standardized now, manufacturers use one of several different standards to encode the data. [Alex Sidorenko] has built an open source OBD-II Adapter which provides a serial interface using the ELM327 command set and supports all OBD-II standards.

The hardware is built around the LPC1517 Cortex-M3 microprocessor and can accept a couple of different versions. Here’s the PDF schematic, and a set of Gerber files (ZIP archive) for the PCB layout, if you’d like to dig in to it’s internals. The MC33660 ISO K Line Serial Link Interface device is used to provide bi-directional half-duplex communication interface with the micro-controller. Also included is the TJF1051, a high-speed CAN transceiver that provides an interface between the micro controller and the physical two-wire CAN lines on the ODB-II connector. The serial output from the adapter board is connected to a computer using a serial to USB adapter.

The software is written in C++ for the LPCXpresso IDE – a GNU tool chain for ARM Cortex-M processors, but can also be compiled using a couple of other toolchains. He’s got instructions if you’d like to build the firmware from source, or if you’d like to program the adapter via Flash Magic.

We featured [Alex]’s inexpensive PIC based ODB-II interface way back in 2007, so he’s been working on this for a while and has a good grip on what he’s doing.

What’s Tiny, Has Eight Legs, And Acts Like An Arduino?

Back in the late 1970s, comedian Steve Martin had a bit about “Let’s get small!” Over on Hackaday.io, [Daniel Grießhaber], has taken that call to heart. He’s been working on DIL-Duino, a minuscule form factor Arduino in an 8-pin DIP format.

Built with an ATtiny85, the board has an area of just under 75 square millimeters (less than 8 mm x 10 mm). If you add the USB port, it still comes in at just over 144 square millimeters. [Daniel] found other small Arduino boards like the Olimexino-85s and the Nanite are not as small as his design.

The module has a QFN CPU and castellated holes around the perimeter for mounting. With pin headers, this would easily fit into a breadboard (as [Daniel] shows) or you could mount it directly to another board like a surface mount device. In fact, that’s the reason for using castellated holes: you can inspect that the solder joint at the mating SMD pad is good. You sometimes hear the technique called half-vias or leadless chip carrier.

If you note, [Daniel] used an oversized board with full holes around the perimeter and then had the board maker score the board, so the holes are cut in half. This is a better technique than trying to drill half holes on the board edge, which is difficult to do.

Naturally, this isn’t the first tiny Arduino we’ve seen. If you are an ARM fan, there’s some little bitty cards for it, too, although not quite as small as DIL-Duino.

They Put The “P” In Power

Fuel cells are like batteries, sort of. Both use chemical reactions to produce electricity. The difference is that when a battery exhausts its reactants, it goes dead. In some cases, you can recharge it, but you typically get less energy back with each recharge. A fuel cell, on the other hand, will make electricity as long as you keep supplying fuel. What kind of fuel? Depends on the cell, but most often it is hydrogen or methanol.

Researchers at the University of Bath, Queen Mary University of London, and the Bristol Robotics Laboratory want to use a different fuel: urine. According to the researchers, that’s one resource we will never deplete. The fuel cell is a type of microbial fuel cell which is nothing new. The breakthrough is that the new cell is relatively inexpensive, using carbon cloth and titanium wire. Titanium isn’t usually something you think of as cheap, until you realize that conventional cells usually use platinum.

Continue reading “They Put The “P” In Power”

Home Made Farnsworth Fusor

The Farnsworth Fusor is a fascinating device, a reactor that fuses hydrogen into helium by creating a plasma under a very high voltage. Although it isn’t a practical way to generate energy, it is a fascinating way to see nuclear fusion. An increasing number of home experimenters are starting to build their own fusors, and [Erik] decided he wanted to be among them. He’s put together a great build log of his progress, starting with a propane tank he bought off craigslist. He added a window, a vacuum pump and a 40KV power supply. Once he added some deuterium (electrolyzed from heavy water he bought from United Nuclear) it was ready to go. After a couple of failed runs, he got the characteristic plasma glow that shows that the reactor is working. The central globe is the plasma, while the light on the left side is a beam of electrons freed by the fusion process. So far, [Erik] has not detected the high-energy neutrons that would show that fusion is underway, but he is close.

Needless to say, this is not a casual build. [Erik] is using a 40KV power supply that would kill you in a heartbeat if your body happened to be the easiest pathway to ground, especially as the power supply is generating pulls over 9 amps to create the fusion reaction. [Erik] joins a select group of amateur fusor builders called the Plasma Club. It isn’t the first Farnsworth Fusor that we have covered, but it is one of the most impressive.

Resistance Is Futile: Balancing Cubes Are Taking Over!

It’s been a while since we’ve seen a balancing cube, but as different companies and universities start making them, we’re excited to see how they continue to develop. This one doesn’t really have a catchy name, but its designers [Erik Bjerke] and [Björn Pehrsson] call it a Nonlinear Mechatronic Cube.

Very similar to Cubli — the first self-balancing cube inside of balancing cubewe remember seeing — this cube can jump up from surfaces, “walk” and balance in any orientation.

The system features an IMU to determine orientation, three gyros powered by beefy 70W motors, three bicycle brakes powered by servo motors, and a microprocessor to control it all.

The way it balances is quite obvious with the gyros, but the ability to jump comes from the rapid breaking of the “reaction wheels”, allowing for a sudden impulse of force that is powerful enough to reorient the entire cube. The interesting part is how both systems are actually controlled individually with separate control systems.

Continue reading “Resistance Is Futile: Balancing Cubes Are Taking Over!”