Dumping U8Plus Smartwatch ROM Via Vibration Motor

[Lee] continues with his exploration of the U8Plus (a cheap smartwatch). He hasn’t got it all cracked, yet, but he did manage to get a dump of the device’s ROM using an unusual method. At first, [Lee] thought that the JTAG interface (or, at least, the pins presumed to be the JTAG interface) would be a good way to explore the device. However, none of the people experimenting with the device have managed to get it to work.

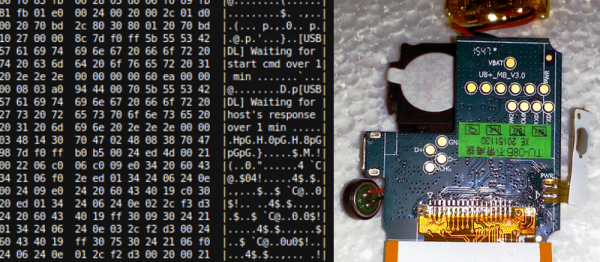
Instead, [Lee] went through the serial bootloader and dumped the flash memory. He found out, though, that the bootloader refused to read the ROM area. It would, however, load and run a program. Unfortunately, no one has found how to access the UART device directly, but they have found how to drive the vibration motor.

[Lee] took off the vibration motor and used it as an output port for a simple program to dump the ROM. An Arduino picked up the data at a low baud rate and produced an output file. This should allow more understanding of how to drive the watch hardware.

We covered the initial teardown of this watch earlier this year. Of course, if you don’t want to reverse engineer a smartwatch, you could always build your own.


Particle Electron – The Solution To Cellular Things

Just over a year ago, Particle (formerly Spark), makers of the very popular Core and Particle Photon WiFi development kits, released the first juicy tidbits for a very interesting piece of hardware. It was the Electron, a cheap, all-in-one cellular development kit with an even more interesting data plan. Particle would offer their own cellular service, allowing their tiny board to send or receive 1 Megabyte for $3.00 a month, without any contracts.

Thousands of people found this an interesting proposition and the Electron crowdfunding campaign took off like a rocket. Now, after a year of development and manufacturing, these tiny cellular boards are finally shipping out to backers and today the Electron officially launches.

Particle was kind enough to provide Hackaday with an Electron kit for a review. The short version of this review is the Electron is a great development platform, but Particle pulled off a small revolution in cellular communications and the Internet of Things

Continue reading “Particle Electron – The Solution To Cellular Things” →

Error Detection And Correction: Reed-Solomon, Convolution And Trellis Diagrams

Transferring data without error when there is a lot of background noise is a challenge. Dr. Claude E. Shannon in 1948 provided guidance with his theory addressing the capacity of a communications channel in the presence of noise. His work quickly spread beyond communications into other fields. Even other aspects of computer use were impacted. An example is the transfer of data from a storage medium, like a hard drive or CD-ROM. These media and their sensors are not 100% reliable so errors occur. Just as Shannon’s work defines communication channel capacity it defines the transfer rate from a media surface to the read head.

Shannon told us how much could be passed through a channel but didn’t say how. Since 1948 a lot of research effort went into accurately detecting errors and correcting them. Error correction codes (ECC) add extra bits to messages, but their cost pays off in their ability to work around errors. For instance, without ECC the two Voyager spacecraft, now leaving our solar system, would be unable to phone home with the information they’ve gathered because noise would overwhelm their signals. Typically in hardware, like memory, error correction is referred to as ECC. In communications, the term forward error correction (FEC) is used.

Robust communication, or data transfer, is a combination of fancy software and tricky signal processing. I’m going to focus on the software side in this article. You may find some of these techniques useful in communicating data among your devices. While I’ll be using the term communications keep in mind this is applicable to transferring data in general.

Continue reading “Error Detection And Correction: Reed-Solomon, Convolution And Trellis Diagrams” →

Experiments With A Bowden Extruder Filament Force Sensor

We were excited to learn that someone had started working with force sensors on filament extruders, especially after we posted about a recent development in filament thickness sensors.

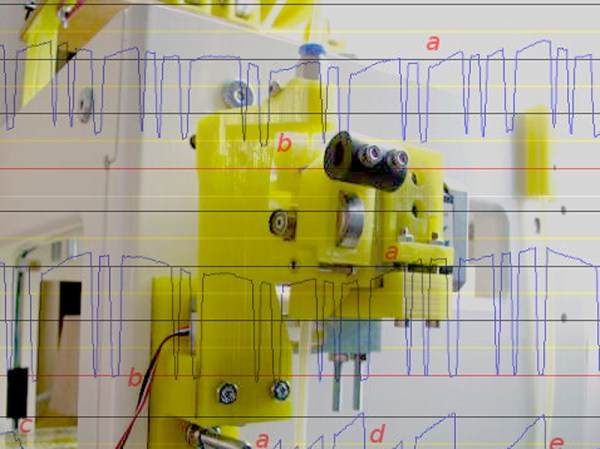
[airtripper] primarily uses a Bowden extruder, and wanted to be a little more scientific in his 3D printing efforts. So he purchased a force sensor off eBay and modified his extruder design to fit it. Once installed he could see exactly how different temperatures, retraction rates, speed, etc. resulted in different forces on the extruder. He used this information to tune his printer just a bit better.

More interesting, [airtripper] used his new sensor to validate the powers of various extruder gears. These are the gears that actually transfer the driving force of the stepper to the filament itself. He tested some of the common drive gears, and proved that the Mk8 gear slipped the least and provided the most constant force. We love to see this kind of science in the 3D printing community — let’s see if someone can replicate his findings.


Learn Resin Casting Techniques: Duplicating Plastic Parts

Resin casting lets you produce parts that would be otherwise impossible to make without a full CNC and injection molding set-up. It costs about as much as a 3d printer, 300 to 600 US dollars, to get a good set-up going. This is for raw material, resin, dye, pressure chamber, and an optional vacuum degassing set-up. A good resin casting set-up will let you produce parts which are stronger than injection molding, and with phenomenal accuracy, temperature resistance, and strength. I will be covering various techniques from the simple to advanced for using resin casting from a hacker’s perspective.

Continue reading “Learn Resin Casting Techniques: Duplicating Plastic Parts” →

This Car Lets You Fistbump To Unlock

In the dark ages, you had to use a key to lock and unlock your car doors. Just about every car now has a remote control on the key that lets you unlock or lock with the push of a button. But many modern cars don’t even need that. They sense the key on your person and usually use a button to do the lock or unlock function. That button does nothing if the key isn’t nearby.

[Pierre Charlier] wanted that easy locking and unlocking, so he refitted his car with a Keyduino to allow entry with an NFC ring. What results is a very cool fistbump which convinces your car to unlock the door.

Keyduinio is [Pierre’s] NFC-enabled project, but you can also use a more conventional Arduino with an NFC and relay shield. The demo also works with a smartphone if you’re not one for wearing an NFC ring. Going this round, he even shows how to make it work with Bluetooth Low Energy (BLE).

Continue reading “This Car Lets You Fistbump To Unlock” →

Local Hacker Discovers Card Edge Connectors

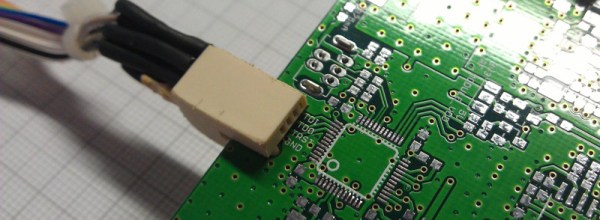
When [turingbirds] was looking around for the absolute minimum connector for a JTAG adapter, he wanted something small, that didn’t require expensive adapters, and that could easily and reliably connect a few JTAG pins to a programmer. This, unsurprisingly, is a problem that’s been solved many times over, but that doesn’t mean there isn’t room for improvement. [turingbirds] found his better solution by looking at some old card edge connectors.

Instead of 0.1″ pitch pin headers, weirder and more expensive connectors, the Tag Connect, or even pogo pins, [turingbirds] came up with a JTAG adapter that required no additional parts, had a small footprint, and could be constructed out of trash usually found behind any busy hackerspace or garage. The connector is based on the venerable PCI connector, chopped up with a Dremel and soldered to a JTAG or ISP programmer.

This is simply a card edge connector, something the younglings seem to have forgotten. Back in the day, card edge connectors were a great way to connect peripherals, ports, and anything else to the outside world. They were keyed, and you could only put them in one way. They were relatively cheap, and with a big coil of ribbon cable, you could make custom adapters easily. For low-speed connections that will only be used a few times, it’s very hard to beat a card edge connector.

Of course the connector itself is only half of the actual build. To turn a chopped up PCI connector into a JTAG adapter, [turingbirds] made footprint and part files for his favorite PCB design tool. In this case it’s Eagle, and the libraries that will plop one of these connectors down are available on GitHub.

Is this the latest and greatest way to plug a programmer into a board? No, because this has been around for 30 or 40 years. It does, however, put a programming port on a PCB with zero dollars in components, a minimum of board footprint, and uses parts that can be salvaged from any pile of old computers.