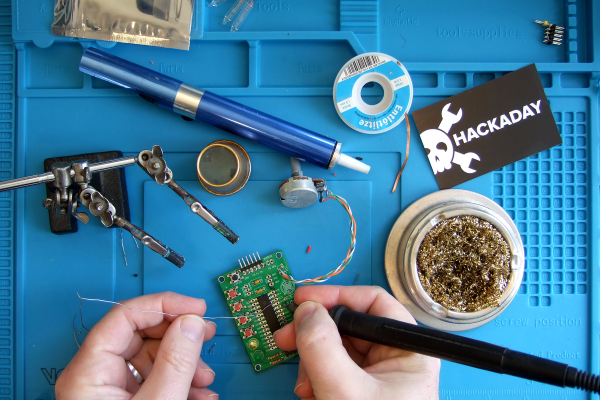
One of the joys of an itinerant existence comes in periodically being reunited with the fruits of various orders that were sent to hackerspaces or friends somewhere along the way. These anonymous parcels from afar hold an assortment of wonders, with the added element of anticipation that comes from forgetting exactly what had been ordered.
So it is with today’s subject, a Mustool MT525 electromagnetic radiation tester. At a cost not far above £10 ($13.70), this was an impulse purchase driven by curiosity; these devices claim to measure both magnetic and electric fields, but what do they really measure? My interest in these matters lies in the direction of radio, but I have never examined such an instrument. Time to subject it to the Hackaday treatment.
This mini handheld chainsaw by [Make it Extreme] is based around an electric motor from a car door, the same ones used to raise and lower car windows. They are common salvage parts, and with the right modifications and a few spare chainsaw bits attached, it turns out that the motor is more than capable of enough zip to cut through a variety of wood. Add a cordless tool battery pack, and the portable mini handheld chainsaw is born.
What’s really remarkable about the build video (embedded below, after the break) is not simply that it shows the build process and somehow manages to make it all look easy. No, what’s truly remarkable is that in the video it is always clear what is happening, and all without a single word being spoken. There’s no narration, no watching someone talk, just a solid build and demonstration. The principle of “show, don’t tell” is definitely taken to heart, here.
So, how well does it work as a chainsaw? It seems to work quite well! [Make it Extreme] does feel that a chain with smaller teeth and a higher motor speed would probably be an improvement, but the unit as built certainly can cut. You can judge for yourself by watching the build video, embedded below.
And the emphasis is on empty extinguisher. Part of the deal involves twisting the gauge off, and we wouldn’t want you to get blasted in the face with any last gasps of high-powered firefighting foam. In order to make the thing re-pressurizable, [liquidhandwash] stripped all the rubber from a tire valve and removed the core temporarily so it could be soldered into the fitting where the gauge was. The handy hose is from a large can of WD-40, which is also where the label came from — since it’s no longer a fire extinguisher, it needs to stop bearing resemblance to one, so [liquidhandwash] removed the sticker, painted it blue, and glued the cut-open can to the outside.
To use it, [liquidhandwash] fills it up about halfway and then pressurizes it through the tire valve with a bike pump or compressor. (We think we’d go with bike pump.) Since [liquidhandwash] goes through so much lubricant, now, they can just buy it by the gallon and keep refilling the extinguisher.
Preferring to spend hours typing code instead of graphically pushing traces around in a PCB layout tool, [James Bowman] over at ExCamera Labs has developed CuFlow, a method for routing PCBs in Python. Whether or not you’re on-board with the concept, you have to admit the results look pretty good.
GD3X Dazzler PCB routed using CuFlow
Key to this project is a concept [James] calls rivers — the Dazzler board shown above contains only eight of them. Connections get to their destination by taking one or more of these rivers which can be split, joined, and merged along the way as needed in a very Pythonic manner. River navigation is performed using Turtle graphics-like commands such as left(90) and the appropriately named shimmy(d)that aligns two displaced rivers. He also makes extensive use of pin / gate swapping to make the routing smoother, and there’s a nifty shuffler feature which arbitrarily reorders signals in a crossbar manner. Routing to complex packages, like the BGA shown, is made easier by embedding signal escapes for each part’s library definition.
We completely agree with [James]’s frustration with so many schematics these days being nothing more than a visual net lists, not representing the logical flow and function of the design at all. However, CuFlow further obfuscates the interconnections by burying them deep inside the wire connection details. Perhaps, if CuFlow were melded with something like the SKiDL Python schematic description language, the concept would gain more traction?
That said, we like the concept and routing methodologies he has implemented in CuFlow. Check it out yourself by visiting the GitHub repository, where he writes in more detail about his motivation and various techniques. You may remember [James] two of his embedded systems development tools that we covered back in 2018 — the SPI Driver and the I2C driver.
Aspiring TIG welders very quickly learn the importance of good tungsten electrode grinding skills. All it takes is a moment’s distraction or a tiny tremor in the torch hand to plunge the electrode into the weld pool, causing it to ball up and stop performing its vital function. Add to that the fussy nature of the job — tungstens must only be ground parallel to the long axis, never perpendicular, and at a consistent angle — and electrode maintenance can become a significant barrier to the TIG beginner.
A custom tungsten grinder like this one might be just the thing to flatten that learning curve. It comes to us by way of [The Metalist], who turned an electric die grinder into a pencil sharpener for tungsten electrodes. What we find fascinating about this build is the fabrication methods used, as well as the simplicity of the toolkit needed to accomplish it. The housing of the attachment is built up from scraps of aluminum tubing and sheet stock, welded together and then shaped into a smooth, unibody form that almost looks like a casting. Highlights include the mechanism for adjusting the angle of the grind as well as the clever way to slit the body of the attachment so it can be clamped to the nosepiece of the die grinder. We also thought the inclusion of a filter to capture tungsten dust was a nice touch; most TIG electrodes contain a small amount of lanthanum or thorium, so their slight radioactivity is probably best not inhaled.
We love builds like this that make a tedious but necessary job a little quicker and easier to bear, and anything that stands to make us a better welder — from simple purpose-built fixtures to large-scale rotary tables — is OK in our book.
If there’s one thing that woodworkers have always been good at, it’s coming up with clever jigs and work-holding solutions. Most jigs, however, are considerably simpler and more static than this CNC-controlled scroll saw add-on that makes cool wooden spirals a snap.
As interesting as the products of this setup are, what we like about this is the obvious care and craftsmanship [rschoenm] put into making what amounts to a hybrid between a scroll saw and a lathe. Scroll saws are normally used to make narrow-kerf cuts in thin, delicate materials, often with complicated designs using very tight radius turns. In this case, though, stock is held between centers on the lathe-like carriage. The jig uses a linear slide driven by a stepper and a lead screw to translate the workpiece perpendicular to the scroll saw blade while a geared headstock rotates it. Starting with the blade inserted into a through-hole, the saw slowly cuts a beautiful nested spiral down the length of the workpiece. An Uno, a GRBL shield, and some stepper drivers let a little G-code control the two axes of the jig.
The video below shows it in action; things do get a bit wobbly as the cut progresses, but in general the jig works wonderfully and results in some lovely pieces. At first we thought these would purely be objets d’art, but then we thought about this compression screw grinder for DIY injection molding machines and realized these wooden screws look pretty similar.
[Mr Innovative] needed to wind some coils, and decided to make a machine to do the work. Making such machines has become a lot easier over the years. There was a time when we might probably have had to hack an old printer or scanner to get linear rods and stepper motors. Now, thanks to widespread 3D printing, we can order parts like that from lots of places. The 3D printing helps, too, to fabricate all the little custom widgets you need to put something like that together.
The machine looks great. It uses a number of parts that would look at home on a 3D printer or CNC build. We thought his Chinese mini table saw did a great job cutting the aluminum extrusions, but we did worry about the safety of his fingers. We’ll admit we are generally lazy and buy the extrusions precut.