It’s the season to be surrounded by greeting cards of all shapes and sizes from friends old and new. News of their families and achievements, reminders that they exist, and a pile of cards to deal with sometime in January. Wouldn’t it be great if you could send something with a little more substance, something your friends would remember, maybe even hang on to?
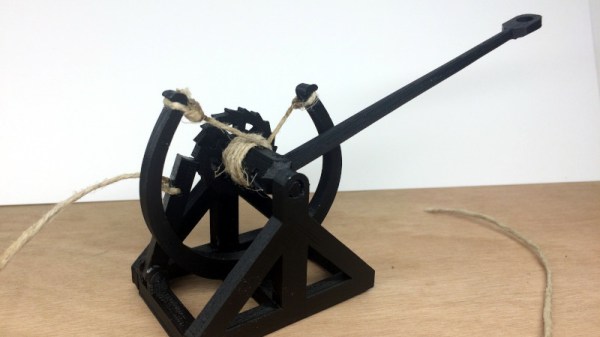
[Brian Brocken]’s 3D-printed Da Vinci catapult kit may not fill that niche for everyone, but we can guarantee it will be a talking point. The Da Vinci catapult design uses a pair of springs similar to an archer’s bow, to unwind a pair of ropes and thus turn the shaft upon which the catapult shaft itself is fitted. All these components are mounted in a single piece with sprues similar to an injection moulded model kit, allowing the whole to easily be posted in an envelope.
The parts are all available to print separately among the files on the Thingiverse page for those with no need to mail them. For the casual spectator he’s made a YouTube video that we’ve placed below the break, detailing the design and build process as well as showing the device in use.
Continue reading “Catapult Your Best Wishes With This 3D-Printable Card”