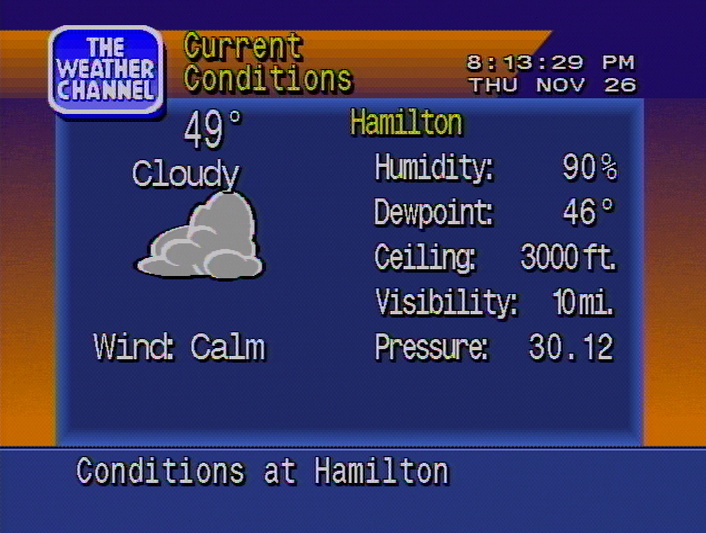
For American readers of a certain age, Local on the 8s likely holds a special spot in your heart. The program, once a staple of The Weather Channel, would provide viewers with a text and eventually graphical depiction of their local forecast set to some of the greatest smooth jazz ever heard outside of an elevator. In the days before smartphones, or even regular Internet access for that matter, these broadcasts were a critical part of planning your day in the 1980s through to the early 2000s.
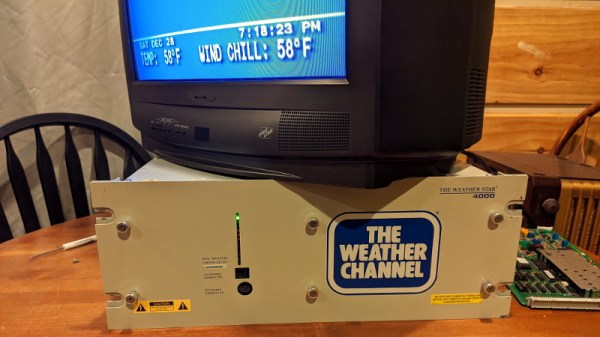
 Up until recently the technical details behind these iconic weather reports were largely unknown, but thanks to the Herculean efforts of [techknight], the fascinating engineering that went into the WeatherSTAR 4000 machines that pumped out current conditions and Shakin’ The Shack from CATV distribution centers all over the US for decades is now being documented and preserved. The process of reversing the hardware and software has actually been going on for the last couple of years, but all those juicy details are now finally going to be available on the project’s Hackaday.IO page.
It all started around Christmas of 2018, when an eBay alert [techknight] had configured for the WeatherSTAR 4000 finally fired off. His offer was accepted, and soon he had the physical manifestation of Local on the 8s in his own hands. He’d reasoned that getting the Motorola MC68010 machine working would be like poking around in a retrocomputer, but it didn’t take long for him to realize he’d gotten himself into a much larger project than he could ever have imagined.
Continue reading “Reverse Engineering The Weather Channel’s Magic”