Steel-Reinforced 3D Prints

Continuing on the never-ending adventure of how to make a 3D print stronger, [Brauns CNC] is coming at us with a new technique that involves steel-reinforced 3D printed parts.

We’ve seen plenty of methods to create stronger 3D prints, from using carbon fiber filament to simply printing the part in a way that the layers of the print are orthogonal to the direction of force. We’ve even seen casting carbon fiber bars into 3D prints, but of course that will only work with straight parts. [Brauns]’ technique uses steel wire, embedded into the print itself, and from some testing there’s about a 50% increase in strength of the part.

The process of embedding a steel cable into a 3D printed part is simply taking apart the model and putting a channel in for the cable. At a specific layer height, the printer is stopped, the steel cable is embedded with the help of a soldering iron, and the printer continues doing its thing.

There’s a slight amount of Gcode hacking to make this happen, and the process of embedding a steel cable into a print is a bit finicky. Still, if you want stronger 3D prints, there are worse ways to do it, and certainly less effective ways of doing it. You can check out the video for this technique below.

Continue reading “Steel-Reinforced 3D Prints”

Brush With The Power Of 3D Printing

When it comes to 3D printing, functional prints are still few and far between. Sure, you can print a mount for anything, a Raspberry Pi case, but there are few prints out there that are truly useful, and even fewer that are useful while taking advantage of the specific capabilities of a 3D printer.

The Bouldering Brush from Turbo SunShine turns this observation on its head. It’s a useful device for getting the grime, sand, and sweat out of handholds while rock climbing, and it’s entirely 3D printed using manufacturing techniques only 3D printers can do.

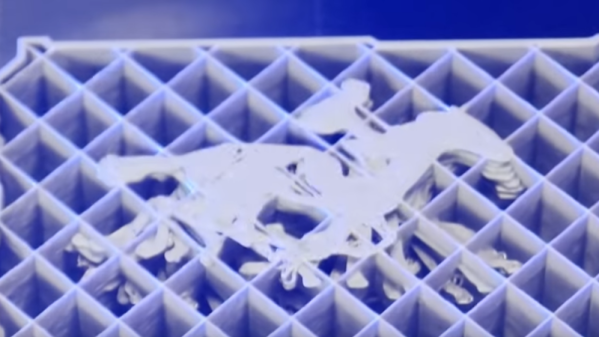
If you’re thinking you’ve seen something like this technique before, you’re correct. The Hairy Lion from [_primoz_] on Thingiverse used a fine mesh of bridging to create small fibers of filament emanating from the mane of a lion. While it’s not a gender-neutral print, this is one of the first objects to make it to Thingiverse that truly showcased the sculptural element of many thin fibers of 3D printed filament. With this Bouldering Brush, these fibers become much more useful and even functional. It’s still a great technique, and if you can get your printer set up correctly and the settings correct, this is an awesome print that will easily demonstrate the capabilities of your printer.

Like the Hairy Lion, the Bouldering Brush is two handles that are mostly solid, and fine filaments of extruded plastic connecting these handles. Take the completed print off the bed , cut down the middle of the bristles, and you have a functional, completely 3D printed brush. Just don’t brush your teeth with it.

Sanding Seashells By The Seashore

We all maintain this balancing act between the cool things we want, the money we can spend, and our free time. When the pièce de résistance is a couple of orders of magnitude out of our budget, the only question is, “Do I want to spend the time to build my own?” [Nick Charlton] clearly answered “Yes,” and documented the process for his Nautilus speakers. The speaker design was inspired by Bowers & Wilkins and revised from a previous Thingiverse model which is credited.

The sound or acoustic modeling is not what we want to focus on since the original looks like something out of a sci-fi parody. We want to talk about the smart finishing touches that transform a couple of 3D printed shells into enviable centerpieces. The first, and most apparent is the surface. 3D prints from consumer FDM printers are prone to layer lines, and that aesthetic has ceased to be trendy. Textured paint will cover them nicely and requires minimal elbow grease. Besides sand and shells go together naturally. At first glance, the tripod legs holding these speakers seemed like a classy purchase from an upscale furniture store, but they are, in fact, stained wood and ground-down bolts. Nicely done.

The moral is to work smarter, take pictures, then drop us a line.

Hacker Makes A Flawless Booby Trap, Strikes Back Against Package Thieves

[Mark Rober] was fed up with packages going missing. He kept receiving notifications that his shipments had been delivered, but when checking his porch he found nothing there. Reviewing the CCTV footage revealed random passers-by sidling up to his porch and stealing his parcels. It was time to strike back. Over six months, [Mark] and his friends painstakingly designed, prototyped and iterated the perfect trap for package thieves, resulting in a small unit disguised as an Apple HomePod. The whole scheme is wonderfully over-engineered and we love it.

The main feature of the device is a spinning cup on the top which contains a large amount of glitter. When activated, it ejects glitter in every directions. You could say it’s harmless, as it’s just glitter. But then again, glitter has a way of staying with you for the rest of your life — turning up at the least expected times. It certainly leaves an emotional impression.

Activation is quite clever; the fake package sits on the porch until an accelerometer detects movement. At that point, GPS checks to see if the package has traveled outside a geo-fence around [Mark]’s house. A signal is then sent to the four smartphones to start recording — yes, that’s right, there are 4 phones inside, one on each side to capture the reaction of the thief.

How can [Mark] be so confident that he’ll be able to recover the four phones and their footage? That’s answered by GPS tracking and a can of fart spray actuated by a 3D printed cam and DC motor, ensuring the thief won’t want this package around for long. This actuator and the glitter motor are controlled by a custom PCB, which also triggers the phones to start recording through their headphone jacks and detects the opening of the package with some microswitches. This is truly a masterpiece that outsmarts the package thieves in a way that leaves an impression while still being playful.

(Editor’s Note 2: On 12/20/18 it was announced that two of the five thieves shown in the originally video were staged, apparently without [Mark Rober’s] knowledge. Here is his statement on the matter.)

(Editor’s Note 1: [Sean Hodgins] wrote in with bonus video on how the Glitter Bomb works and how it was made.)

If booby traps are your thing, we’ve got you covered. Check out this ticking bomb style puzzle, or this crate challenge which is rigged to blow.

Continue reading “Hacker Makes A Flawless Booby Trap, Strikes Back Against Package Thieves”

A Servo Powered Robotic Arm, But Like You’ve Never Seen Before

We’ve written about a lot of DIY robotic arms. Some of them are high-performance, some are inexpensive, and some are just uniquely fun. This one certainly falls into the last category; whilst watching an episode of Black Mirror, [Gear Down For What] was struck by inspiration for a thin robotic limb. After some iterations he has a final prototype, and it’s quite something to see in action.

To make a robotic arm as slender as possible, the actuators can’t be mounted on the arm itself but must instead drive the arm remotely. There are a number of ways of doing this, and though [Gear Down For What] considered using pneumatics or hydraulics, he opted to keep it simple with RC servos which produced a nifty solution that we really like.

The arm is made out of a series of 3D printed ball joints, allowing rotation in any direction. The tricky bit is transferring the force from the servos to each joint. Initially bare fishing line was considered, but this made the remote joints difficult to control when lower joints were moving. The solution was to use the fishing line inside of tubing, similar to the way that bike brakes operate. This allows the force to be carried to the appropriate joint regardless of lower movement. Each joint needs an x and y tension to allow it to rotate in any direction, which means an army of sixteen servos is needed to operate the eight segment arm.

Robotic arms are always fun to build and we’ve seen some pretty neat uses for them, such as mapping magnetic fields in 3D, or teaching sign language.

Continue reading “A Servo Powered Robotic Arm, But Like You’ve Never Seen Before”

Out Of Batteries For Your Torch? Just Use A Mini Nitro Engine

We can certainly relate to an incomplete project sowing the seed for a better one, and that’s just what happened in [JohnnyQ90]’s latest video. He initially set out to create an air compressor powered by a nitro engine, and partially succeeded – air was compressed, but not nearly enough to be useful.

Instead, he changed tack and decided to use the 1 cc engine to make a small electric generator. [JohnnyQ90] is, of course, no stranger to the nitro engine, having previously brought us the micro chainsaw conversion, and nitro powered rotary tool. This time round, the build is a conceptually simple task: connect an engine to a DC motor and you’re done. But physically implementing it in an elegant way is a different story, and this is always where [JohnnyQ90] shines; we never get tired of watching him produce precision parts on the lathe. A fuel tank is made from a modified Zippo can and, courtesy of a CNC milled fan and 3D printed shroud, the motor air cools itself.

Towards the end of the video, [JohnnyQ90] plays with the throttle a little, causing the bulb connected to the generator to brighten accordingly. It might be fun to control the throttle with a servo and try to regulate the voltage on the output under different load conditions.

We love novel ways of creating electricity; previously we’ve written about how to generate power from a coke can, as well as this 120 W thermoelectric generator (TEG) setup.

Continue reading “Out Of Batteries For Your Torch? Just Use A Mini Nitro Engine”

Supersize DIY R/C Servos From Windscreen Wipers

We’re all familiar with the experience of buying hobby servos. The market is awash with cheap clones which have inflated specs and poor performance. Even branded servos often fail to deliver, and sometimes you just can’t get the required torque or speed from the small form factor of the typical hobby servo.

Enter [James Bruton] and his DIY RC servo from a windscreen wiper motor. Windscreen wiper motors are cheap as chips, and a classic salvage. The motor shaft is connected to a potentiometer via a pulley and some string, providing the necessary closed-loop feedback. Instead of using the traditional analog circuitry found inside a servo, an Arduino provides the brains. This means PID control can be implemented on the ‘duino, and tuned to get the best response from different load characteristics. There’s also the choice of different interfacing options: though [James]’ Arduino code accepts PWM signals for a drop-in R/C servo replacement, the addition of a microcontroller means many other input signal types and protocols are available. In fact, we recently wrote about serial bus servos and their numerous advantages.

We particularly love this because of the price barrier of industrial servomotors; sure, this kind of solution doesn’t have the precision or torque that off-the-shelf products provide, but would be sufficient for many hacks. Incidentally, this is what inspired one of our favourite open source projects: ODrive, which focuses on harnessing the power of cheap brushless motors for industrial use.

Continue reading “Supersize DIY R/C Servos From Windscreen Wipers”