Thingiverse user [The-Mechanic] shared a design for 3D printed enclosures that are made to house wire and cable junctions, which can then be rendered weatherproof by injecting them with a suitable caulking compound and allowing it to cure. It’s a cross between an enclosure and potted electronics. It’s also a one-way trip, because the result is sealed up like a pharaoh’s tomb. On the upside, it’s cheap, accessible, and easily customized.
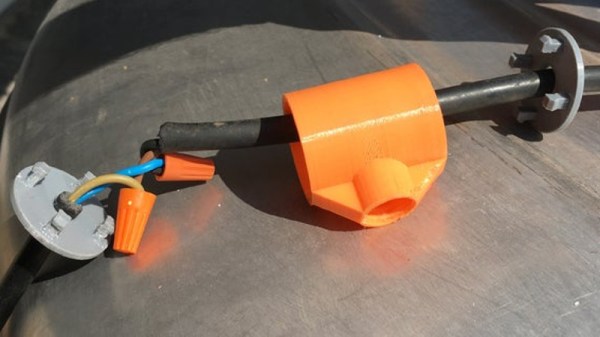
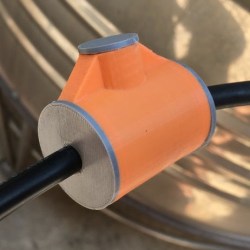 The way it works is this: wires go through end caps which snap onto the main body, holding the junction inside. Sealant is then pumped in via the hole on the side, then the hole is plugged. Afterwards, all there is to do is wait until the sealant cures. [The-Mechanic] has a couple of companion designs, as well. For tubes of sealant that have threaded tops, one can more effectively save the contents of the tube for later with this design for screw-on caps. There are also 3D printed nozzles in a variety of designs.
One thing to keep in mind about silicone-based sealants is that thick gobs of it can take a really, really long time to cure fully. A thick gob of the stuff will tend to firm up on the outside but leave the inside gooey. If that will be a problem, maybe take a cue from Oogoo and mix in a bit of corn starch with the silicone sealant. The resulting mixture will be thicker, but it’ll cure throughout with no problems.