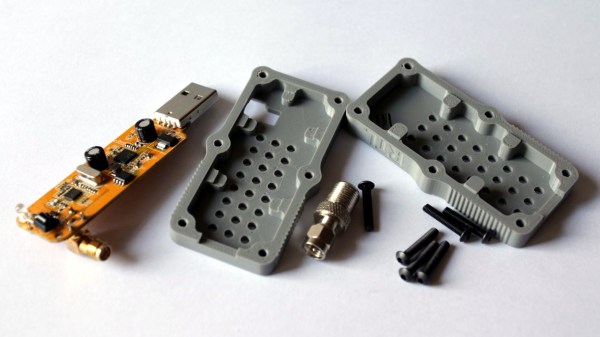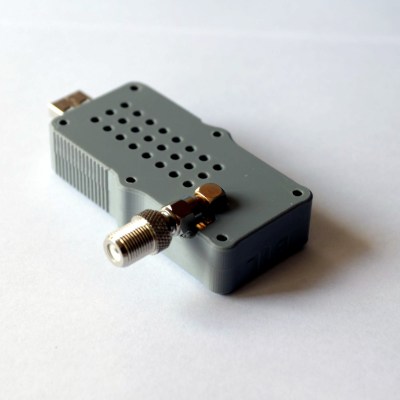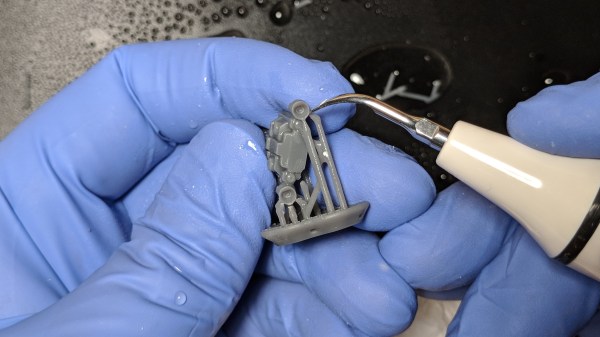
An ultrasonic knife is a blade that vibrates a tiny amount at a high frequency, giving the knife edge minor superpowers. It gets used much like any other blade, but it becomes far easier to cut through troublesome materials like rubber or hard plastics. I was always curious about them, and recently made my own by modifying another tool. It turns out that an ultrasonic scaling tool intended for dental use can fairly easily be turned into a nimble little ultrasonic cutter for fine detail work.
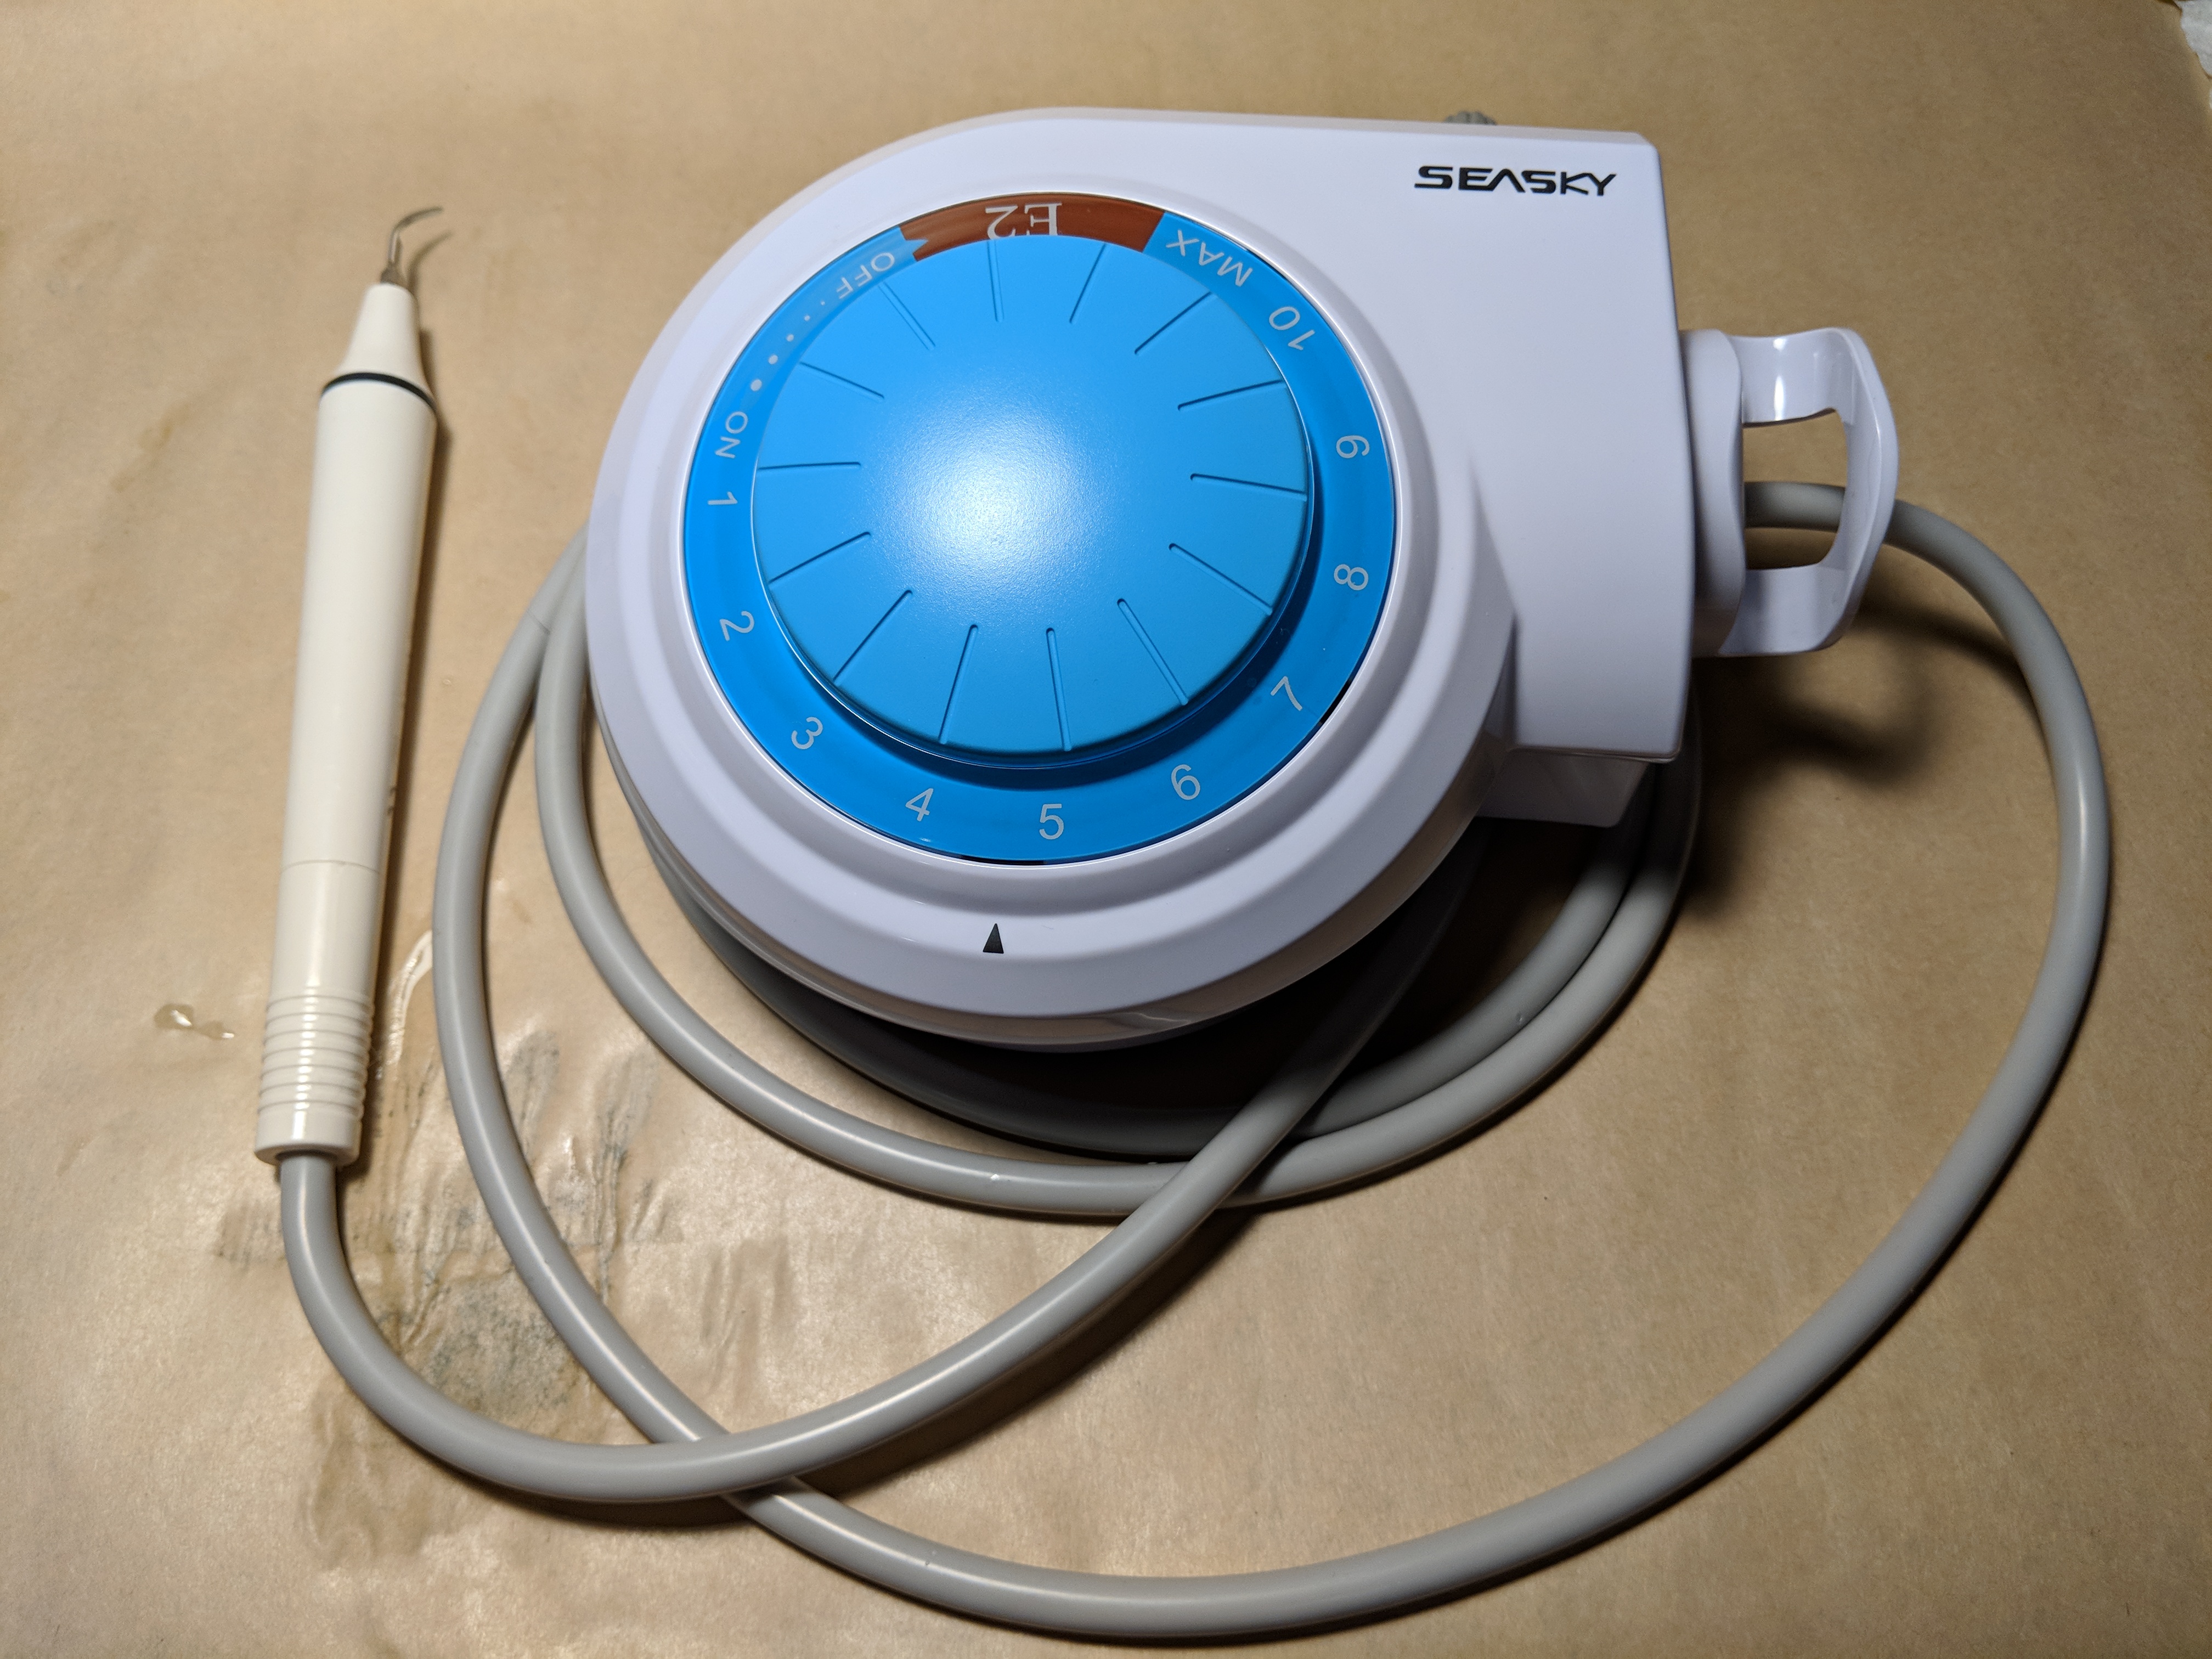
I originally started thinking about an ultrasonic knife to make removing supports from SLA 3D prints easier. SLA resin prints are made from a smooth, hard plastic and can sometimes require a veritable forest of supports. These supports are normally removed with flush cutters, or torn off if one doesn’t care about appearances, but sometimes the density of supports makes this process awkward, especially on small objects.
I imagined that an ultrasonic blade would make short work of these pesky supports, and for the most part, I was right! It won’t effortlessly cut through a forest of support bases like a hot knife through butter, but it certainly makes it easier to remove tricky supports from the model itself. Specifically, it excels at slicing through fine areas while preserving delicate features. Continue reading “Making An Ultrasonic Cutter For Post-processing Tiny 3D Prints”
 Cortex 1 was launched as part of
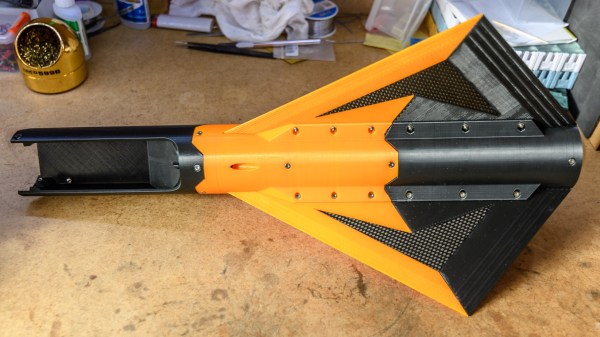
 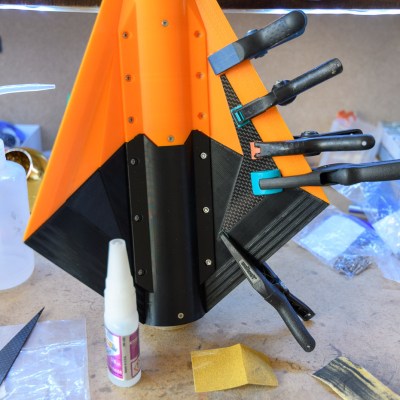 Cortex 2 uses a different rocket motor from its predecessor, which led to another interesting design issue. The new motor is similar to hobby solid rocket motors where a small explosive charge at the top of the motor blows some time after the fuel is gone. This charge is meant to eject a parachute, but the Cortex 2 is not designed to use this method, and so the gasses must be vented. [Foaly] was understandably not enthusiastic about venting hot gasses through the mostly-PLA rocket body. Instead, a cylindrical cartridge was designed that both encases the motor and redirects any gasses from the explosive charge out the rear of the rocket. That cartridge was SLA printed out of what looks to us like Formlabs’
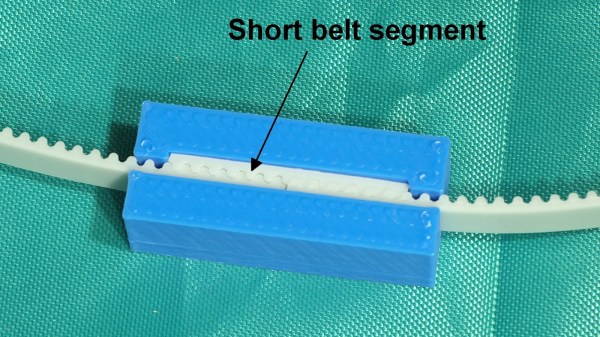
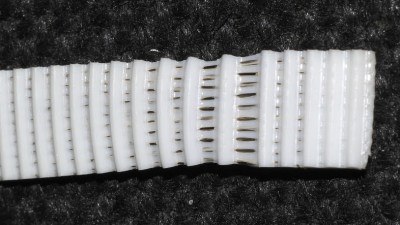 The belts used were common steel-core polyurethane GT2 belts, and the clamp design uses a short segment of the same belt to lock together both ends, as shown above. It’s a simple and effective design, but one that isn’t sustainable in the longer term.