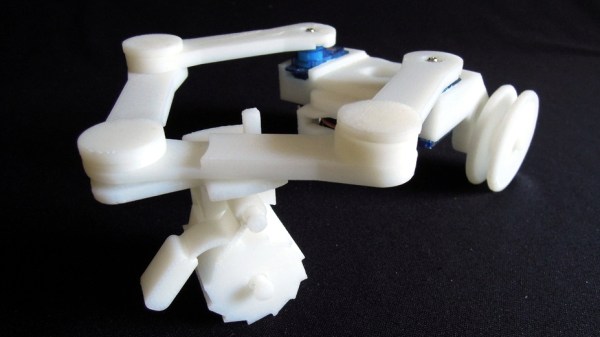
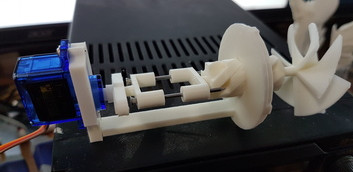
This unusual 3D printed Rolling Robot by [ebaera] uses two tiny hobby servos for locomotion in an unexpected way. The motors drive the front wheel only indirectly, by moving two articulated arms in a reach-and-retract motion similar to a breaststroke. The arms are joined together at the front, where a ratcheting wheel rests underneath. When the arms extend, the wheel rolls forward freely. When the arms retract, the wheel’s ratchet locks and the rest of the body is pulled forward. It looks as though extending one arm more than the other provides for rudimentary steering.
The parts are all 3D printed but some of them look as though they might be a challenge to print well due to the number of small pieces and overhangs. A short video (embedded below) demonstrates how it all works together; the action starts about 25 seconds in.
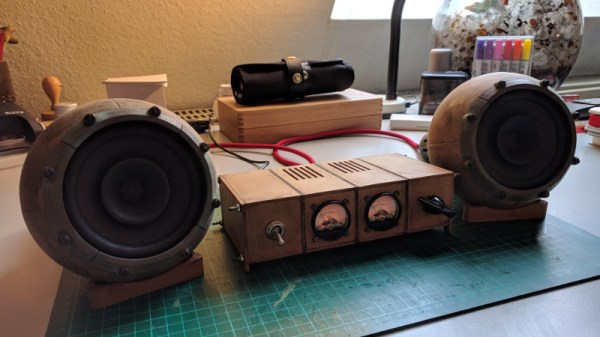
On the off chance you’re reading these words on an actual desktop computer (rather than a phone, tablet, smart mirror, game console…), stop and look at the speakers you have on either side of your monitor. Are you back now? OK, now look at the PC speakers and amplifier [Kris Slyka] recently built and realize you’ve been bested. Don’t feel bad, she’s got us beat as well.
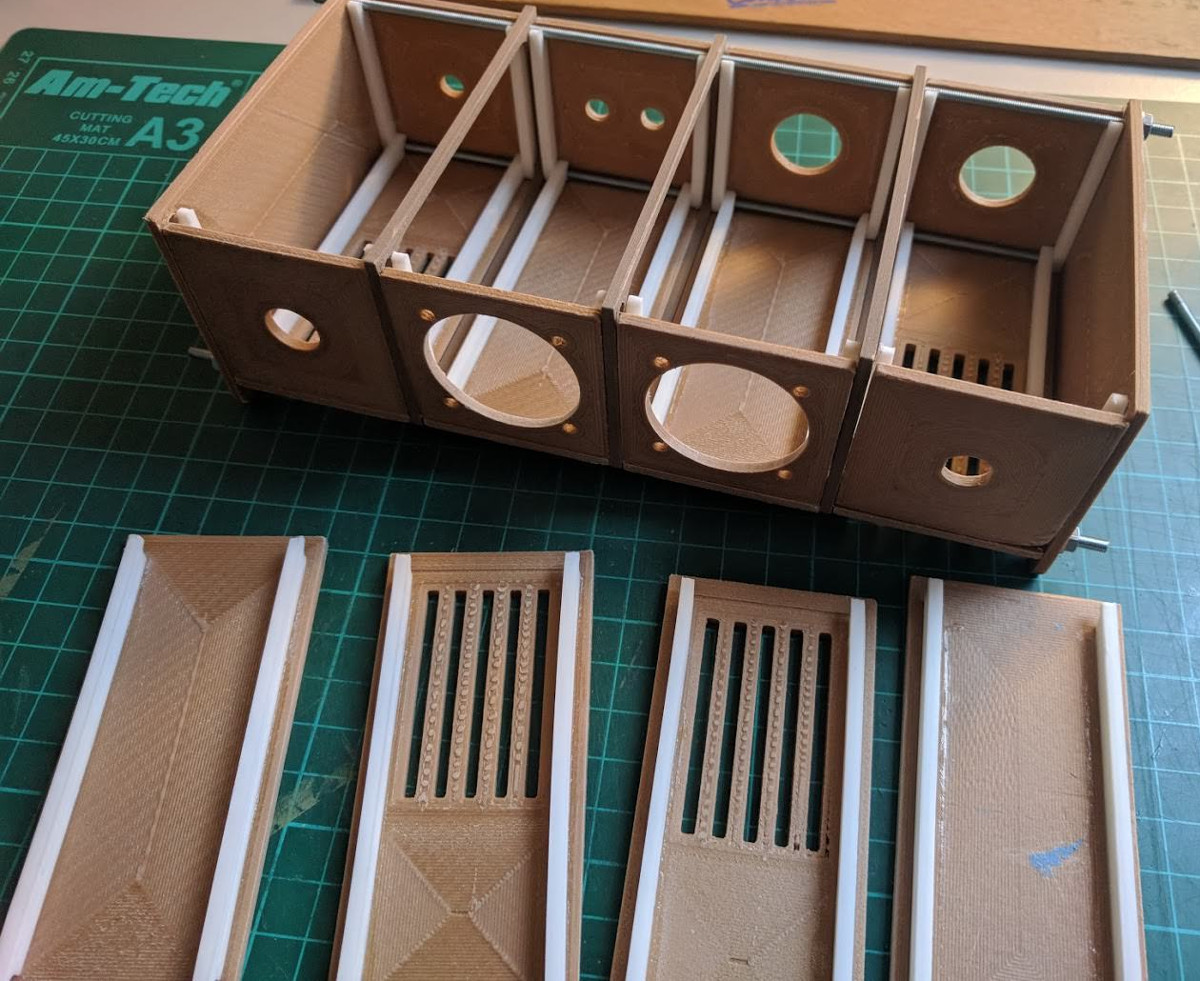
The speaker and amplifier enclosures were painstakingly printed and assembled over the course of three months, and each piece was designed to be small enough to fit onto the roughly 4 in x 4 in bed of her PrintrBot Play. While limited print volume made the design considerably trickier, it did force [Kris] to adopt a modular design approach with arguably made assembly (and potential future repairs or improvements) easier.
The amplifier is made up of rectangular “cells” which are connected to each other via 3 mm threaded rods. For now the amplifier only has 4 cells, but this could easily be expanded in the future without having to design and print a whole new case. Internally the amplifier is using two TDA8932 digital amplifier modules, and some VU meters scored off of eBay.
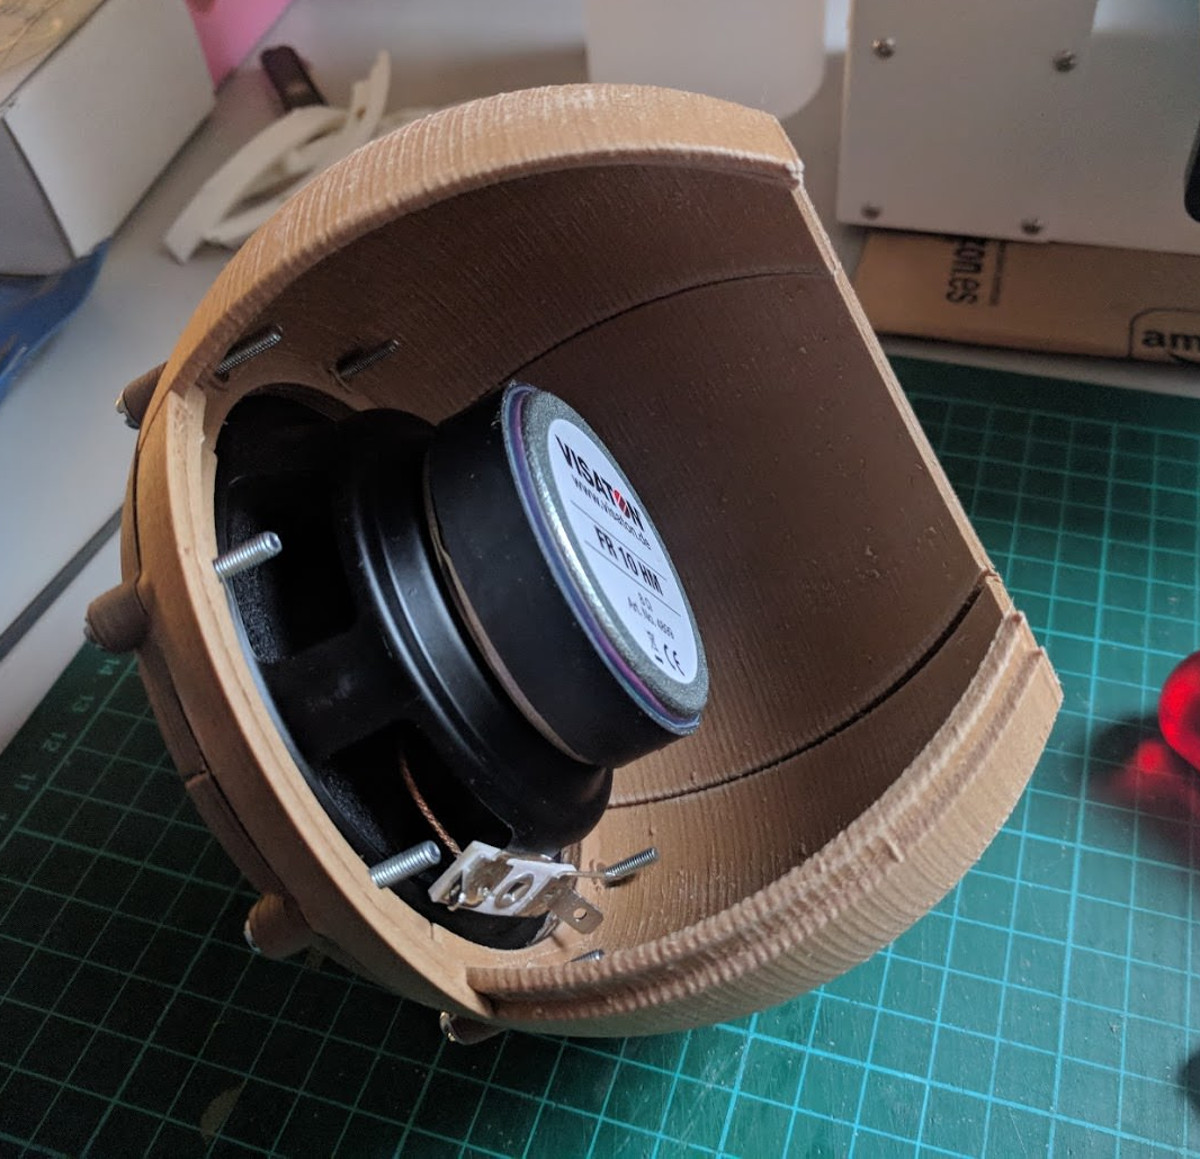
Each speaker enclosure is made up of 10 individual printed parts that are then glued and screwed together to make the final shape, which [Kris] mentions was inspired by an audio installation at the Los Angeles County Museum of Art. They house 4″ Visaton FR 10 HM drivers, and are stuffed with insulation.
It’s a bit difficult to nail down the style that [Kris] has gone for here. You see the chunky controls and analog VU meters and want to call it retro, but it’s also a brass cog and sprocket away from being Steampunk. On the other hand, the shape of the speakers combined with the bamboo-filled PLA used to print them almost gives it an organic look: as if there’s a tree somewhere that grows these things. That’s actually a kind of terrifying thought, but you get the idea.
If your computer speakers were assembled by mere mortals, never fear. We’ve covered a number of interesting hacks and mods for more run-of-the-mill desktop audio setups which should hold you over until it’s time to harvest the speaker trees.
I have a confession to make: ever since the first time I read about them online, I’ve been desperate to find an ATM skimmer in the wild. It’s the same kind of morbid curiosity that keeps us from turning away from a car accident, you don’t want to be witness to anyone getting hurt, but there’s still that desire to see the potential for danger up close. While admittedly my interest is largely selfish (I already know on which shelf I would display it), there would still be tangible benefits to the community should an ATM skimmer cross my path. Obviously I would remove it from the machine and prevent others from falling prey to it, and the inevitable teardown would make interesting content for the good readers of Hackaday. It’s a win for everyone, surely fate should be on my side in this quest.
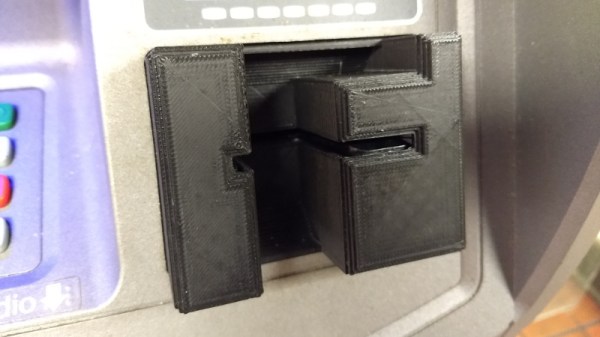
So when my fingers brushed against that unmistakable knobby feel of 3D printed plastic as I went to insert my card at a local ATM, my heart skipped a beat. After all these years, my dream had come true. Nobody should ever be so excited about potentially being a victim of fraud, but there I was, grinning like an idiot in the farmer’s market. Like any hunter I quickly snapped a picture of my quarry for posterity, and then attempted to free it from the host machine.
But things did not go as expected. I spend most of my free time writing blog posts for Hackaday, so it’s safe to say that physical strength is not an attribute I possess in great quantity, but even still it seemed odd I couldn’t get the skimmer detached. I yanked it in every direction, tried to spin it, did everything short of kicking it; but absolutely no movement. In fact, I noticed that when pulling on the skimmer the whole face plate of the ATM bulged out a bit. I realized this thing wasn’t just glued onto the machine, it must have actually been installed inside of it.
I was heartbroken to leave my prize behind, but at the very least I would be able to alert the responsible party. The contact info for the ATM’s owner was written on the machine, so I emailed them the picture as well as all the relevant information in hopes that they could come check the machine out before anyone got ripped off.
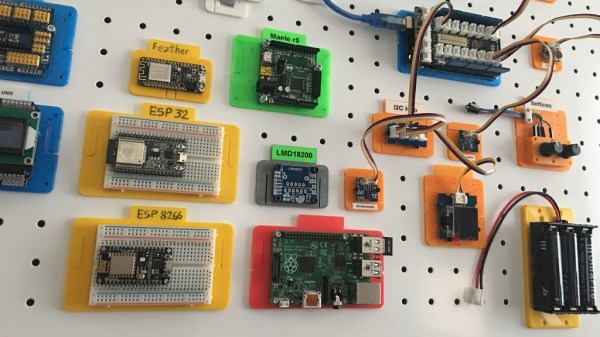
[JesusGomez] has certainly put work into his Vertical Laboratory concept. There’s a bit more to the idea than simply using 3D printed parts to move electronics from the desktop onto a metal pegboard, although that part is certainly nicely done. There are 3D models for securely mounting various hardware such as Raspberry Pi, Beaglebone, ESP32, cable management, breadboards, and other common parts to a metal pegboard. Instead of having parts and wires splayed across a workbench, it can be mounted and organized vertically. Having a project or prototype mounted on pegboard is easier to store, saves room, and frees up desk space in small work areas. It also makes for an organized and visually pleasing layout.
A clever piece of design is in the plastic mounts that he created. He wanted parts to remain securely mounted unless intentionally removed, allow different mounting orientations, and to never require access to the back side of the pegboard. To accomplish this, the parts use a combination of pegs that slide-lock with bendable sections that act as lock tabs. Once mounted, the parts stay put until the lock tabs are released by gently prying them out of position. Since mounting and removal can be done entirely from the front, wall mounted pegboards with inaccessible backs can be used.
Metal pegboard has its uses, even if the more common dead-tree version shows up more often in projects from DIY vacuforming to making a modular work surface for when space is at an absolute premium.
In 2011, [Fabio] had been working behind a keyboard for about a decade when he started noticing wrist pain. This is a common long-term injury for people at desk jobs, but rather than buy an ergonomic keyboard he decided that none of the commercial offerings had all of the features he needed. Instead, he set out on a five-year journey to build the perfect ergonomic keyboard.
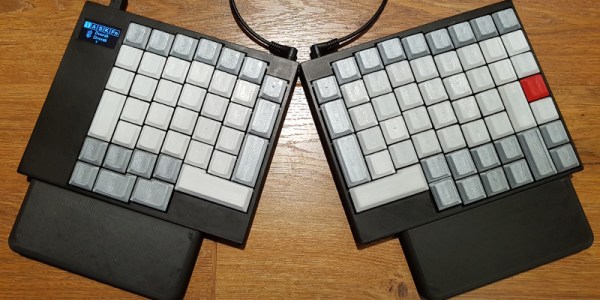
Part of the problem with other solutions was that no keyboards could be left in Dvorak (a keyboard layout [Fabio] finds improves his typing speed) after rebooting the computer, and Arduino-based solutions would not make themselves available to the computer’s BIOS. Luckily he found the LUFA keyboard library, and then was able to salvage a PCB from another keyboard. From there, he programmed everything on a Teensy microcontroller, added an OLED screen, and soldered it all together (including a set of Cherry MX switches).
Of course, the build wasn’t truly complete until recently, when a custom two-part case was 3D printed. The build quality and attention to detail in this project is impressive, and if you want to roll out your own [Fabio] has made all of the CAD files and software available. Should you wish to incorporate some of his designs into other types of specialized keyboards, there are some ideas floating around that will surely improve your typing or workflow.
When it’s time to put together the annual Christmas card, most families take a few pictures of the kids, slap on a generic greeting, and call it a day. It used to be fairly common for the whole family to get dressed up and pose for a special Christmas picture, but who has the time anymore? It’s not like we have hours and hours to slave over a unique and memorable gift we can mail out to a dozen (or more) people.
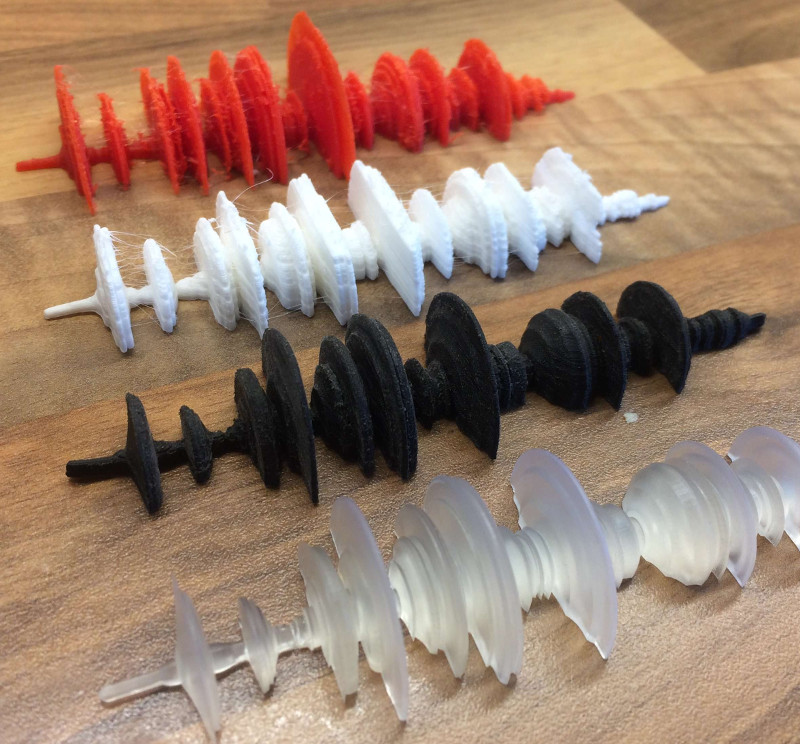
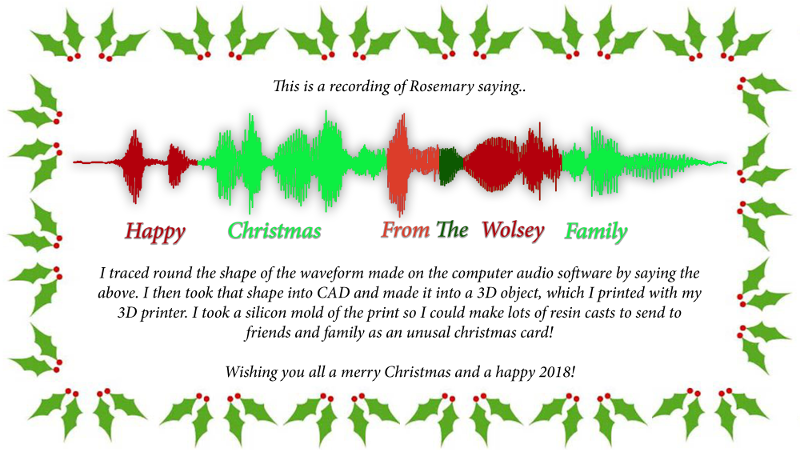
As it turns out, getting sound into CAD software isn’t exactly straightforward. To start, he made a recording of his daughter saying the words “Happy Christmas From the Wolsey Family” with Audacity, and then took a screenshot of the resulting waveform. This screenshot was then brought into Adobe Illustrator and exported to SVG, which Fusion 360 (and most other CAD packages) is able to import.
Now that the wave was in Fusion 360 he could scale it to a reasonable size, and use the revolve function to bring it into three dimensions. Cutting that object in half down the length then gave [Chris] a shape which should, theoretically, be printable on his FDM printers. But unfortunately, it wasn’t so easy. His personal Anet A8 had a tough time printing it, and the Prusa i3 MK2 at work didn’t fare much better. In the end, he had to make the leap to SLA, getting the shape printed on a Form 2 via 3D Hubs.
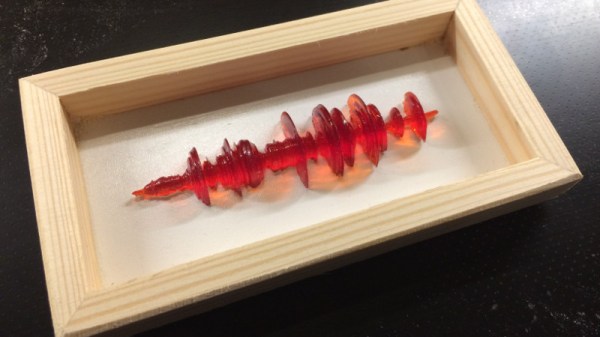
With the finalized shape in hand, [Chris] just need to put them into production. Printing them all via 3D Hubs wasn’t really an option, so he decided to make a mold and cast them in resin. He printed up a mold box, and after fiddling around with the mix a bit, was able to settle on a resin which allowed him to de-mold the shapes just 30 minutes after pouring.
Finally, he made frames for each cast waveform, and printed up a little label explaining just what the recipient was looking at; even going as far as showing which word corresponded to which section of the shape.
This is a fantastically executed and documented project, and while it’s too late to whip up your own version this year, we have no doubt they’ll be a few people “borrowing” this idea next time the holidays roll around.
For this year’s office holiday party, [Gavan Fantom] wanted to do something really special. Coworkers were messing with LEDs to come up with displays and decorations, but they lack that old-school feel of mechanical displays. He wanted to create something that had retro look of moving elements, but didn’t want to just recreate the traditional flip mechanism we’ve all seen over and over.
The mechanism to drive a single “pixel”.
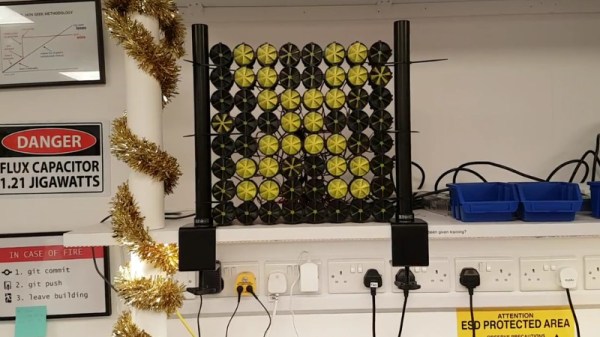
What [Gavan] came up with is breathtakingly impractical 8×8 display that sounds as cool as it looks. Each “pixel” in the display is a 3D printed screw mechanism rotated by a hobby servo. As the pixel is rotated in its case, it becomes progressively more visible to the observer. The opacity of the pixel can even be adjusted by varying the degree of rotation, allowing for rudimentary display of grayscale images.
Each element in the display is made up of seven 3D printed parts and two nails, which the mechanism slides on to move forward and backward. An 8×8 display needs 64 elements, which means the entire display needs 64 servos, 128 nails, and a whopping 448 3D-printed parts. Even with two printers attacking the production in parallel, the printing alone took over two weeks to complete.
The display is powered by a Raspberry Pi and three “Mini Maestro” controllers which can each handle 24 servos. [Gavan] found some sample code in Python to pass commands to the Maestro servo controllers, which he used as a template when writing his own software. The Python script opens image files, converts them to grayscale, and then maps the value of each pixel to rotation of the corresponding servo. He says the software is a little rough and that there’s still some calibration to be done, but we think the results are phenomenal so far.