For many of our readers, the classic 555 timer holds a special place in their heart, and cursed be the fool who dares to use an Arduino in its place. For the seriously devoted ones, or those who simply like a novelty decorative item, [acerlaguinto7] built just the right thing: a giant, actually functional, cardboard 555 timer IC.
Taking all the measurements of the original IC, [acerlaguinto7] scaled it up by factor 22 and started cutting out pieces of cardboard — also considering the orientation notch — and added the markings to emulate TI’s NE555P. Next he took a bunch of aluminum cans apart and shaped them into the pins, again staying as close as possible to the original. To top it all off, he put an actual NE555 inside the giant counterpart, and hooked it up to the soda can pins, turning it into a fully operational, oversized timer IC.
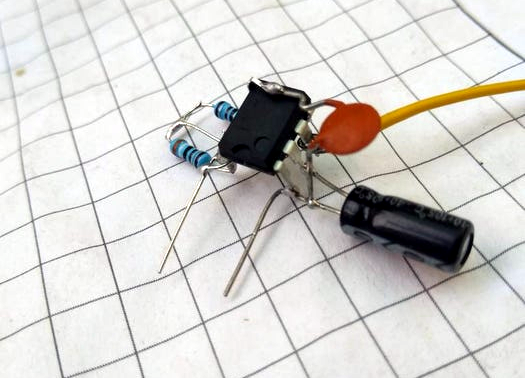
Obviously, giant conductive pins like that scream for some dead bug blinky light that even the shakiest of hands could manage to solder, and [acerlaguinto7] certainly delivers, as you can see in the video after the break. One nifty way we could see this taken further would be integrating this breadboard implementation as replacement for the 555 inside — or then just connect it to the giant Raspberry Pi.