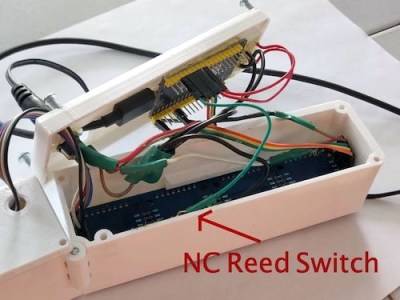
Looking for a cheap way to keep an eye on something? [Kevin Hester] pointed us to a way to make a WiFi webcam for under $10. This uses one of the many cheap ESP32 dev boards available, along with the Internet of Things platform PlatformIO and a bit of code that creates an RTSP server. This can be accessed by any software that supports this streaming protocol, and a bit of smart routing could put it on the interwebs. [Kevin] claims that the ESP32 camera dev boards he uses can be found for less than $10, but we found that most of them cost about $15. Either way, that’s cheaper than most commercial streaming cameras.
ESP32656 Articles
Don’t Toss That Bulb, It Knows Your Password
Whether it was here on Hackaday or elsewhere on the Internet, you’ve surely heard more than a few cautionary tales about the “Internet of Things” by now. As it turns out, giving every gadget you own access to your personal information and Internet connection can lead to unintended consequences. Who knew, right? But if you need yet another example of why trusting your home appliances with your secrets is potentially a bad idea, [Limited Results] is here to make sure you spend the next few hours doubting your recent tech purchases.
In a series of posts on the [Limited Results] blog, low-cost “smart” bulbs are cracked open and investigated to see what kind of knowledge they’ve managed to collect about their owners. Not only was it discovered that bulbs manufactured by Xiaomi, LIFX, and Tuya stored the WiFi SSID and encryption key in plain-text, but that recovering said information from the bulbs was actually quite simple. So next time one of those cheapo smart bulb starts flickering, you might want to take a hammer to it before tossing it in the trash can; you never know where it, and the knowledge it has of your network, might end up.
Regardless of the manufacturer of the bulb, the process to get one of these devices on your network is more or less the same. An application on your smartphone connects to the bulb and provides it with the network SSID and encryption key. The bulb then disconnects from the phone and reconnects to your home network with the new information. It’s a process that at this point we’re all probably familiar with, and there’s nothing inherently wrong with it.
The trouble comes when the bulb needs to store the connection information it was provided. Rather than obfuscating it in some way, the SSID and encryption key are simply stored in plain-text on the bulb’s WiFi module. Recovering that information is just a process of finding the correct traces on the bulb’s PCB (often there are test points which make this very easy), and dumping the chip’s contents to the computer for analysis.
It’s not uncommon for smart bulbs like these to use the ESP8266 or ESP32, and [Limited Results] found that to be the case here. With the wealth of information and software available for these very popular WiFi modules, dumping the firmware binary was no problem. Once the binary was in hand, a little snooping around with a hex editor was all it took to identify the network login information. The firmware dumps also contained information such as the unique hardware IDs used by the “cloud” platforms the bulbs connect to, and in at least one case, the root certificate and RSA private key were found.
On the plus side, being able to buy cheap smart devices that are running easily hackable modules like the ESP makes it easier for us to create custom firmware for them. Hopefully the community can come up with slightly less suspect software, but really just keeping the things from connecting to anything outside the local network would be a step in the right direction.
(Some days later…)
[Limited Results] had hinted to us that he had previously disclosed some vulnerabilities to the bulb’s maker, but that until they fixed them, he didn’t want to make them public. They’re fixed now, and it appears that the bulbs were sending everything over the network unencrypted — your data, OTA firmware upgrades, everything. They’re using TLS now, so good job [Limited Results]! If you’re running an old version of their lightbulbs, you might have a look.
On WiFi credentials, we were told: “In the case where sensitive information in the flash memory wasn’t encrypted, the new version will include encrypted storage processing, and the customer will be able to select this version of the security chips, which can effectively avoid future security problems.” Argue about what that actually means in the comments.
Compiling NodeMCU For The ESP32 With Support For Public-Private Key Encryption
When I began programming microcontrollers in 2003, I had picked up the Atmel STK-500 and learned assembler for their ATtiny and ATmega lines. At the time I thought it was great – the emulator and development boards were good, and I could add a microcontroller permanently to a project for a dollar. Then the ESP8266 came out.
I was pretty blown away by its features, switched platforms, except for timing-sensitive applications, and it’s been my chip of choice for a few years. A short while ago, a friend gave me an ESP32, the much faster, dual core version of the ESP8266. As I rarely used much of the computing power on the ESP8266, none of the features looked like game changers, and it remained a ‘desk ornament’ for a while.
About seven weeks ago, support for the libSodium
Elliptic Curve Cryptography library was added. Cryptography is not the strongest feature of IoT devices, and some of the methods I’ve used on the ESP8266 were less than ideal. Being able to more easily perform public-private key encryption would be enough for me to consider switching hardware for some projects.
However, my preferred automated build tool for NodeMCU wasn’t available on the ESP32 yet. Compiling the firmware was required – this turned out to be a surprisingly user-friendly experience, so I thought I’d share it with you. If I had known it would be so quick, this chip wouldn’t have sat on my desk unused quite so long! Continue reading “Compiling NodeMCU For The ESP32 With Support For Public-Private Key Encryption”
Make An Impression At The Bar With A CNC Coaster Plotter
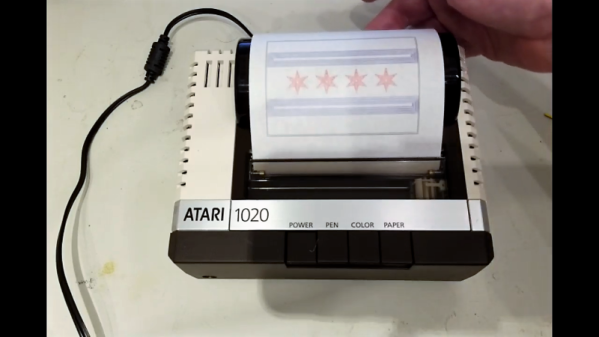
If you’re anything like us, your success with the opposite sex at the bar wasn’t much to brag about. But imagine if you had only had this compact CNC polar plotter and could have whipped up a few custom coasters for your intended’s drink. Yeah, that definitely would have helped.
Or not, but at least it would have been fun to play with. This is actually an improved version of [bdring]’s original “Polar Coaster”. Version 2 is really just a more compact and robust version of the original. The new one has a custom controller for the steppers and pen-lift servo, and everything is mounted neatly to the main PCB. Where the original used a timing belt to drive the platter, the new one uses 3D-printed helical gears, and the steppers have been replaced by slimmer motors. It even has an SD card and smartphone UI, and the coasters look pretty good.
There’s no video of the new one, but you can see its predecessor in action below and imagine the possibilities. Snap a picture and have a line art rendition of someone plotted while you’re waiting for drinks? Just remember not to take any laser engraved wooden nickels.
Continue reading “Make An Impression At The Bar With A CNC Coaster Plotter”
A Deep Dive Into Low Power WiFi Microcontrollers
The Internet of Things is eating everything alive, and the world wants to know: how do you make a small, battery-powered, WiFi-enabled microcontroller device? This is a surprisingly difficult problem. WiFi is not optimized for low-power operations. It’s power-hungry, and there’s a lot of overhead. That said, there are microcontrollers out there with WiFi capability, but how do they hold up to running off of a battery for days, or weeks? That’s what [TvE] is exploring in a fantastic multi-part series of posts delving into low-power WiFi microcontrollers.
The idea for these experiments is set up in the first post in the series. Basically, the goal is to measure how long the ESP8266 and ESP32 will run on a battery, using various sleep modes. Both the ESP8266 and ESP32 have deep-sleep modes, a ‘sleep’ mode where the state is preserved, a ‘CPU only’ mode that turns the RF off, and various measures for sending and receiving a packet.
The takeaway from these experiments is that a battery-powered ESP8266 can’t be used for more than a week without a seriously beefy battery or a solar panel. Run times are much longer with an open network as compared to a secured network, and that security eats up a ton of power: connecting to a secure network every now and again means your ESP might only run for a day, instead of a week.
There is another option, though: the ESP32. While the ’32 is vastly more powerful and more capable than the ESP8266, it also has a few improved features that help with power consumption. Importantly, there’s a bug in the ESP8266 where it drops into modem sleep instead of light sleep about half the time. This error was fixed in the ESP32, but all that power does come at a cost. On the whole, if you’re concerned about security, the ESP32 is slightly better, simply because it does the ‘security’ part of connecting to a WiFi network faster. This is really a remarkable amount of testing that’s gone into this write-up, so if you’re developing something battery-powered with any ESP, it’s well worth the read.
An Over-engineered LED Sign Board
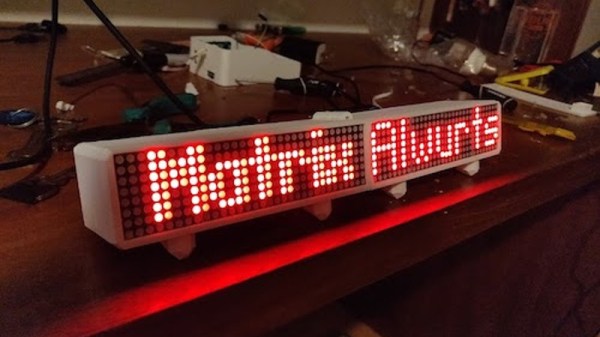
Never underestimate the ability of makers in over thinking and over-engineering the simplest of problems and demonstrating human ingenuity. The RGB LED sign made by [Hans and team] over at the [Hackheim hackerspace] in Trondheim is a testament to this fact.
As you would expect, the WS2812 RGB LEDs illuminate the sign. In this particular construction, an individual strip is responsible for each character. Powered by an ESP32 running FreeRTOS, the sign communicates using MQTT and each letter gets a copy of the 6 x 20 framebuffer which represents the color pattern that is expected to be displayed. A task on the ESP32 calculates the color value to be displayed by each LED.
The real question is, how to calibrate the distributed strings of LEDs such that LEDs on adjacent letters of the sign display an extrapolated value? The answer is to use OpenCV to create a map of the LEDs from their two-dimensional layout to a lookup table. The Python script sends a command to illuminate a single LED and the captured image with OpenCV records the position of the signal. This is repeated for all LEDs to generate a map that is used in the ESP32 firmware. How cool is that?
And if you are wondering about the code, it is up on [Github], and we would love to see someone take this up a level. The calibration code, as well as the Remote Client and ESP32 codes, are all there for your hacking pleasure.
Its been a while since we have seen OpenCV in action like with the Motion Tracking Turret and Face Recognition. The possibilities seem endless. Continue reading “An Over-engineered LED Sign Board”
Smooth Moves From Cheap Motors
Building an electric motor isn’t hard or technically challenging, but these motors have very little in the way of control. A stepper motor is usually employed in applications that need precision, but adding this feature to a motor adds complexity and therefore cost. There is a small $3 stepper motor available, but the downside to this motor is that it’s not exactly the Cadillac of motors, nor was it intended to be. With some coaxing, though, [T-Kuhn] was able to get a lot out of this small, cheap motor.
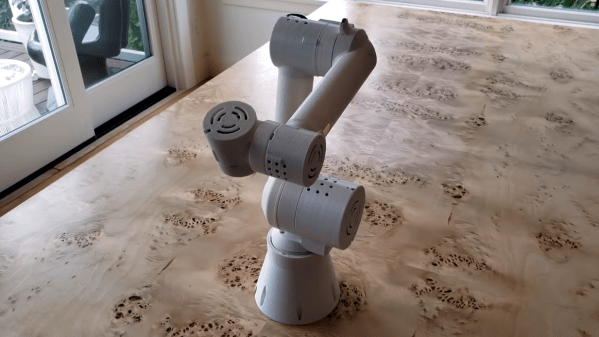
To test out the motors, [T-Kuhn] built a small robotic arm. He began by programming his own pulse generating algorithm that mimics a sine wave in order to smooth out the movement of the motor. An Arduino isn’t fast enough to do these computations, though, so he upgraded to using the ESP32. He also was able to implement the inverse kinematics on his own. The result of all this work for a specific platform and motor type is a robotic arm that has a very low cost but delivers performance of much more expensive hardware.
The robot arm was built by [T-Kuhn] too, and all of the details on that build, as well as all the schematics and code, are available on the project site if you need a low-cost robot arm or a good stepper motor controller for a low cost. There are many other ways of getting the most out of other types of low-cost motors as well.