Perfecting The Open Source RC Controller

Over the last few months we’ve seen an influx of homebrew RC controllers come our way, and we’re certainly not complaining. While the prices of commercial RC transmitters are at an all-time low, and many of them can even run an open source firmware, there’s still nothing quite like building the thing yourself. How else are you going to get exactly what you want?

For this entry into the 2019 Hackaday Prize, [Vitor de Miranda Henrique] is working on his own version of the ultimate open source remote control. His design follows some of the trends we’ve already seen in terms of outward design and hardware expandability, but also branches off into some new territory with features such as dual integrated displays.

Why does your controller need two displays? The top 4.3 inch TFT is linked up to a 5.2 GHz video receiver, which makes it perfect for controlling vehicles in “first-person” view, such as drones. The lower screen is a 2.8 inch touch screen from Adafruit, which is intended to be used for navigating through menus and options once the firmware is fully fleshed out.

Powering the controller is a ESP32 and dual MCP23017 GPIO expanders to connect up to the array of input devices available to the user. The current iteration of the controller has ten switches, two encoders, some buttons, and a pair of scroll wheels for good measure. Oh, and of course there are a couple of joysticks in the mix as well. All the devices terminate at a custom PCB in the back of the controller which looks to make modifying and adding input devices simple and neat.

We’ve previously seen the Alpha V1, an open source controller with a fairly similar setup, albeit without the dual displays. If even that one is a bit more complex than you’d like, you can always just do it with an Arduino.

What’s More Accurate Than A GPS Clock? The OpenPPS GPS Clock

Making a GPS clock is a relatively straightforward process on the face of it. Buy a GPS module for a few dollars, hook it up to a microcontroller board of your choice, pick the appropriate library and write a bit of code, et voila! A clock with time-wonk bragging rights!

Of course, your GPS clock will always tell the right time, but it won’t be really right. Your microcontroller will introduce all sorts of timing errors and jitter, so at best it’ll only be nearly right. [Rick MacDonald] has been striving to quantify and minimise these errors in his OpenPPS project, which aims to be as accurate a GPS time and frequency reference as possible.

In a very comprehensive multi-page write-up, he details his progression, through the GPS modules he used, his experience with timing jitter when he used an ESP32 alone to process their output, and then his experiments with an FPGA and then temperature-compensated oscillators. It moves from being a mere description of a GPS clock into a fascinating run-down of both GPS timing itself and the development pitfalls he encountered along the way. At the end of it all he has a GPS clock in a smart 3D-printed enclosure which he admits as yet doesn’t do anything more than tell the time, but as he points out it’s a clock with minimised jitter, delay, and drift, and it remains an ongoing project that will evolve into a full-blown time and frequency standard.

If your taste in GPS clocks is far more simple, there are plenty of projects showing how a more basic one can be produced.

Robot Arms Nudge The Hands Of Time In The Strangest Clock

We see a lot of clocks here at Hackaday. Digital clocks, retro clocks, lots of Nixie clocks, binary clocks, and clocks that appear to be designed specifically to be unreadable. But this dual-servo kinematic clock is something we haven’t seen yet, and it’s certainly worth a mention.

[mircemk]’s idea is simple and hearkens back to grammar school days when [Teacher] put a large cardboard clock dial on the blackboard and went through the “big hand, little hand” drill. In this case, the static cardboard clock has been replaced by a 3D-printed dial and hands, while a pair of servos linked together by two arms takes the place of the teacher. The video below shows it in action; the joint in the linkage between the two servos has a screw sticking out that can be maneuvered across the clock face to reposition the hands. It’s a little jittery, though; [mircemk] might want to tune the servo loops up a bit or tighten the linkage joints to make things a little smoother.

Even with the shakes, we find it wonderfully weird and hard to stop watching. It reminds us a bit of this luminous plotting clock from a while back – same linkage, different display.

Continue reading “Robot Arms Nudge The Hands Of Time In The Strangest Clock”

Lots Of Blinky! ESP32 Drives 20,000 WS2812 LEDs

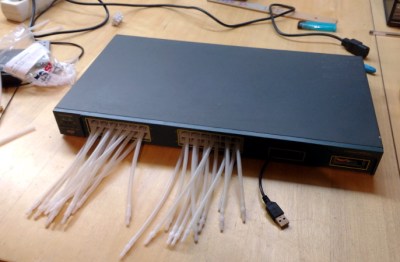
20,000 LEDs sounds like an amazing amount of blink. When we start to consider the process of putting together 20,000 of anything, and then controlling them all with a small piece of electronics the size of a postage stamp, we get a little bit dizzy. Continue reading “Lots Of Blinky! ESP32 Drives 20,000 WS2812 LEDs”

Parasite ATtiny Resets Your ESP32 For You

Embedded development can be a tough process. Between weird electrical gremlins, obscure bugs and our own mistakes, it can be a real struggle at times. To keep cognitive loads to a minimum, it’s best to make sure your tools are as simple and easy to use as possible. [tech] got tired of having to push a button to prepare the ESP32 for programming, and decided to solve the problem.

The solution comes via another microcontroller, in this case an ATtiny9. The small device listens in on the ESP32’s serial receiving pin. When it detects the Arduino IDE’s boot sequence on the line, it switches the BOOT0 and RESET lines on the ESP32, emulating the button presses to force it into programming mode.

Once you’ve become accustomed to one-click programming your ESP boards, you’re not going to want to go back. We could imagine this hack being replicated in a tidy piggyback format so it could be moved from board to board as workflow dictates.

If you’ve got an ESP32 lying around and don’t know what to do with it, you could always consider getting into game development.


ESP32 Adds Bluetooth To GameCube Controllers

While it might not be the most traditional design, there’s no debating that Nintendo created something truly special when they unleashed the GameCube controller on an unsuspecting world back in 2001. Hardcore fans are still using the controller to this day with current-generation Nintendo consoles, and there’s considerable interest in adding modern conveniences like USB support to the nearly 20-year-old design.

One particularly promising project is the BlueCubeMod created by [Nathan Reeves]. He’s developed a small custom PCB that can be installed into an official GameCube controller to turn it into a Bluetooth device. You do have to sacrifice the original cord and force feedback for this mod, but we think many will see the ability to use this iconic controller with their computer or phone as a pretty fair trade.

The PCB holds an ESP32-PICO-D4 which is operating as a standard Bluetooth HID controller for maximum compatibility with modern systems. Control signals are pulled directly from the controller’s original PCB with just two wires, making the installation very simple. Wondering where the power comes from? As the rumble motor isn’t supported anyway, that gets tossed and in its places goes a 700 mAh battery which powers the controller for up to six hours. Overall it’s a very clean modification that [Nathan] believes even beginners will be capable of, and he ultimately plans to turn this design into a commercial kit.

Currently you still need a receiver if you want to use the BlueCubeMod with the Nintendo Switch, but [Nathan] says he’s working on a way to get around that requirement by potentially switching out the ESP32 for a STM32 with a CC256x radio. He says this will give him more direct control over the Bluetooth communications, which should allow him to take into tackle the intricacies of talking to the Switch directly.

Of course, the GameCube did have an official wireless controller back in the day. We’ve seen modifications to get the WaveBird to get it talking to modern systems as well, but there’s something to be said for slimmer form factor of the original edition.

Continue reading “ESP32 Adds Bluetooth To GameCube Controllers”

FemtoBeacon Is A Tiny ESP32 Coin-Shaped Dev Board

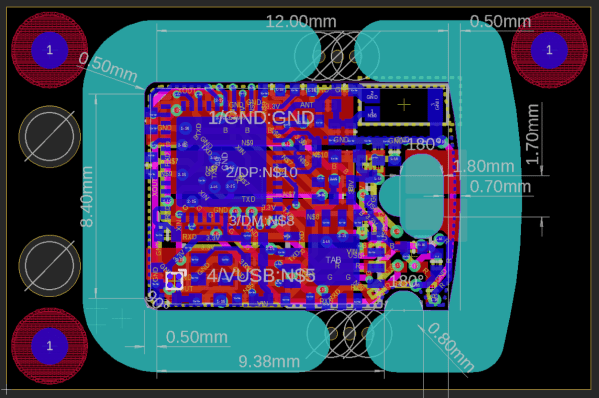
Our single board microcontroller platforms have become smaller over the years, from the relatively large classic Arduino and Beagleboard form factors of a decade ago to the postage stamp sized Feather and ESP boards of today. But just how small can they go? With current components, [Femtoduino] think they’ve cracked it, delivering an ESP32-based board with WiFi and Bluetooth, and an LDO regulator for 5 V operation in a circular footprint that’s only 9 mm in diameter.

There are some compromises from such a paucity of real-estate, of which perhaps the most obvious is a lack of space to make I/O lines available. It has SPI, a UART, and a couple of I/O lines, and aside from an onboard RGB LED that’s it. But SPI is versatile well beyond its number of lines, and even with so little there is much that can be done. Another potential compromise comes from the antenna, a Molex surface-mount component, which is an inevitable consequence of a 9 mm circular board.

There has to come a point at which a microcontroller platform becomes so small as to be unusable, but it’s clear that there is a little further for this envelope to be pushed. We’d love to see what other designers do in response to this board.