ESP8266 In Commercial Products

The hobbyist electronics market is still tiny, and even though random companies are coming out with some very interesting hardware, these parts and components aren’t exactly meant for us. The ESP8266 WiFi module is a slight deviation from this trend, with hundreds of different ESP dev boards floating around, and weirdos buying them by the bag.

[4ndreas] finally found the ESP8266 in a product; it’s not a very noteworthy observation until you realize how much work has gone into the development of open source toolchains for the ESP.

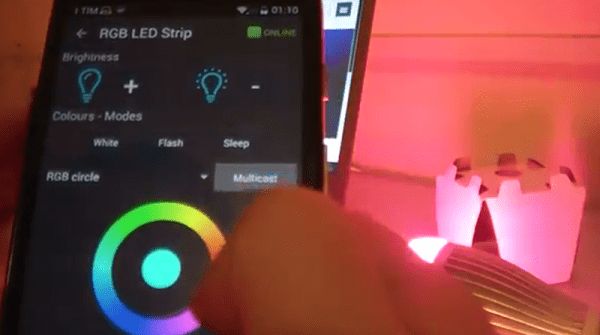
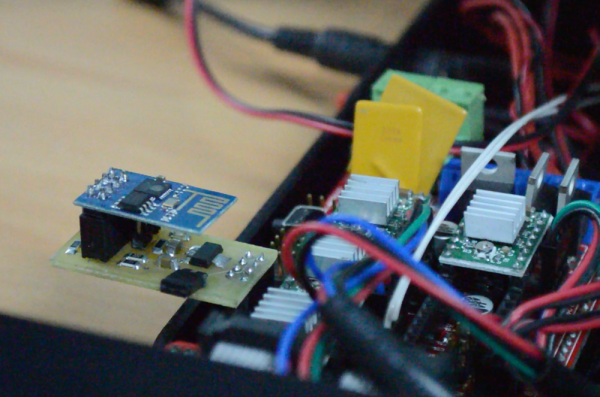
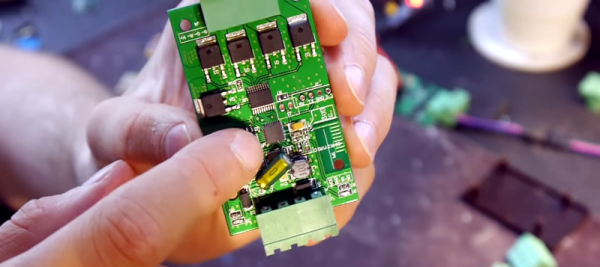
[4ndreas] found an RGB LED strip on Ali Express that could be controlled by WiFi. Inside, he found everyone’s favorite WiFi module, and by shorting two pins, he started up the controller in bootloader mode.

Because of the massive amount of open source development surrounding the ESP8266, there are a host of tools that can be used to program this cheap LED controller. [4ndreas] took a swing at writing his own firmware for the controller and came up with this project.

It’s not a killer project, but it does demonstrate the power of open source toolchains for cheap WiFi modules. This is only the first product found with an ESP8266 inside, but there are undoubtedly others out there just waiting to be taken apart and controlled in more advanced ways.

Continue reading “ESP8266 In Commercial Products”

Make Your Own Remote Control LED Light

Want to control the colors in your home? Sure, you could just buy a Philips Hue bulb, but where’s the hacking fun in that? [Dario] agrees: he has written a tutorial on building an Arduino-controlled RGB light system that plugs into a standard light socket.

[Dario] is using a bulb from Automethion in Italy, an Arduino, and an ESP8266 shield that sends signals to the bulb. The Arduino and shield are running the Souliss framework that provides smart home features and runs on a number of platforms, so it is a good open platform for creating your own smart home apps, and would be easy to expand. We have also seen a few other projects that use the ESP8266 to control an RGB strip, but this is the first one that uses a bulb that plugs into a standard light socket.

At the moment, Automethion is the only company selling this light, but I hope that others will sell similar products soon.

Continue reading “Make Your Own Remote Control LED Light”

Hello RAMPS, Meet ESP8266

The proliferation of  DIY 3D printers has been helped in large measure by the awesome open-source RepRap project. A major part of this project is the RAMPS board – a single control board / shield to which all of the other parts of the printer can be easily hooked up. A USB connection to a computer is the usual link of choice, unless the RAMPS board has the SD-Card option to allow the 3D printer to operate untethered. [Chetan Patil] from CreatorBot built a breakout board to help attach either the ESP8266 WiFi or the HC-05 Bluetooth module to the Aux-1 header on the RAMPS board. This lets him stream G-code to the printer and allow remote control and monitoring.

While the cheap ESP8266 modules are the current flavor of the season with Hackers, getting them to work can be quite a hair tearing exercise. So [Chetan] did some hacking to figure out the tool chain for developing on the ESP module and found that LUA API from NodeMcu would be a good start. The breakout board is nothing more than a few headers for the ESP8266, the HC-05 and the Aux-1 connections, with a few resistors, a switch to set boot loader mode and a 3.3V regulator. If you’re new to the ESP8266, use this quick, handy, guide by [Peter Jennings] to get started with the NodeMCU and Lualoader. [Chetan]’s code for flashing on the ESP8266, along with the Eagle board design files are available via his Github repo. Just flash the code to the ESP8266 and you’re ready to go.

One gotcha to be aware of is to plug in the ESP module after the printer has booted up. Otherwise the initial communication from the ESP module causes the printer to lock up. We are sure this is something that can be taken care of with an improved breakout board design. Maybe use a digital signal from the Arduino Mega on the RAMPS board to keep the ESP module disabled for a while during start up, perhaps? The video after the break gives a short overview of the hack.

Continue reading “Hello RAMPS, Meet ESP8266”

An Internet Speedometer With A Dekatron

[Sprite_tm], like most of us, is fascinated with the earlier ways of counting and controlling electrons. At a hacker convention, he found an old Dekatron tube hooked up to a simple spinner circuit. The prescription for this neon infatuation was to build something with a Dekatron, but making another spinner circuit would be a shame. Instead, he decided to do something useful and ended up building an Internet Speedometer with this vintage display tube.

Like all antique tubes, the Dekatron requires about 400V to glow. After a bit of Googling, [Sprite] found a project that drives a Dekatron with an AVR with the help of a boost converter. Borrowing the idea of controlling a boost converter with a microcontroller, [Sprite] built a circuit with the Internet’s favorite Internet of Things thing – the ESP8266 – that requires only a 12 volt wall wart and a handful of parts.

Controlling the rotating glow of a Dekatron is only half of the build; this device is an Internet speedometer, too. To read out his Internet speed, [Sprite] is using a managed switch that allows SNMP to read the number of incoming and outgoing octets on a network interface. By writing a simple SNMP client for the ESP8266, the device can read how clogged the Intertubes are, both incoming and outgoing.

With an acrylic case fresh out of the laser cutter and a remarkably good job at bending acrylic with a heat gun, [Sprite] has a tiny device that tells him how much Internet he’s currently using. He has a video of it running a speedtest, you can check that video out below.

Continue reading “An Internet Speedometer With A Dekatron”

Hacking Cheap Chinese PID Temperature Controllers

[Harvs] hacked a cheap PID controller he found on eBay to improve its performance. The controller originally used a K-type thermocouple but lacked cold junction compensation. As thermocouples only provide a differential measurement between the measurement junction and cold junction, this meant the controller was assuming the cold junction was at room temperature, and would in many cases be significantly inaccurate. The system also used a no-name brand Chinese microcontroller making firmware hacks impractical.

[Harvs] decided that even with cold junction compensation a K-type thermocouple wasn’t ideal for his application anyway, and designed a replacement PCB to interface to the display and power supply. The new PCB is based around a Cypress PsoC (a popular choice for its great analog functionality) with a DS18B20 temperature sensor. At the lower temperature ranges [Harvs] is interested in the DS18B20 is far more accurate and easy to use than the thermocouple.

Though the project hasn’t been updated recently, [Harvs] was planning on adding an ESP8266 for remote monitoring and control. Great work [Harvs]!

Thanks to Peter for the tip.

Hackaday Prize Entry: Smart Low Voltage Lighting

A common theme around Internet of Things things is connecting a relay to the web. It’s useful for everything from turning on a lamp from across the country to making sure your refrigerator is still running without the twice-hourly calls from the International Refrigeration Commission. For his Hackaday Prize project, [Matt] is turning lights on and off with an ESP8266 WiFi module, but not just any lights: he’s focusing on low-voltage lighting with the ESPLux.

Most downlights and landscape lights run off a 12 or 24 V transformer, and because [Matt] wanted to add dimming to his lighting box, he’s rectifying the low voltage AC to DC; PWMing an output to light an LED is a much better idea than chopping AC with a triac.

With a rectifier, MOSFET, and an ESP8266, the ESPLux is a simple build, but the project doesn’t end with electronics. for automation and control of these lights, [Matt] is turning to OpenHAB, automation software that works with everything you would ever use to make your home smart.

The 2015 Hackaday Prize is sponsored by:

Coffee Alarm

Alarm Notifies The Office When The Coffee Is Ready

[Stian] thought it would be nice if his coworkers could be electronically notified when the latest batch of coffee is ready. He ended up building an inexpensive coffee alarm system to do exactly that. When the coffee is done, the brewer can press a giant button to notify the rest of the office that it’s time for a cuppa joe.

[Stian’s] first project requirement was to activate the system using a big physical button. He chose a button from Sparkfun, although he ended up modifying it to better suit his needs. The original button came with a single LED built-in. This wasn’t enough for [Stian], so he added two more LEDs. All three LEDs are driven by a ULN2003A NPN transistor array. Now he can flash them in sequence to make a simple animation.

This momentary push button supplies power to a ESP8266 microcontroller using a soft latch power switch. When the momentary switch is pressed, it supplies power to the latch. The latch then powers up the main circuit and continues supplying power even when the push button is released. The reason for this power trickery is to conserve power from the 18650 li-on battery.

The core functionality of the alarm uses a combination of physical hardware and two cloud-based services. The ESP8266 was chosen because it includes a built-in WiFi chip and it only costs five dollars. The microcontroller is configured to connect to the WiFi network with the push of a button. The device also monitors the giant alarm button.

When the button is pressed, it sends an HTTP request to a custom clojure app running on a cloud service called Heroku. The clojure app then stores brewing information in a database and sends a notification to the Slack cloud service. Slack is a sort of project management app that allows multiple users to work on projects and communicate easier over the internet. [Stian] has tapped into it in order to send the actual text notification to his coworkers to let them know that the coffee is ready. Be sure to watch the demo video below. Continue reading “Alarm Notifies The Office When The Coffee Is Ready”