Screech Owl Is A Tribute To The Eowave Persephone

The Eowave Persephone was a beautiful thing—a monophonic ribbon synth capable of producing clean, smoothly varying tones. [Ben Glover] used to own a nice example that formerly belonged to Peter Christopherson, but lost it in the shifting sands of time. His solution was to build one of his own from scratch.
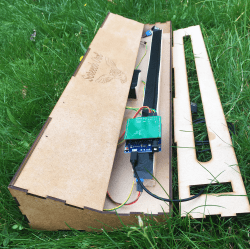
It’s a simple build, but the final result puts out a nice pleasant sound.

Known as the Screech Owl, the build is based around a custom shield designed to suit the Arduino Leonardo. The primary control interface is a Softpot 500 mm membrane potentiometer, layered up with a further thin film pressure sensor which provides aftertouch control. The Leonardo reads these sensors and synthesizes the appropriate frequencies in turn.

All the electronics is wrapped up inside a tidy laser-cut enclosure that roughly approximates the design of the original Eowave device. [Ben] noted the value of services like Fiverr and ChatGPT for helping him with the design, while he also enjoyed getting his first shield design professionally manufactured via JLCPCB.

It’s a tidy build, and in [Ben’s] capable hands, it sounds pretty good, too. We’ve seen some other great ribbon controlled synths before, too. Video after the break.

Continue reading “Screech Owl Is A Tribute To The Eowave Persephone”

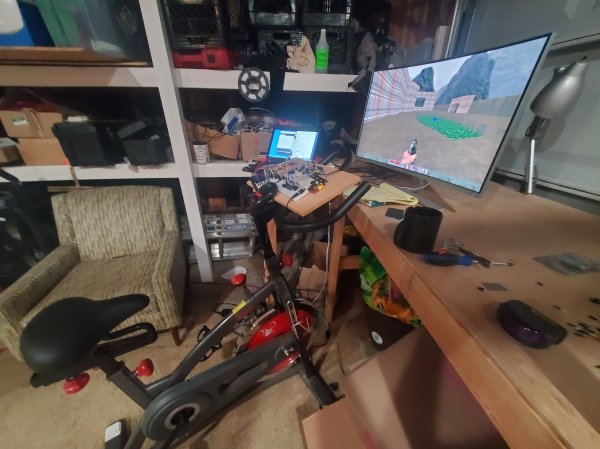
An exercise bike modified to become a game controller

Pedal Your Way Through Games With This USB Exercise Bike

If you’re into cycling, there’s nothing better than heading out on the open road and feeling the wind in your hair. Unfortunately, climatic conditions make this uncomfortable or impossible at certain times of year, so you might be tempted to stay inside and play video games instead. Luckily, you can now get your gaming fix and still get in shape thanks to [Patrick]’s exercise bike game controller.

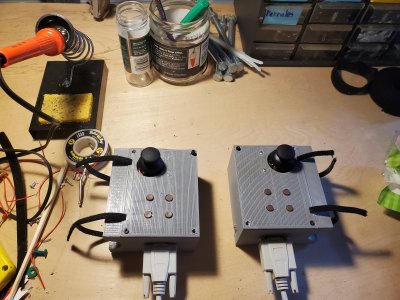
Two 3D-printed boxes with buttons and joysticks, to be attached to a bike's handlebar[Patrick] got himself a second-hand exercise bike and discovered that the speed sensor inside it was based on a magnet and reed relay, just like a regular bike computer. Reading out the sensor was therefore as simple as counting pulses using an Arduino Leonardo, and the USB HID protocol made it easy to turn the cycling mechanism into a one-dimensional game controller.

He then completed the setup by adding two 3D-printed handlebar-mounted gamepads with a few buttons and a thumbstick on each side. The total system now works as an ordinary gamepad, but with the option of using the bike as a forward/backward control.

We can imagine that this system will stay interesting for far longer than any off-the-shelf internet-connected exercise bike, because you can interface it with basically any game. [Patrick] demos his rig using first-person shooters like Doom and Team Fortress 2, but the possibilities are endless: how about turning FIFA games into bike polo? Or Mirror’s Edge into a bicycle courier adventure? After all, we’ve already seen how a similar game controller can turn Grand Theft Auto into something more like Grand Theft Bicycle.

Continue reading “Pedal Your Way Through Games With This USB Exercise Bike”

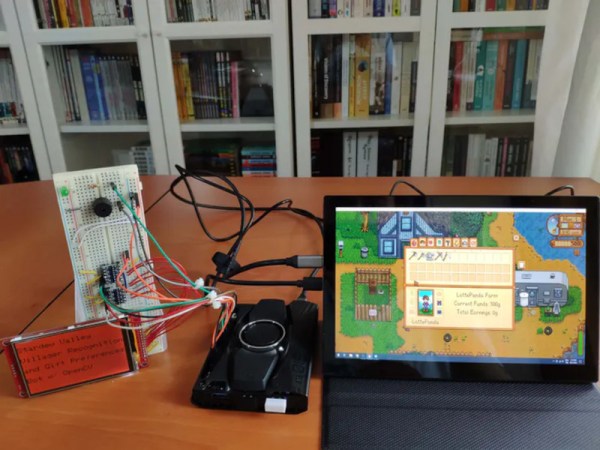
A robot that uses CV to detect villagers in Stardew Valley and display their gift preferences on a screen.

Stardew Valley Preferences Bot Is A Gift To The Player

It seems like most narrative games have some kind of drudgery built in. You know, some tedious and repetitious task that you absolutely must do if you want to succeed. In Stardew Valley, that thing is gift giving, which earns you friendship points just like in real life. More important than the giving itself is that each villager has preferences — things they love, like, and hate to receive as gifts. It’s a lot to remember, and most people don’t bother trying and just look it up in the wiki. Well, except for Abigail, who seems to like certain gemstones so much that she must be eating them. She’s hard to forget.

[kutluhan_aktar]’s villager gift preferences bot is a fun and fantastic use of OpenCV. This bot uses a LattePanda Alpha 864s, which is a single-board computer with an Arduino Leonardo built in. It works using template matching, which is basically a game of Where’s Waldo? for computers.

Given a screenshot of each villager in various positions, the LattePanda recognizes them among a given game scene, then does a lookup of their birthday and preferences which the Leonardo prints on a 3.5″ LCD screen. At the same time, it alerts the player with a buzz and big green LED. Be sure to check it out in action after the break.

In Animal Crossing, the drudgery amounts to pressing the A button while catching shooting stars. That’s not a huge problem for a Teensy.

Continue reading Stardew Valley Preferences Bot Is A Gift To The Player”

Over-the-Top Cyberdeck Is Really A Geiger-Deck

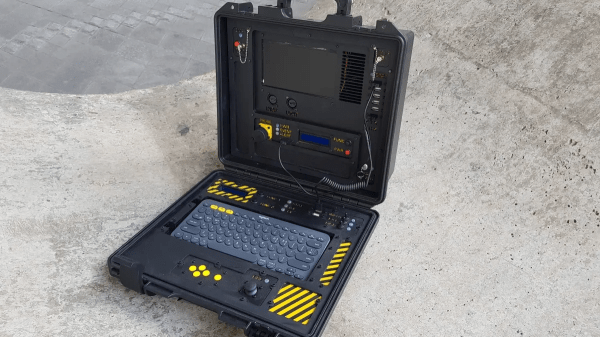
If you like it when a hack has a little backstory, then you’re going to love this cyberdeck build log, the first half of which reads like a [Tom Clancy] novel. And the build itself looks the part, like something that fell off a military helicopter as the Special Forces operators were fast-roping into a hot LZ. Or something like that.

The yarn that [Paul Hoets] spins around his cyberdeck, dubbed RATIS for Remote Assault and Tactical Intelligence System, is pretty good reading and pretty imaginative. The cyberdeck itself looks very much the part, built into a Pelican-style air travel case as such things usually are. Based on a Raspberry Pi 4, the lid of the case serves as a housing for keyboard and controls, while the body houses the computer, an LCD display, and an unusual peripheral: a Geiger counter, which is very much in keeping with the device’s “mission profile”. The handheld pancake probe and stout coiled cord with its MILSPEC connectors really sell the look, too.

Imaginative backstory aside, the construction method here is what really shines. Lacking access to a 3D-printer to produce the necessary greebling, [Paul] instead used a laser cutter to make acrylic panels with cutouts. The contrast between the black panels and the yellow backgrounds makes it all look official, and it’s a technique to keep in mind for builds of a more serious nature, too.

Feel free to look through our fine collection of cyberdeck builds. Some have a fanciful backstory like [Paul]’s, others are intended for more practical purposes. Build whatever you want, just make sure to tip us off when you’re done.

MIL-SPEC Keyboard Now Salutes USB

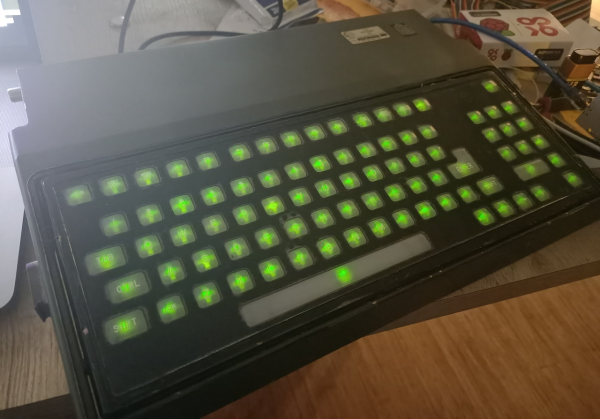
When [easyjo] picked up this late ’80s Marconi mil-spec keyboard for cheap, he knew it wouldn’t be easy to convert it to USB — just that it would be worth it. Spoiler alert: those LEDs aren’t a mod, they’re native. They get their interesting shape from the key traces, which are in the four corners.

Despite having way-cool buttons such as WPNS HOLD, and the fact that Control is on the home row where it belongs, this keyboard does not look fun to type on at all for any length of time. Of course, the point of this keyboard is not comfort, but a reliable input device that keeps out dust, sweat, liquids, and the enemy.

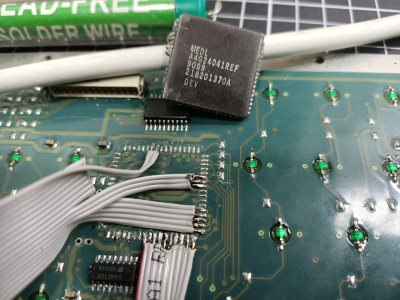
This is probably why the controller is embedded into the underside of the key switch PCB instead of living on its own board.  [easyjo] tried to analyze the signals from the existing 26-pin connector, but it didn’t work out.

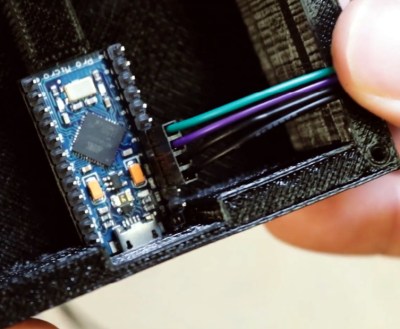
So once he was able to decode the matrix, he removed the controller chip and wired the rows and columns directly to an Arduino Leonardo. Fortunately, the LEDs were just a matter of powering their columns from the front side of the board.

The availability of certain kinds of military surplus can make for really interesting modernization projects, like adding POTS to a field telephone.

Via r/duino

Stomp Switches Let You Skip Tracks Hands-Free

You’ve (probably) got four limbs, so why are you only using half of them when you’re working on the computer? Just because your toes don’t have the dexterity to type (again, probably) doesn’t mean your feet should get to just sit there doing nothing all day. In a recent project, [MacCraiger] shows you just how easy it can be to put some functionality under foot by building a pair of media control stomp switches.

Crimp pin connectors grant +50 professionalism.

If the devices pictured above look a lot like guitar effects, that’s because they share a lot of parts. [MacCraiger] used the same sort of switch and aluminum case that you might see on a pedal board, as he figured they’d be better suited to a lifetime of being stepped on than something he 3D printed.

Up on the desk, and this time in a printed case, is the Arduino Leonardo that they connect to. The wiring for this project is very straightforward, with the switches connected directly to the GPIO pins. From there, the Arduino firmware emulates a USB Human Interface Device and fires off the appropriate media control keystrokes to skip to the next track or pause playback depending on which switch has been engaged.

This hardware isn’t exactly breaking any new ground here, but we did like how [MacCraiger] used standard 3.5 mm audio cable and the associated jacks to connect everything up. It’s obviously on-theme for what’s essentially a music project, but more importantly, gives the whole thing a very professional look. Definitely a tip to mentally file away for the future.

For the more accomplished toe-tapper, our very own [Kristina Panos] recently recently took us through the construction of her macro slinging footstool. Between these two examples of bespoke peripherals, you should have everything you need to create your own custom input devices. We suppose you could even make one that’s hand operated if you’re into that sort of thing.

Continue reading “Stomp Switches Let You Skip Tracks Hands-Free”

Hacking An Arduino NFC Reader With WebUSB

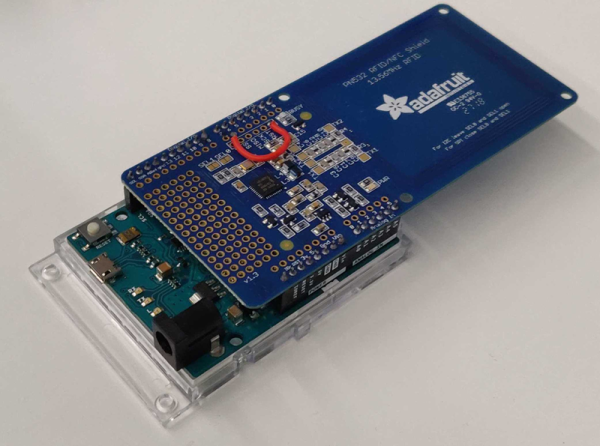
When [gdarchen] wanted to read some NFC tags, he went through several iterations. First, he tried an Electron application, and then a client-server architecture. But his final iteration was to make a standalone reader with an Arduino and use WebUSB to connect to the application on the PC.

This sounds easy, but there were quite a few tricks required to make it work. He had to hack the board to get the NFC reader’s interrupt connected correctly because he was using a Leonardo board. But the biggest problem was enabling WebUSB support. There’s a library, but you have to change over your Arduino to use USB 2.1. It turns out that’s not hard, but there’s a caveat: Once you make this change you will need the WebUSB library in all your programs or Windows will refuse to recognize the Arduino and you won’t be able to easily reprogram it.

Once you fix those things, the rest is pretty easy. The PC side uses node.js. If you back up a level in the GitHub repository, you can see the earlier non-Arduino versions of the code, as well.

If you want to understand all the logic that went into the design, the author also included a slide show that discusses the three versions and their pros and cons. He did mention that he wanted a short-range solution so barcodes and QR codes were out. He also decided against RFID but didn’t really say why.

NFC business cards are a thing. You can also use them to catch some public transportation.