HairIO: An Interactive Extension Of The Self

Most of what we see on the wearable tech front is built around traditional textiles, like adding turn signals to a jacket for safer bike riding, or wiring up a scarf with RGB LEDs and a color sensor to make it match any outfit. Although we’ve seen the odd light-up hair accessory here and there, we’ve never seen anything quite like these Bluetooth-enabled, shape-shifting, touch-sensing hair extensions created by UC Berkeley students [Sarah], [Molly], and [Christine].

HairIO is based on the idea that hair is an important part of self-expression, and that it can be a natural platform for sandboxing wearable interactivity. Each hair extension is braided up with nitinol wire, which holds one shape at room temperature and changes to a different shape when heated. The idea is that you could walk around with a straight braid that curls up when you get a text, or lifts up to guide the way when a friend sends directions. You could even use the braid to wrap up your hair in a bun for work, and then literally let it down at 5:00 by sending a signal to straighten out the braid. There’s a slick video after the break that demonstrates the possibilities.

HairIO is controlled with an Arduino Nano and a custom PCB that combines the Nano, a Bluetooth module, and BJTs that drive the braid. Each braid circuit also has a thermistor to keep the heat under control. The team also adapted the swept-frequency capacitive sensing of Disney’s Touché project to make HairIO extensions respond to complex touches. Our favorite part has to be that they chalked some of the artificial tresses with thermochromic pigment powder so they change color with heat. Makes us wish we still had our Hypercolor t-shirt.

Nitinol wire is nifty stuff. You can use it to retract the landing gear on an RC plane, or make a marker dance to Duke Nukem.

Continue reading “HairIO: An Interactive Extension Of The Self”

Improved camera slider controls

Improving Controls For A Camera Slider Kit

We’ve all gone through it. You buy a kit or even an assembled consumer item, and it’s either not quite right or it’s only a part of what you need. Either you do a fix, or you add to it. In [Jeremy S. Cook’s] case, he’d been working for a while with a camera slider kit which came with just the slider. He’d added a motor and limit switches but turning it on/off and reversing direction were still done by manipulating alligator clips. Now he’s put together some far better, and more professional-looking controls.

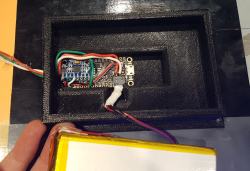
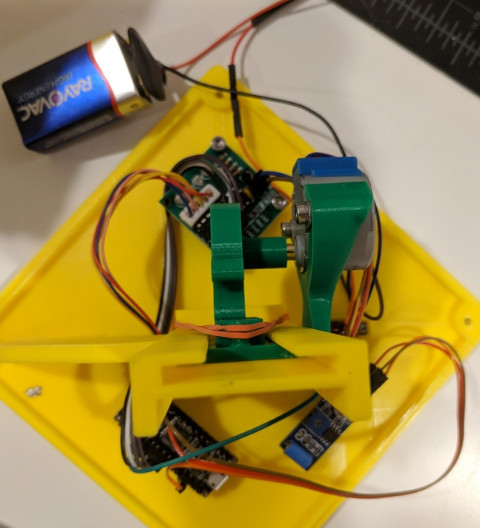
He started by replacing the DC motor with a servo motor modified for continuous rotation. Then he built a circuit around an Arduino Nano for controlling the motor and put it all in a carefully made box which he bolted to the side of the slider. A switch built into the box turns it on and off, and a potentiometer sets the direction of the slider. While not necessarily new, we do like when we see different approaches being taken, and in this case, he’s using magnets to not only hold the case’s cover on for easy access, but also a couple of them to hold the 9-volt battery in place. Check out his construction process and the new slider in action in the video below.

Continue reading “Improving Controls For A Camera Slider Kit”

A Bar Graph For Beer Fridge Vitals

[ChrisN219] has an antique Coke machine that used to hold glass bottles. Now it holds around 30 tall boy cans of his favorite post-work suds. The only problem is that [Chris] has no idea how many cans are in it without opening up the door or keeping tally on a nearby slate board. Enter the Arduino.

He wanted to make something completely non-invasive to the machine (phew!) while using as many parts he already had as possible. The result is a simple circuit that uses an ultrasonic sensor mounted inside the machine to ping the depths, and a Nano in a nifty 3D printed box up top to do some math and display the number of cans remaining as a simple bar graph. The sensor reads one bay, and the code multiplies by two to get the total. It was touch and go there for a minute as he wasn’t sure that the HC-SR04s would get a good response from the cylindrical cans. Not only did they give a good reading, the first test was quite accurate.

[Chris] recently finished Mk. II, which replaces the momentary (and the Coke logo) with a second HC-SR04. The first version required the push of a button to do inventory, but now he simply walks up to the machine and knows at a glance if it’s time to make a beer run.

Okay, so maybe you don’t have cool old Coke machine problems. But surely you can find something that needs pinging, like an inconvenient rain barrel.

Pocket-Sized Multiduino Does It All

How many times have you wished for a pocket-sized multimeter? How about a mini microcontroller-based testing rig? Have you ever dared to dream of a device that does both?

Multiduino turns an Arduino Nano into a Swiss Army knife of portable hacking. It can function as an analog multimeter to measure resistance, voltage drop, and continuity. It can also produce PWM signals, read from sensors, do basic calculator functions, and display the health of its rechargeable battery pack.

Stick a 10kΩ pot in the left-side header and you can play a space shooter game, or make line drawings by twisting the knob like an Etch-A-Sketch. Be sure to check out the detailed walk-through after the break, and a bonus video that shows off Multiduino’s newest functions including temperature sensing, a monophonic music player for sweet chiptunes, and a virtual keyboard for scrolling text on the OLED screen. [Danko] has a few of these for sale in his eBay store. They come assembled, and he ships worldwide. The code for every existing function is available on his site.

More of a maximalist? Then check out this Micro-ATX Arduino.

Continue reading “Pocket-Sized Multiduino Does It All”

Touchless Shop Doors Over-Engineered To A Blissful Level

When [John Saunders] wanted an automatic door for his shop, rather than settle for a commercial unit, he designed and built a proximity-sensing opener to ease his passing. Sounds simple, right?

Fortunately for us, there are no half-measures at Saunders Machine Works, thanks to the multiple Tormach workcells and the people who know how to use them. The video below treats us to quite a build as a result; the first part is heavy on machining the many parts for the opener, so skip ahead to 8:33 if you’re more interested in the control electronics and programming.

The opener uses time-of-flight distance sensors and an Arduino to detect someone approaching, with a pneumatic cylinder to part a plastic strip curtain. [John] admits to more than a little scope creep with this one, which is understandable when you’ve got easy access to the tools needed to create specialized parts at will.

In the end, though, it works well for everyone but [Judd], the shop dog, and it certainly looks like it was a fun build to boot. [John]’s enthusiasm for mixing machining and electronics is infectious; check out his automated bowl feeder for assembly line use.

Continue reading “Touchless Shop Doors Over-Engineered To A Blissful Level”

Wireless Protocol Reverse Engineered To Create Wrist Wearable Mouse

We’ve seen a few near-future sci-fi films recently where computers respond not just to touchscreen gestures but also to broad commands, like swiping a phone to throw its display onto a large flat panel display. It’s a nice metaphor, and if we’re going to see something like it soon, perhaps this wrist-mounted pointing device will be one way to get there.

The video below shows the finished product in action, with the cursor controlled by arm movements. Finger gestures that are very much like handling a real mouse’s buttons are interpreted as clicks. The wearable has a Nano, an MPU6050 IMU, and a nRF24L01 transceiver, all powered by some coin cells and tucked nicely into a 3D-printed case. To be honest, as cool as [Ronan Gaillard]’s wrist mouse is, the real story here is the reverse engineering he and his classmate did to pull this one off.

The road to the finished product was very interesting and more detail is shared in their final presentation (in French and heavy with memes). Our French is sufficient only to decipher “Le dongle Logitech,” but there are enough packet diagrams supporting into get the gist. They sniffed the packets going between a wireless keyboard and its dongle and figured out how to imitate mouse movements using an NRF24 module. Translating wrist and finger movements to cursor position via the 6-axis IMU involved some fairly fancy math, but it all seems to have worked in the end, and it makes for a very impressive project.

Is sniffing wireless packets in your future? Perhaps this guide to Wireshark and the nRF24L01 will prove useful.

Continue reading “Wireless Protocol Reverse Engineered To Create Wrist Wearable Mouse”

Arduino BabyTV Is Big Fun At Low Resolution

What kind of TV do you have? An older 720p model, or the now standard 1080p? Perhaps you’ve made the leap to the next generation, and are rocking a 4K display in the living room. All those are are fine and dandy if you just want to watch the local sportball contest, but where’s the challenge in that? With all the technology and modular components we have access to anymore, nowadays all the real hackers are making their own TVs.

Of course, when [Nikolai] built his very own LED TV, he did have to make a few concessions. For one thing, there’s no tuner on this model. Oh, and there’s the small issue of only having a 16×16 resolution. It might not be your idea of the perfect display, but it’s just perfect for his newborn son.

That’s right, [Nikolai] got his entry for the “Hacker Parent of the Year” award in early, and built an LED display for his son that he’s calling “BabyTV”.

Rather than the shows, trash, advertisements that they play on the kid channels, this TV only shows animated characters from retro games. We’ll concede that this project might be an elaborate Clockwork Orange style attempt at hypnotizing his son to instill an appreciation for classic gaming. But we’ll allow it.

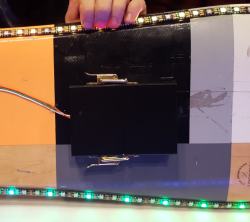
To make his BabyTV go, [Nikolai] used a 16×16 WS2812B LED panel and an Arduino Nano. Two rotary encoders are used to allow adjusting brightness and change the character currently being shown on the screen. As a particularly clever hack, the Arduino has an IR sensor attached and is constantly watching for any signals. If an IR signal is detected, the BabyTV switches to the next image. So if Junior has a standard IR remote in his hands, any button he presses will cause the display to change to the next “channel”.

Historically speaking we haven’t seen much stuff for children here at Hackaday, but 2018 seems to be changing that. Recent projects like the incredible scratch built mini excavator and gorgeous AT-ST high chair would seem to indicate we’re currently witnessing a generation of hackers become parents. Don’t panic folks, but we might be getting old.

Continue reading “Arduino BabyTV Is Big Fun At Low Resolution”