The Chicago Pile led to the Manhattan Project, which led to the atomic bomb. In Germany, there were similar efforts with less success, and now we have physical evidence from the first attempted nuclear reactor in Germany. In Physics Today, there’s a lovely historical retrospective of one of the ‘fuel cubes’ that went into one of Germany’s unsuccessful reactor experiments. This is a five-centimeter cube that recently showed up in the hands of a uranium collector. In the test reactor, six hundred of these cubes were strung along strings and suspended like a chandelier. This chandelier was then set inside a tub surrounded by graphite. This reactor never reached criticality — spectroscopy tells us the cube does not contain fission products — but it was the best attempt Germany made at a self-sustaining nuclear reaction.
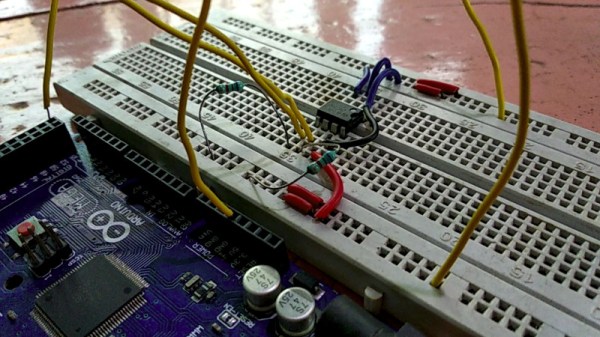
The biggest failing of the Arduino is the pinout. Those header pins aren’t all on 0.1″ centers, and the board itself is too wide to fit on a single solderless breadboard. Here’s the solution to that problem. It’s the BreadShield, an Arduino Uno-to-Breadboard adapter. Plug an Uno on one end, and you get all the pins on the other.
There’s a new listing on AirBnB. this time from NASA. They’re planning on opening the space station up to tourism, starting at $35,000 USD per night. That’s a cool quarter mil per week, launch not included. The plan appears to allow other commercial companies (SpaceX and whoever buys a Boeing Starliner) to accept space tourists, the $35k/night is just for the stop at the ISS. Costs for launch and landing are expected to be somewhere between $20 and $60 Million per flight. Other space tourists have paid as much: [Dennis Tito], the first ‘fee-paying’ space tourist, paid $20M for a trip to the ISS in 2001. [Mark Shuttleworth] also paid $20M a year later. Earlier space ‘tourists’ paid a similar amount; Japanese journalist [Toyohiro Akiyama] flew to Mir at a cost of between $12M and $37M. Yes, the space station is now an AirBnB, but it’s going to cost twenty million dollars for the ride up there.
We’re getting into conference season, and there are two hardware cons coming up you should be aware of. The first is Hardwear.io, keynoted by [Christopher Tarnovsky], famous for DirecTV hacks. There will be other talks by [@TubeTimeUS] on cloning the Sound Blaster and [John McMaster] on dropping acid. All of this is going down this week at The Biltmore in Santa Clara, CA. The second upcoming conference of note is Teardown, the hardware conference put on by Crowd Supply. That’s in Portland, June 21-23, with a presence from the Church of Robotron.