DIY Optoisolator

MacGyvered Optoisolator Is A Great Introduction

Sometimes the best way to learn about a technology is to just build something yourself. That’s what [Dan] did with his DIY optoisolator. The purpose of an optoisolator is to allow two electrical systems to communicate with each other without being electrically connected. Many times this is done to prevent noise from one circuit from bleeding over into another.

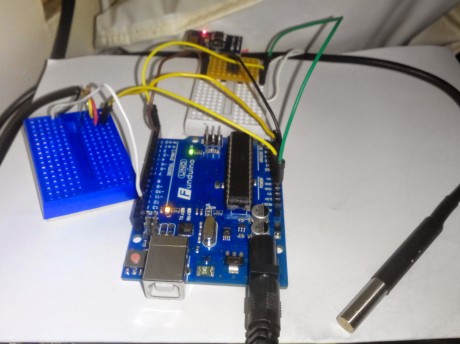
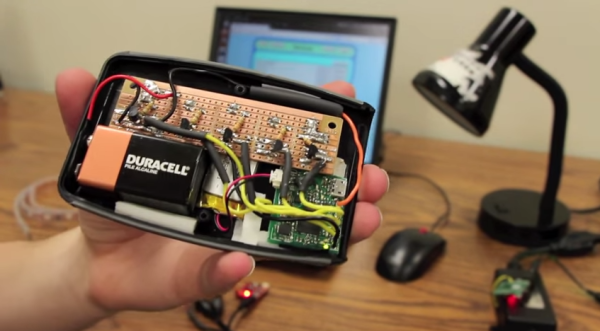
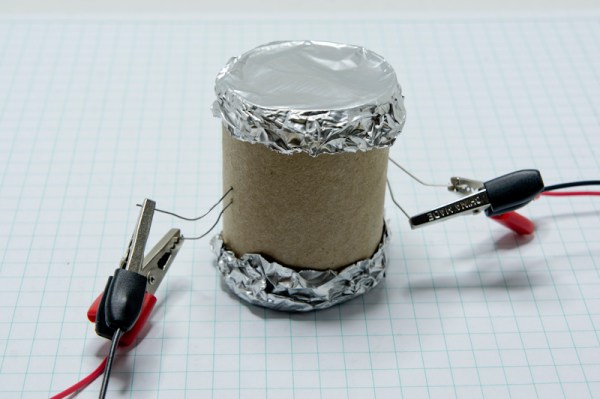
[Dan] built his incredibly simple optoisolator using just a toilet paper tube, some aluminum foil, an LED, and a photo cell. The electrical components are mounted inside of the tube and the ends of the tube are sealed with foil. That’s all there is to it. To test the circuit, he configured an Arduino to send PWM signals to the LED inside the tube at various pulse widths. He then measured the resistance on the other side and graphed the resulting data. The result is a curve that shows the LED affects the sensor pretty drastically at first, but then gets less and less effective as the frequency of the signal increases.

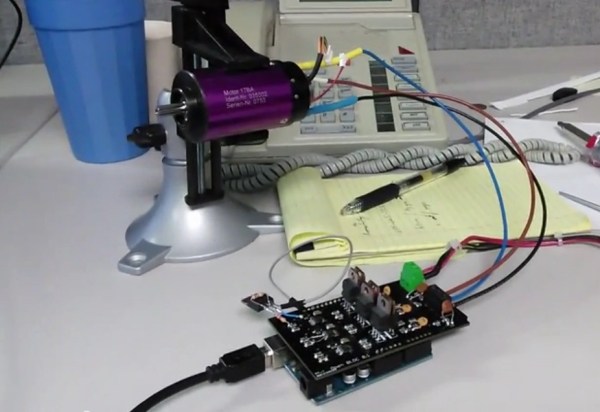
[Dan] then had some more fun with his project by testing it on a simple temperature controller circuit. An Arduino reads a temperature sensor and if the temperature rises above a certain value, it turns on a fan to cool the sensor off again. [Dan] first graphed the sensor data with no fan hooked up. He only used ambient air to cool things down. The resulting graph is a pretty smooth curve. Next he hooked the fan up and tried again. This time the graph went all kinds of crazy. Every time the fan turned on, it created a bunch of electrical noise that prevented the Arduino from getting an accurate analog reading of the temperature sensor.

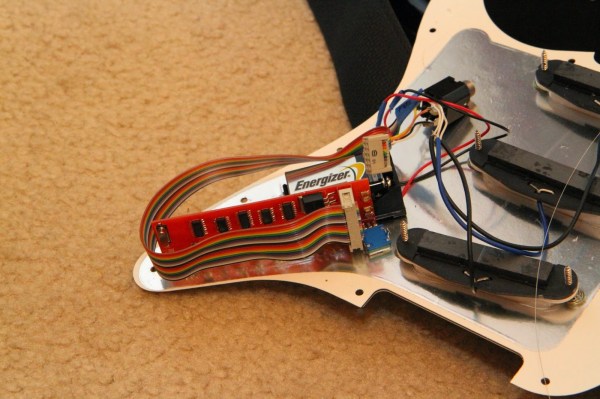
The third test was to remove the motor circuit and move it to its own bread board. The only thing connecting the Arduino circuit to the fan was a wire for the PWM signal and also a common ground. This smoothed out the graph but it was still a bit… lumpy. The final test was to isolate the fan circuit from the temperature sensor and see if it helped the situation. [Dan] hooked up his optoisolator and tried again. This time the graph was nice and smooth, just like the original graph.

While this technology is certainly not new or exciting, it’s always great to see someone learning by doing. What’s more is [Dan] has made all of his schematics and code readily available so others can try the same experiment and learn it for themselves.

Open-source BLDC motor driver

Brushless Motor Controller Shield For Arduino

Brushless motors are ubiquitous in RC applications and robotics, but are usually driven with low-cost motor controllers that have to be controlled with RC-style PWM signals and don’t allow for much customization. While there are a couple of open-source brushless drivers already available, [neuromancer2701] created his own brushless motor controller on an Arduino shield.

[neuromancer2701]’s shield is a sensorless design, which means it uses the back-EMF of the motor for feedback rather than hall effect sensors mounted on the motor. It may seem strange to leave those sensors unused but this allows for less expensive sensorless motors to work with the system. It also uses discrete FETs instead of integrated driver ICs, similar to other designs we have covered. Although he is still working on the back-EMF sensing in his firmware, the shield successfully drives a motor in open-loop mode.

The motor controller is commanded over the Arduino’s serial interface, and will support a serial interface to ROS (Robot Operating System) in the future. This shield could be a good alternative to hobby RC controllers for robots that need a customizable open-source motor controller. The PCB design and source code are available on GitHub.

Continue reading “Brushless Motor Controller Shield For Arduino”

internal guitar effects

The Effects Are IN The Guitar? It’s So Simple…

We’ve all had that problem. Up on stage, rocking out Jimi Hendrix-style on guitar with your band, but frustrated at having to mess around with foot pedals to control all of the effects. [Richard] solved this problem in a unique way: he put a preamp and a microcontroller in a guitar that can create some very interesting effects.

For the musically challenged, electric guitars often have several sets of electromagnetic pickups that detect vibrations in the strings at different points along the strings. Selecting different pickup combinations with a built-in switch changes the sound that the guitar makes. [Richard] wired the pickups in his Fender Stratocaster to the microcontroller and programmed it to switch the pickups according to various patterns. The effect is somewhat like a chorus pedal at times and it sounds very unique.

The volume and tone knobs on the guitar are used to select the programmed patterns to switch various pickups at varying speeds. This has the added bonus of keeping the stock look of the guitar in tact, unlike some other guitars we’ve seen before. The Anubis preamp, as it is called, is a very well polished project and the code and wiring schematic are available on the project site along with some audio samples.

Internet-Connected TI-84

Just before the days where every high school student had a cell phone, everyone in class had a TI graphing calculator. In some ways this was better than a cell phone: If you wanted to play BlockDude instead of doing trig identities, this was much more discrete. The only downside is that the TI calculators can’t easily communicate to each other like cell phones can. [Christopher] has solved this problem with his latest project which provides Wi-Fi functionality to a TI graphing calculator, and has much greater aspirations than helping teenagers waste time in pre-calculus classes.

The boards are based around a Spark Core Wi-Fi development board which is (appropriately) built around a TI CC3000 chip and a STM32F103 microcontroller. The goal of the project is to connect the calculators directly to the Global CALCnet network without needing a separate computer as a go-between. These boards made it easy to get the original Arduino-based code modified and running on the new hardware.

After a TI-BASIC program is loaded on the graphing calculator, it is able to input the credentials for the LAN and access the internet where all kinds of great calculator resources are available through the Global CALCnet. This is a great project to make the math workhorse of the classroom even more useful to students. Or, if you’re bored with trig identities again, you can also run a port of DOOM.

arduino browser

Web Browser Pushes Arduino’s Limits

Some projects that we build fulfill a genuine need for a new piece of hardware or software that will make life easier or fix a common problem. Other projects, on the other hand, we do just because it’s possible to do. [Gilchrist] has finished work on a project that fits squarely in the second category: a web browser that runs exclusively on an Arduino Uno with an ethernet shield.

The Arduino can serve plain-text web pages to an attached LCD and can follow hyperlinks. User input is handled by a small joystick, but the impressive part of the build is on the software side. The Arduino only has 2KB of RAM to handle web pages, and the required libraries take up 20KB of memory, leaving only about 12 KB for the HTML parser/renderer and the LCD renderer.

The Arduino browser is a work in progress, and [Gilchrist] mentions that goals for the project include more robustness to handle poor HTML (the Hackaday retro edition loads flawlessly though), a terminal, and WiFi capabilities. To that end, maybe a good solution would be using the new ESP8266 chip to keep things small and inexpensive?

The ESP8266 Becomes A Terrible Browser

The ESP8266 are making their way over from China and onto the benches of tinkerers around the world for astonishing web-enabled blinking LED projects and the like. [TM] thought he could do something cooler with his WiFi to UART module and decided to turn one into a web browser.

There’s no new code running on the ESP8266 – all the HTML is being pushed through an Arduino Mega, requesting data from a server (in this case our fabulous retro edition), and sending the data to the Arduino serial console. The connection is first initiated with a few AT commands to the ESP module, then connecting to the retro server and finally dumping everything received to the console.

It’s not much – HTML tags are still displayed, and images are of course out of the question. The result, however, isn’t that much different from what you would get from Lynx, meaning now the challenge is open for an Arduino port of this ancient browser.

Simple Photo Flash Trigger For Water Balloon Photography

Water Balloon Photography

There have been countless projects to make custom photo flash trigger circuits. Usually the circuits react to sound, triggering the camera flash at the moment a certain sound is triggered. That type of trigger can be used to detect the popping of a balloon or shattering of glass. Other triggers detect motion, like a projectile crossing a laser beam for example. [Udo’s] friend had a fun idea to take photos of water balloons popping. Unfortunately neither of those trigger methods would be well suited for this situation. That’s when [Udo] had to get creative.

[Udo] built a unique trigger circuit that uses the water inside the balloon as the trigger. The core component of the circuit is an Arduino. One of the Arduino’s analog pins is configured to enable the internal pull-up resistor. If nothing else is connected to the pin, the Arduino will read 5 volts there. The pin is connected to a needle on the end of a stick. There is a second needle on the same stick, just a short distance away from the first. When these needles pierce the balloon’s skin, the water inside allows for a brief moment of conductivity between the two pins. The voltage on the analog pin then drops slightly, and the Arduino can detect that the balloon has popped.

[Udo] already had a flash controller circuit. He was able to trigger it with the Arduino by simply trying the flash controller’s trigger pin to one of the Arduino’s pins. If the Arduino pulls the pin to ground, it closes the switch on the flash controller and the flash is triggered. Both circuits must share a common ground in order for this to work.

All of the code for [Udo’s] project is freely available. With such spectacular photographs, it’s only a matter of time before we see more of these floating around.