Remoticon Video: KiCad To Blender PCB Renders

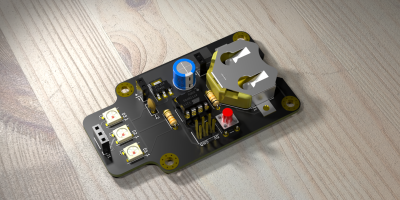
We seem to want our PCB design software to do everything these days, and it almost delivers. You can not only lay it all out, check electrical and design rules, and even spit out a bill of materials, but many PCB tools produce 3D models that are good enough to check parts clearance or are useful in designing enclosures. But when it comes to producing photorealistic output, whether for advertising or just for eye-candy, you might want to turn to 3D design tools.

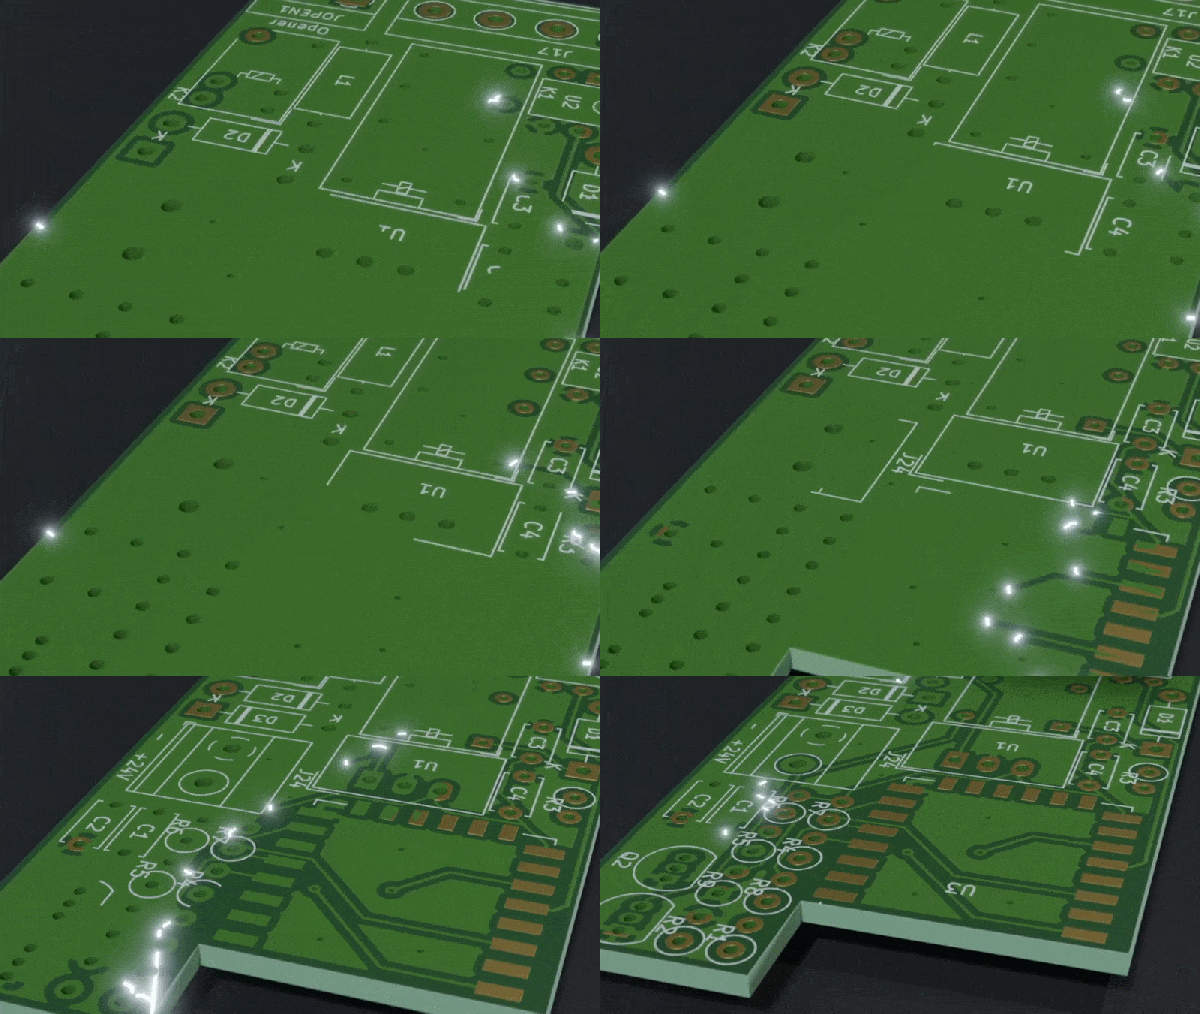
In this workshop, Anool Mahidharia takes the output of KiCad’s VRML export, gets it rendering in Blender, and then starts tweaking the result until you’re almost not sure if it’s the real thing or a 3D model. He starts off with a board in KiCad, included in the project’s GitHub repo, and you can follow along through the basic import, or go all the way to copying the graphics off the top of an ATtiny85 and making sure that the insides of the through-plated holes match the tops.

If you don’t know Blender, maybe you don’t know how comprehensive a 3D modelling and animation tool it is. And with the incredible power comes a notoriously steep learning curve up a high mountain. Anool doesn’t even try to turn you into a Blender expert, but focuses on the tweaks and tricks that you’ll need to make good looking PCB renders. You’ll find general purpose Blender tutorials everywhere on the net, but if you want something PCB-specific, you’ve come to the right place.

Continue reading “Remoticon Video: KiCad To Blender PCB Renders”

Projecting Halloween Peril

Every holiday has a few, dedicated individuals committed to “going all out.” Whether they’re trying to show up the neighbors, love the look, or just want to put a smile on the faces of those passing by; the results are often spectacular. A recent trend in decorations has been away from analog lights and ornaments and towards digital light shows via a projector. [Georgia Clegg] and [Luma Bakery] have written up a fantastic guide detailing the involved process of house projection for those feeling the holiday spirit.

There is more to the effect than simply pointing a projector at a home and running a video clip. The good displays make use of the geometry of the home and the various depths of the walls don’t distort the picture. The house itself is mapped into the image being displayed.

There are generally two approaches to mapping: point of view mapping and neutral/orthographic mapping. The first is just setting the projector in a fixed position and designing the graphics in such a way that they will look correct. The downside is that if there are multiple projectors, each projector will need to be separately designed for and they cannot be moved or adjusted. The second maps the house in an actual 3d sense and figures out how to display the content according to the viewpoint that the projector is currently at. This means you can create one source content and simply export it for the various projectors.

As you can imagine, the second is much more involved and this is where [Georgia Clegg] has stepped in. There’s a whole series that covers creating your house in MeshRoom, cleaning it up in Blender, creating the videos in After Effects, and setting up your projector to keep it running through the season.

We’ve seen other amazing projector mapping displays with lasers here at Hackaday. Now you can make one yourself. Just don’t get bogged down refurbishing your vector projector along the way.
Continue reading “Projecting Halloween Peril”

Gas Powered Blender Packs Real Grunt

Whether you’re into fruit smoothies or icy blended cocktails, a blender comes in handy when preparing these beverages in the kitchen. But, if a small electric motor can do the job well, a noisy combustion engine can certainly do it louder. This is demonstrated ably by this project from [JT Makes It].

The build is a steel-framed contraption, mounting a small gas engine of the type you’d typically find in a weed trimmer or other garden tool. It’s attached to a shaft allowing it to spin a blender blade at up to 41,000 rpm when unloaded. A stout metal container is mounted on top, along with a plexiglass lid to ensure the contents of the bowl don’t escape when the blender is in action.

It’s a fun build, and one that has no trouble turning a bucket of apples into mush in under 60 seconds. More realistically, [JT] is able to whip up several litres of blended cocktail without major effort, which would be great for parties. Though, we do imagine the burning oil and gas fumes does somewhat spoil the taste sensation. We’ve seen similar hacks before, like this nitro-fuelled pencil sharpener. Video after the break.

Continue reading “Gas Powered Blender Packs Real Grunt”

A Word Clock You Don’t Have To Actually Build To Enjoy

The great thing about word clocks is that while they all follow the same principle of spelling out the time for you, they come in so many shapes, sizes, and other variations, you have plenty of options to build one yourself. No matter if your craft of choice involves woodworking, laser cutting, PCB design, or nothing physical at all. For [Yasa], it was learning 3D modeling combined with a little trip down memory lane that led him to create a fully functional word clock as a rendered animation in Blender.

Inspired by the picture of a commercially available word clock, [Yasa] remembered the fun he had back in 2012 when he made a Turkish version for the Pebble watch, and decided to recreate that picture in Blender. But simply copying an image is of course a bit boring, so he turned it into an actual, functioning clock by essentially emulating a matrix of individually addressable LEDs using a custom texture he maps the current time to it. And since the original image had the clock positioned by a window, he figured he should have the sun move along with the time as well, to give it an even more realistic feel.

Of course, having the sun situation in real-time all year round would be a bit difficult to render, so [Yasa] choose to base the scene on the sun during spring equinox in his hometown Stockholm instead. You can see the actual clock showing your local time (or whichever time / time zone you set your device to) on his website, and his write-up is definitely a fun read you should check out if you’re interested in all the details or 3D modeling in general — or just to have a look at a time lapse of the clock itself. As he states, the general concept could be also used to model other word clocks, so who knows, maybe we will see this acrylic version or a PCB version of it in the future.

The Smart Home Gains An Extra Dimension

With an ever-growing range of smart-home products available, all with their own hubs, protocols, and APIs, we see a lot of DIY projects (and commercial offerings too) which aim to provide a “single universal interface” to different devices and services. Usually, these projects allow you to control your home using a list of devices, or sometimes a 2D floor plan. [Wassim]’s project aims to take the first steps in providing a 3D interface, by creating an interactive smart-home controller in the browser.

Note: this isn’t just a rendered image of a 3D scene which is static; this is an interactive 3D model which can be orbited and inspected, showing information on lights, heaters, and windows. The project is well documented, and the code can be found on GitHub. The tech works by taking 3D models and animations made in Blender, exporting them using the .glTF format, then visualising them in the browser using three.js. This can then talk to Hue bulbs, power meters, or whatever other devices are required. The technical notes on this project may well be useful for others wanting to use the Blender to three.js/browser workflow, and include a number of interesting demos of isolated small key concepts for the project.

We notice that all the meshes created in Blender are very low-poly; is it possible to easily add subdivision surface modifiers or is it the vertex count deliberately kept low for performance reasons?

This isn’t our first unique home automation interface, we’ve previously written about shAIdes, a pair of AI-enabled glasses that allow you to control your devices just by looking at them. And if you want to roll your own home automation setup, we have plenty of resources. The Hack My House series contains valuable information on using Raspberry Pis in this context, we’ve got information on picking the right sensors, and even enlisting old routers for the cause.

Awesome Animation Channel Is An Educational Rabbit Hole

Once [Shabab] clued us in to the brilliant animations of [Jared Owen], we pretty much lost an afternoon exploring this incredible YouTube channel. Self-taught Blender wizard [Jared] combines fantastic animations with clear and concise explanations for the inner workings of everything from Nerf guns and Fisher-Price corn poppers to the International Space Station.

Space nerds and casuals alike should check out [Jared]’s crowning achievement: a three-video Apollo spacecraft series, which covers many details in a short amount of time. Want more Apollo? Here’s a deeper dive into the lunar module. [Jared] uses music to great effect in these videos, especially in the Apollo series.

Several videos are devoted to mechanisms, like the humble gumball machine, the grand piano, and the combination lock. In addition to all the great how-it-works videos, [Jared] explores various noteworthy buildings. You know there’s a bowling alley in the White House, right? [Jared]’s tour shows you exactly where it is.

We love the diversity of the videos, all of which [Jared] researches in great detail. He enjoys working from user suggestions, so let him know what you’re dying to see dissected in detail.

Thanks for the tip, [Shabab].

Old Chainsaw Repurposed For Kitchen Use

There are many ways to keep critical appliances running during a power outage. Maybe a UPS for a computer, a set of solar panels to charge your phone, or even a generator to keep your refrigerator or air conditioning working. This modification to a standard blender will also let you ride through a power outage while still being able to make delicious beverages. It runs on gasoline.

The build uses an old chainsaw to power the blades of the blender. [Bob] was able to design and build an entirely new drivetrain to get this device to work, starting by removing the chainsaw chain and bar and attaching a sprocket to the main shaft of the motor. A chain connects it to a custom-made bracket holding part of an angle grinder, which supports the blender jar. Add in a chain guard for safety and you’ll have a blender with slightly more power than the average kitchen appliance.

The video of the build is worth watching, even if your boring, electric-powered blender suits your needs already. The shop that [Bob] works in has about every tool we could dream of, including welders, 3D printers, band saws, and even a CNC plasma cutter. It reminds us of [This Old Tony]’s shop.

Continue reading “Old Chainsaw Repurposed For Kitchen Use”