What Development Board To Use? (Part Two)

We asked for responses to our last Development Board post, and you all followed through. We got comments, forum posts, and emails filled with your opinions. Like last time, there is no way we could cover every board, so here are a few more that seemed to be popular crowd choices. Feel free to keep sending us your favorite boards, we may end up featuring them at a later date!

Continue reading “What Development Board To Use? (Part Two)”

Make Your Own Toner Transfer Paper

Who would have thought that some corn starch could be made into toner transfer paper? We’re not sure of the advantages (perhaps its cheaper?), but if you have a lot of time or just love to get sticky [Matthew Sager] shows the proper method for making the paper, printing, and then etching a PCB.

If you’re just getting started making PCBs, we recommend you check out these DIY circuit etching videos to get a better grasp on the printing and etching steps.

PCB Drill Press On A Budget

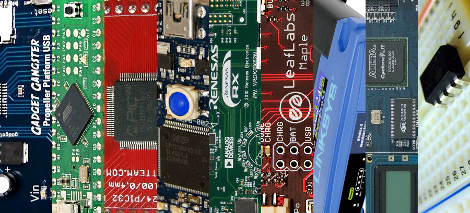
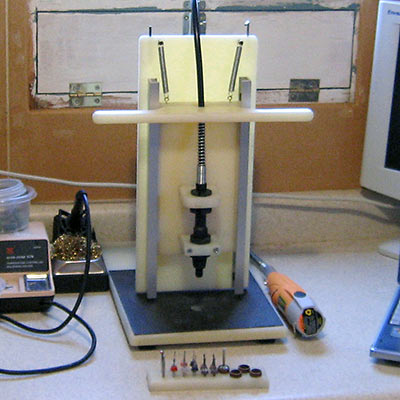
An accurate drill press is an essential tool for making your own through-hole printed circuit boards at home. Reader [Josh Ashby] offers up a solid design using scrap bin materials.

A major issue with PCB drilling is that even the slightest horizontal play will snap the delicate carbide drill bit. Hobbyist-grade tools such as Dremel’s drill press attachment are usually too sloppy for this task, while a more precise instrument might set you back a couple hundred bucks.

[Josh’s] design uses a nylon “sled” moving vertically in an aluminum u-channel track. Most of these materials were salvaged or were acquired inexpensively from a local hardware store, and assembled in less than a day. Surprisingly, this low-tech approach has proven sufficiently smooth that he’s yet to break a bit while drilling. And the entire setup, including the knockoff Harbor Freight rotary tool, cost less than the wobbly name-brand accessory alone.

DIY Circuit Etching Video Tutorial

toner-paper

Circuit-bending blog GetLoFi has posted the best tutorial yet on home-made printed circuit boards using the toner transfer method.

We’ve covered homebrew PCB fabrication techniques about a billion times before. What sets this tutorial apart is that it collects many bits of knowledge otherwise scattered all about the web, and then depicts the entire process on video, from initial printing to cut PCB…because reading about it versus seeing it done are two different things entirely. They give a number of immensely useful tips throughout: choice of materials and where to get them, tools and techniques, and dispelling several myths about these methods (for example, they’re adamant about not using acetone to clean toner from the PCB). Well worth the 30 minutes to watch. If that’s too much and you’ve been stuck on just one part of the process, the tutorial is in three segments.

Trimming finished boards on a paper cutter? Who would’ve guessed?

[via Make]

Name That Ware


Last month we mentioned [bunnie]’s Name that Ware competition where participants try to guess the functionality of a random bit of hardware. We thought you might want to see another example; pictured above is the June 2008 ware provided by [xobs]. You can see a high res version here and an image of the daughter card as well. Be forewarned that someone has already posted the solution in the comments. At first glance there are quite a few interesting bits: board is copyright 1991, the 8-bit ISA connector doesn’t have any data lines connected, just power, and it’s got a lot of analog circuitry. Take a guess and then check out the comments on [bunnie]’s site to see the solution.