DIY Bearing Puller

DIY Car Wheel Bearing Puller

Cars are the greatest. They get you to where you need to go… most of the time. They can also let you down at the worst moment if a critical part fails.  Wheel bearings get a lot of use while we drive and [Dmitriy] found out the hard way how quickly they can fail. Instead of getting cranky about it, he set out to change the damaged bearing himself. In the process he made a pretty neat DIY bearing puller.

Some wheel bearings, on the front of a 2WD truck for example, are only held on by one large nut and easily slide off the spindle. This was not the case for the rear of [Dmitriy’s] AWD Subaru. The rear bearings are press-fit into a bearing housing. These are hard to remove because Outer Diameter of the bearing is actually just slightly larger than the Inner Diameter of the bearing housing. This method of retaining parts together is called an ‘interference fit‘.

BearingPuller2

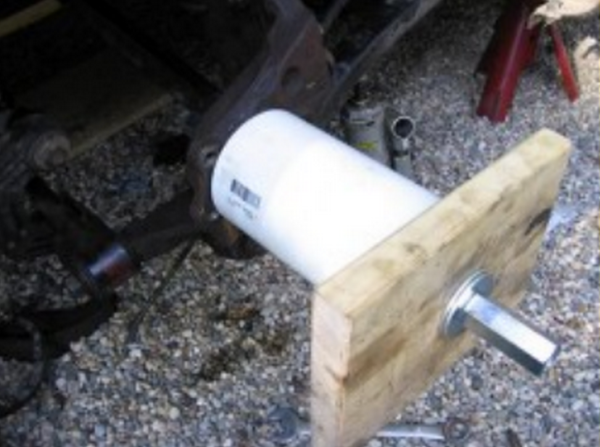
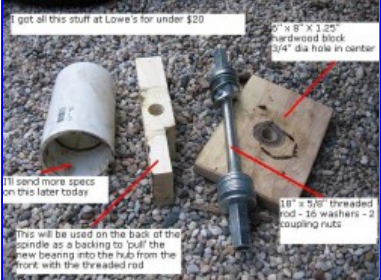
[Dmitriy’s] gadget uses one of Hackaday’s favorite simple machines, the screw, to slowly force the bearing out of its housing. It works by inserting a threaded rod through the bearing and bearing housing. Each side has a large washer and nut installed as well as a PVC pipe spacer providing support for the threaded rod. As the opposing nuts are tightened, one washer presses against the bearing and the bearing slowly slides out of the housing. Installation of the new bearing is the same except the tool is reversed to press the bushing into the housing.

Continue reading “DIY Car Wheel Bearing Puller”

Volvo Phone Holder

DIY IPhone Mount For A Volvo

[Seandavid010] recently purchased a 2004 Volvo. He really liked the car except for the fact that it was missing some more modern features. He didn’t come stock with any navigation system or Bluetooth capabilities. After adding Bluetooth functionality to the stock stereo himself, he realized he would need a secure location to place his iPhone. This would allow him to control the stereo or use the navigation functions with ease. He ended up building a custom iPhone mount in just a single afternoon.

The key to this project is that the Volvo has an empty pocket on the left side of the stereo. It’s an oddly shaped vertical pocket that doesn’t seem to have any real use. [Seandavid010] decided this would be the perfect place to mount his phone. The only problem was that he didn’t want to make any permanent changes to his car. This meant no drilling into the dash and no gluing.

[Seandavid010] started by lining the pocket with blue masking tape. He then added an additional lining of plastic wrap. All of this was to protect the dashboard from what was to come next. He filled about half of the pocket with epoxy putty. We’ve seen this stuff used before in a similar project. He left a small opening in the middle with a thick washer mounted perpendicular to the ground. The washer would provide a place for an off-the-shelf iPhone holder to mount onto. [Seandavid010] also placed a flat, wooden paint stirrer underneath the putty. This created a pocket that would allow him to route cables and adapters underneath this new mount.

After letting the epoxy putty cure for an hour, he removed the block from the pocket. The stick was then removed, and any gaps were filled in with putty. The whole block was trimmed and smooth down for a more streamlined look. Finally, it was painted over with some flat black spray paint to match the color of the dashboard. An aftermarket iPhone holder allows [Seandavid010] to mount his cell phone to this new bracket. The cell phone holder allows him to rotate the phone into portrait or landscape mode, and even is adjustable to accommodate different sized phones.

Nexus 7 Dashboard

Custom Double-Din Mount For Nexus 7 Carputer

Many new vehicles come with computers built into the dashboard. They can be very handy with features like GPS navigation, Bluetooth connectivity, and more. Installing a computer into an older car can sometimes be an expensive process, but [Florian] found a way to do it somewhat inexpensively using a Nexus 7 tablet.

The size of the Nexus 7 is roughly the same as a standard vehicle double-din stereo slot. It’s not perfect, but pretty close. [Florian] began by building a proof of concept mounting bracket. This model was built from sections of MDF hot glued and taped together. Plastic double-din mounting brackets were attached the sides of this new rig, allowing it to be installed into the dashboard.

Once [Florian] knew that the mounting bracket was feasible, it was time to think about power. Most in-vehicle devices are powered from the cigarette lighter adapter. [Florian] went a different direction with this build. He started with a cigarette lighter to USB power adapter, but he cut off the actual cigarette lighter plug. He ended up wiring this directly into the 12V line from the stereo’s wiring harness. This meant that the power cord could stay neatly tucked away inside of the dashboard and also leave the cigarette lighter unused.

[Florian] then wanted to replace the MDF frame with something stronger and nicer. He modeled up his idea in Solidworks to make sure the measurements would be perfect. Then the pieces were all laser cut at his local Techshop. Once assembled, the plastic mounting brackets were placed on the sides and the whole unit fit perfectly inside of the double-din slot.

When it comes to features, this van now has it all. The USB hub allows for multiple USB devices to be plugged in, meaning that Nexus only has a single wire for both power and all of the peripherals. Among these peripherals are a USB audio interface, an SD card reader, and a backup camera. There is also a Bluetooth enabled OBD2 reader that can monitor and track the car’s vitals. If this project seems familiar to you, it’s probably because we’ve seen a remarkably similar project in the past.

[Mike] Shows Us How To Use An Armature Growler

[Mike] has put up a great video  on his [SmallEngineMechanic] YouTube Channel about a tool we don’t see very often these days. He’s using an armature growler (YouTube link) to test the armature from a generator. Armature growlers (or just growlers for short) were commonplace years ago. Back when cars had generators, just about every auto mechanic had one on hand. They perform three simple tests: Check armature windings for shorts to other windings, for open windings, and for shorts to the armature body. [Mike’s] particular growler came to him as a basket case. The wiring was shot, it was rusty, and generally needed quite a bit of TLC. He restored it to like new condition, and uses it to help with his antique engine and genset addiction hobby.

Growlers essentially are a transformer primary with a V-shaped frame. The primary coil is connected to A/C mains. The armature to be tested sits in the “V” and through the magic of induction, some of the windings become the secondary coils (more on this later). This means some pretty high voltage will be exposed on commutator of the armature under test, so care should be taken when using one!

Testing for shorts to the ground or the core of the armature is a simple continuity test. Instead of a piezo beep though, a short will trigger the growler to turn on, which means the armature will jump a bit and everything will emit a loud A/C hum. It certainly makes testing more interesting!

Checking for open windings is a matter of energizing the growler’s coil, then probing pairs of contacts on the commutator.  Voltage induced in the windings is displayed on the growler’s meter. Open windings will show 0 volts. Not all the armature’s windings will be in the field of the growler at once – so fully testing the armature will mean rotating it several times, as [Mike] shows in his video.

The final test is for shorted coils. This is where things get pretty darn cool. The growler is switched on and a thin piece of ferrous metal – usually an old hacksaw blade, is run along the core of the armature. If a short exists, the hacksaw blade will vibrate against the core of the armature above the shorted windings. We’re not 100% clear on how the coupling between the growler’s primary and two windings causes the blade to vibrate, so feel free to chime in over in the comments to explain things.

Most commercial shops don’t troubleshoot armatures anymore, they just slap new parts in until everything works again. As such the growler isn’t as popular as it once was. Still, if you work with DC motors or generators, it’s a great tool to have around, and it’s operation is a pretty darn cool hack in itself.

Click past the break for [Mike’s] video!

Continue reading “[Mike] Shows Us How To Use An Armature Growler”

Zubie

Remotely Controlling Automobiles Via Insecure Dongles

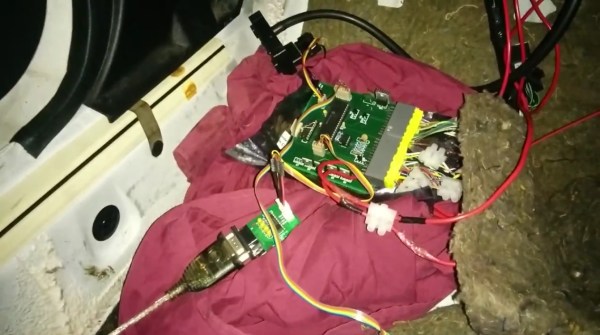
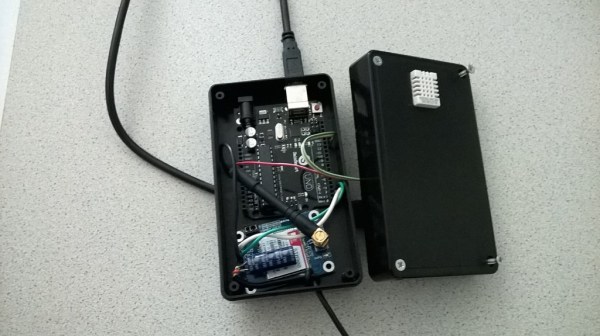
Automobiles are getting smarter and smarter. Nowadays many vehicles run on a mostly drive-by-wire system, meaning that a majority of the controls are electronically controlled. We’re not just talking about the window or seat adjustment controls, but also the instrument cluster, steering, brakes, and accelerator. These systems can make the driving experience better, but they also introduce an interesting avenue of attack. If the entire car is controlled by a computer, then what if an attacker were to gain control of that computer? You may think that’s nothing to worry about, because an attacker would have no way to remotely access your vehicle’s computer system. It turns out this isn’t so hard after all. Two recent research projects have shown that some ODBII dongles are very susceptible to attack.

The first was an attack on a device called Zubie. Zubie is a dongle that you can purchase to plug into your vehicle’s ODBII diagnostic port. The device can monitor sensor data from your vehicle and them perform logging and reporting back to your smart phone. It also includes a built-in GPRS modem to connect back to the Zubie cloud. One of the first things the Argus Security research team noticed when dissecting the Zubie was that it included what appeared to be a diagnostic port inside the ODBII connector.

Online documentation showed the researchers that this was a +2.8V UART serial port. They were able to communicate over this port with a computer with minimal effort. Once connected, they were presented with an AT command interface with no authentication. Next, the team decompiled all of the Python pyo files to get the original scripts. After reading through these, they were able to reverse engineer the communication protocols used for communication between the Zubie and the cloud. One particularly interesting finding was that the device was open for firmware updates every time it checked in with the cloud.

The team then setup a rogue cellular tower to perform a man in the middle attack against the Zubie. This allowed them to control the DNS address associated with the Zubie cloud. The Zubie then connected to the team’s own server and downloaded a fake update crafted by the research team. This acted as a trojan horse, which allowed the team to control various aspects of the vehicle remotely via the cellular connection. Functions included tracking the vehicle’s location, unlocking hte doors, and manipulating the instrument cluster. All of this can be done from anywhere in the world as long as the vehicle has a cellular signal.

A separate but similar project was also recently discussed by [Corey Thuen] at the S4x15 security conference. He didn’t attack the Zubie, but it was a similar device. If you are a Progressive insurance customer, you may know that the company offers a device that monitors your driving habits via the ODBII port called SnapShot. In exchange for you providing this data, the company may offer you lower rates. This device also has a cellular modem to upload data back to Progressive.

After some research, [Thuen] found that there were multiple security flaws in Progressive’s tracker. For one, the firmware is neither signed nor validated. On top of that, the system does not authenticate to the cellular network, or even encrypt its Internet traffic. This leaves the system wide open for a man in the middle attack. In fact, [Thuen] mentions that the system can be hacked by using a rogue cellular radio tower, just like the researchers did with the Zubie. [Thuen] didn’t take his research this far, but he likely doesn’t have too in order to prove his point.

The first research team provided their findings to Zubie who have supposedly fixed some of the issues. Progressive has made a statement that they hadn’t heard anything from [Thuen], but they would be happy to listen to his findings. There are far more devices on the market that perform these same functions. These are just two examples that have very similar security flaws. With that in mind, it’s very likely that others have similar issues as well. Hopefully with findings like this made public, these companies will start to take security more seriously before it turns into a big problem.

[Thanks Ellery]

RasPi Traffic Monitor

Dedicated Automobile Traffic Monitor With Raspberry Pi

[j3tstream] wanted an easier way to monitor traffic on the roads in his area. Specifically, he wanted to monitor the roads from his car while driving. That meant it needed to be easy to use, and not too distracting.

[j3tstream] figured he could use a Raspberry Pi to run the system. This would make things easy since he’d have a full Linux system at his disposal. The Pi is relatively low power, so it’s run from a car cigarette lighter adapter. [j3tstream] did have to add a custom power button to the Pi. This allows the system to boot up and shut down gracefully, preventing system files from being corrupted.

After searching eBay, [j3tstream] found an inexpensive 3.2″ TFT LCD touchscreen display that would work nicely for displaying the traffic data. The display was easy to get working with the Pi. [j3tstream] used the Raspbian linux distribution. His project page includes a link to download a Raspbian image that already includes the necessary modules to work with the LCD screen. Once the image is loaded, all that needs to be done is to calibrate the screen using built-in operating system functions.

The system still needed a data connection. To make things simple and inexpensive, [j3tstream] used a USB WiFi dongle. The Pi then connects to a WiFi hot spot built into his 4G mobile phone. To view the traffic map, [j3tstream] just connects to a website that displays traffic for his area.

The last steps were to automate as much as possible. After all, you don’t want to be fumbling with a little touch screen while driving. [j3tstream] made some edits to the LXDE autostart file. These changes automatically load a browser in full screen mode to the traffic website. Now when [j3tstream] boots up his Pi, it automatically connects to his WiFi hotspot and loads up local traffic maps.

Project Binky, Putting A Celica In A Mini The Hard Way

The old Mini – not the new one, mind you – was a fantastic rally car, but fifty odd horsepower won’t get you very far today. The name of the game is souping up a pile of rust from 1980 to create one of the fastest Minis on the planet. That’s the goal of Bad Obsession Motorsport, a project by [Nik Blackhurst], [Richard Brunning], and [Rex Hamilton] as [Abraham Lincoln].

[Nik] has a 1980 Mini 1000, a car-shaped pile of rust. The plan for this multi-year build is to stuff the engine, gearbox, and suspension from a Toyota Celica ST185 GT4 into the old Mini. If you’re wondering, that’s a two liter, turbocharged engine with 200 horsepower and four-wheel drive in a Mini that originally had 50 or 60 horsepower. No, the engine doesn’t fit, but that’s not going to stop these guys.

This isn’t the kind of build you just dive into. Once the guys had the Mini in the garage, a load of measurements were taken from both cars, written down, and the car stripped down. This is not a simple mod, and a few pieces of equipment were custom-made just for this build. The biggest of these is a custom jig the Mini chassis can be bolted down to. This jig gives [Nik] and [Richard] the ability to mount the Mini and engine on rollers, and rotate the entire chassis 90 degrees for easy welding of the underside of the car.

Already there are eight videos covering a year and a half of work, and only now is there a light at the end of the tunnel. Most of the old body panels from the Mini were removed and replaced with reproduction parts. Those parts were quickly ruined with a cutting disk and some custom fabricated panels were put in place. Somehow, it still looks like a Mini but it’s massively strengthened and cut to accommodate the much larger suspension and engine from the Celica.

Grab a cup of coffee (or tea, if you’re into that) and check out the videos below. It’s incredible how much time and work went into this build, and we can’t wait to see the next update in a few months or so.

Continue reading “Project Binky, Putting A Celica In A Mini The Hard Way”