Balena Introduces DIN-Capable Pi Compute Module Carrier Board

Although you don’t hear about it very much over the clamor of emulating old video game systems, one of the biggest uses of the Raspberry Pi outside its educational roots is in industry. The Pi makes for a great industrial control system, and if you mount it to a DIN rail, you’re golden. This is the biggest reason the Pi foundation is still making the Pi 1, and it’s one of the big motivations behind the Pi Compute Module.

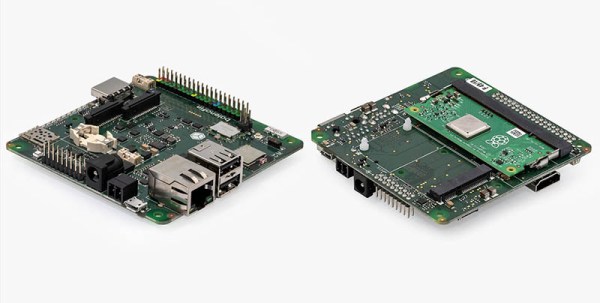
Now that the Pi Compute Module 3 and 3+ have been out for a while, it’s only fitting that these modules get a great carrier board. The balenaFin 1.1 is out now, and it’s the perfect carrier board for the Pi compute module.

Balena (formerly resin.io) is a software stack designed for managing fleets of Linux devices, and there’s no better example of that than a factory filled with Pis fiddling relays and such. Balena has found its way from tracking sea turtles to monitoring oil rigs, and with that comes a need for a developer kit. The Pi compute module is supposed to have a very long support life, so the obvious solution is to make a great carrier board for this fantastic module.

Features of note include two camera connectors, PoE (with a Hat), USB headers, an RGB indicator LED, an industrial temperature range, and a case designed for a DIN rail. So far, so goo, but there’s also a microcontroller with a Bluetooth radio that can operate without the compute module being turned on, and an RTC for time-based operation. There’s a mini PCI express slot designed for cellular modems, and a SIM card slot just for fun.

While most Pi builds we see could make use of these features, they are assuredly one-off builds. You’re not going to be deploying hundreds of Pis if you need to 3D print an enclosure for each one. That’s when actual engineers need to get involved, and if you’re doing that, you might as well go with the Raspberry Pi compute module. If you’re looking for a fleet of Pis, you could do worse than to look at this very nice compute module carrier board.

So You Bought A Raspberry Pi Compute Module. What Now?

The Raspberry Pi Compute Module hasn’t seen as much attention as it should have in our community, probably because the equivalents from the familiar consumer range can be so much cheaper. When a Raspberry Pi Zero is a similar size to a Compute Module and costs so much less, we can’t blame you for asking what would be the point of using the industrial version.

It’s interesting then to see an Instructables piece from [Manolis Agkopian] in which he takes the reader through the process of creating their own Compute Module project. Following hot on the heels of the recent launch of the latest in the range it’s come to us at an appropriate moment to take a fresh look at the fruity computer’s more obscure incarnation. He starts with a description of the Compute Module and its official development board, before taking us through setting up a module and putting an OS on it. Finally he shows us his board design, which he offers us as a jumping-off point for our own projects.

So given that it’s piqued your interest, why might you want to design a Compute Module project? The answer’s simple enough: the consumer boards only provide the subset of features the Pi foundation people deemed appropriate for their mission. A Compute Module project is the equivalent of designing a Raspberry Pi that does it your way, tailored exactly for your needs. If you want an example, look no further than this stereoscopic camera.

Via Hacker News.

Raspberry Pi’s Latest Upgrade: The Compute Module 3+

We’ve become so used to the Raspberry Pi line of boards that have appeared in ever-increasing power capabilities since that leap-year morning in 2012 when the inexpensive and now ubiquitous single board computer was announced and oversold its initial production run. The consumer boards have amply fulfilled their mission in providing kids with a pocket-money computer, and even though they are not the most powerful in the class of small Linux boards they remain the one to beat.

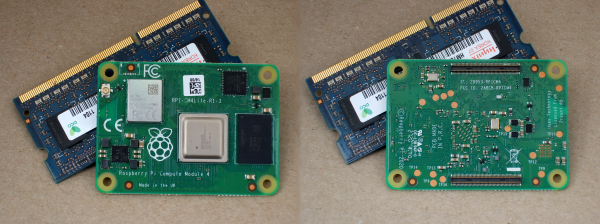
The other side of the Pi coin comes with the industrial siblings of the familiar boards, the Compute Module. This is a version of the Pi meant to be built into other products, utilizing a SODIMM connector as the hardware interface. Today brings news of a fresh addition to that range: the Compute Module 3+.

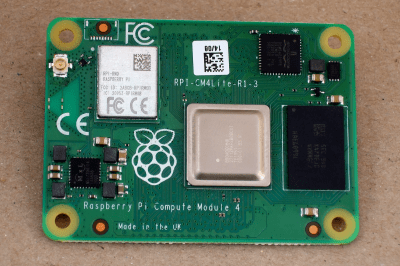
As you might expect from the nomenclature this brings the Broadcom BCM2837B0 processor from the Raspberry Pi 3B+ to the barebones SODIMM-style Pi, but unexpectedly they have also made it available with a range of different size eMMC devices installed. In place of the 4 GB capacity of previous offerings are 8, 16, and 32 GB devices, with an intriguing new “lite” variant that has no onboard storage at all.

Perhaps the saddest thing from a Hackaday reader’s perspective is that as the Pi blog post notes due to commercial sensitivities they have little idea what products many of the Compute Modules they sell end up in — a mystery we’d really like to solve. No doubt there are some fascinating applications just waiting do be discovered by hardware hackers in a decade’s time as units enter the surplus market, but for now we’ll have to be content with community offerings. This stereoscopic camera is a recent one, or perhaps one of several handheld game consoles.

This Raspberry Pi Is A Stereo Camera And So Much More

Over the years we have featured a huge array of projects featuring the Raspberry Pi, but among them there is something that has been missing in all but a few examples. The Raspberry P Compute Module is the essentials of a Pi on a form factor close to that of a SODIMM module, and it is intended as a way to embed a Pi inside a commercial product. It’s refreshing then to see [Eugene]’s StereoPi project, a PCB that accepts a Compute Module and provides interfaces for two Raspberry Pi cameras.

What makes this board a bit special is that as well as the two camera connectors at the required spacing for stereophotography it also brings out all the interfaces you’d expect on a regular Pi, so there is the familiar 40-pin expansion header as well as USB and Ethernet ports. It has a few extras such as a pin-based power connector, and an on-off switch.

Where are they going with this one? So far we’ve seen demonstrations of the rig used to create depth maps with ROS (Robot Operating System). But even more fun is seeing the 3rd-person-view rig shown in the video below. You strap on a backpack that holds the stereo camera above your head, then watch yourself through VR goggles. Essentially you become the video game. We’ve seen this demonstrated before and now it looks like it will be easy to give it a try yourself as StereoPi has announced they’re preparing to crowdfund.

So aside from the stereophotography why is this special? The answer comes in that it is as close as possible to a fresh interpretation of a Raspberry Pi board without being from the Pi Foundation themselves. The Pi processors are not available to third party manufacturers, so aside from the Odroid W (which was made in very limited numbers) we have never seen a significant alternative take on a compatible Raspberry Pi. The idea that this could be achieved through the Compute Module is one that we hope might be taken up by other designers, potentially opening a fresh avenue in the Raspberry Pi story.

The Raspberry Pi Compute Module has passed through two iterations since its launch in 2014, but probably due to the lower cost of a retail Raspberry Pi we haven’t seen it in many projects save for a few game consoles. If the advent of boards like this means we see more of it, that can be no bad thing.

Continue reading “This Raspberry Pi Is A Stereo Camera And So Much More”

A Pi Cluster To Hang In Your Stocking With Care

It’s that time of year again, with the holidays fast approaching friends and family will be hounding you about what trinkets and shiny baubles they can pretend to surprise you with. Unfortunately there’s no person harder to shop for than the maker or hacker: if we want it, we’ve probably already built the thing. Or at least gotten it out of somebody else’s trash.

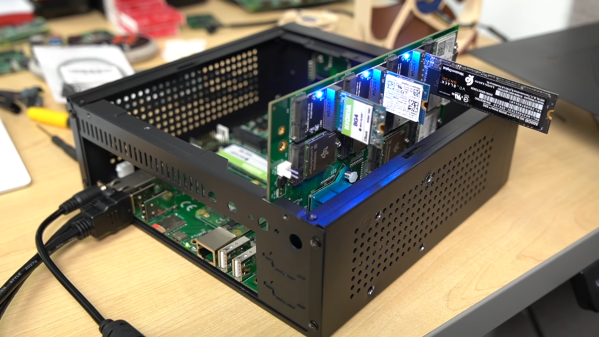
But if they absolutely, positively, simply have to buy you something that’s commercially made, then you could do worse than pointing them to this very slick Raspberry Pi cluster backplane from [miniNodes]. With the ability to support up to five of the often overlooked Pi Compute Modules, this little device will let you bring a punchy little ARM cluster online without having to build something from scratch.

The Compute Module is perfectly suited for clustering applications like this due to its much smaller size compared to the full-size Raspberry Pi, but we don’t see it get used that often because it needs to be jacked into an appropriate SODIMM connector. This makes it effectively useless for prototyping and quickly thrown together hacks (I.E. everything most people use the Pi for), and really only suitable for finished products and industrial applications. It’s really the line in the sand between playing around with the Pi and putting it to real work.

[miniNodes] calls their handy little device the Carrier Board, and beyond the obvious five SODIMM slots for the Pis to live in, there’s also an integrated gigabit switch with an uplink port to get them all connected to the network. The board powers all of the nodes through a single barrel connector on the side opposite the Ethernet jack, leaving behind the masses of spider’s web of USB cables we usually see with Pi clusters.

The board doesn’t come cheap at $259 USD, plus the five Pi Compute Modules which will set you back another $150. But for the ticket price you’ll have a 20 core ARM cluster with 5 GB of RAM and 20 GB of flash storage in a 200 x 100 millimeter (8 x 4 inch) footprint, with an energy consumption of under 20 watts when running at wide open throttle. This could be an excellent choice for mobile applications, or if you just want to experiment with parallel processing on a desktop-sized device.

Amazon is ready for the coming ARM server revolution, are you? Between products like this and the many DIY ARM clusters we’ve seen over the years, it looks like we’re going to be dragging the plucky architecture kicking and screaming into the world of high performance computing.

[Thanks to Baldpower for the tip.]

The Better RetroPie Handheld

The Raspberry Pi has become the best video game console on the planet. With RetroPi, anyone can play Super Mario 3, Doctor Mario, and even Doki Doki Panic. Adafruit’s PiGRRL Zero and [Wermy]’s reconfabulation of an old brick Game Boy to house a Raspi Zero and display have made the Raspberry Pi portable, along with all those retro games we love so dearly.

There’s a problem with these builds, though. They only use the Raspberry Pi Zero, and with that the limitations on emulation performance, and the Raspi 3 is far too big for a portable console. What’s the solution? It’s the greatest homebrew console ever created. For this year’s Hackaday Prize, [DeanChu] is building the Retro-CM3. It’s a retro handheld with a 3D printed enclosure, that’s powered by the Raspberry Pi Compute Module 3. Stand back, folks. We have a winner that will top the Raspberry Pi and 3D printing subreddits.

The key feature for this build is, of course, the raw processing power of the Raspberry Pi Compute Module 3. This is a Raspberry Pi 3 with 4 GB of eMMC stuffed onto a board that fits into an SODIMM socket. The pins on this device give you access to the GPIOs and the DSI connector. All you really need to turn this into an amazing vintage emulation console is a breakout board with a few buttons, power supply, and a display.

The extra components for this build include a 3.2 inch LCD using the DPI interface. There’s a speaker, and a 2000mAh battery. The real tricky part here is the custom PCB, breaking out the DPI pins on the Compute Module, adding a small speaker, and throwing a small STM32 to read the buttons. It’s an entire system, ready to be housed in a 3D printed enclosure.

This is, simply, the best Raspberry Pi portable you’ll ever see, at least until we get a Rasberry Pi Zero with the capabilities of the Pi 3. It’s an excellent use of the very small Compute Module, and one of the most polished Hackaday Prize entries we’ve seen thus far.

Raspberry Pi Launches Compute Module 3

The forgotten child of the Raspberry Pi family finally has an update. The Raspberry Pi Compute Module 3 has been launched.

The Pi 3 Compute Module was teased all the way back in July, and what we knew then is just about what we know now. The new Compute Module is based on the BCM2837 processor – the same as found in the Raspberry Pi 3 – running at 1.2 GHz with 1 gigabyte of RAM. The basic form factor SODIMM form factor remains the same between the old and new Compute Modules, although the new version is 1 mm taller.

The Compute Module 3 comes with four gigabytes of eMMC Flash and sells for $30 on element14 and RS Components. There’s also a cost-reduced version called the Compute Module 3 Light that forgoes the eMMC Flash and instead breaks out those pins to the connector, allowing platform integrators to put an SD card or Flash chip on a daughter (mother?) board. The CM3 Lite version sells for $25. Continue reading “Raspberry Pi Launches Compute Module 3”