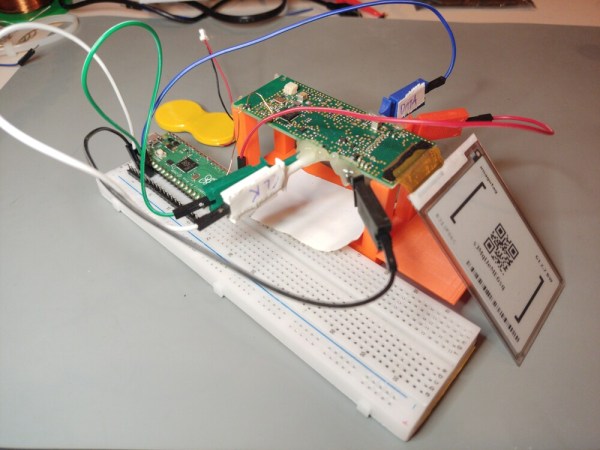
PCB mounted on 3D-printed holder, debug pins attached to Pi Pico on a breadboard. The battery is in the background, disconnected

Reverse Engineering E-Ink Price Tags

E-ink displays are great, but working with them can still be a bit tricky if you aren’t an OEM. [Jasper Devreker] got his hands on three e-ink shelf displays to reverse engineer.

After cracking the tag open, [Devreker] found a CC2510 microcontroller running the show. While the spec sheet shows a debug mode, this particular device has been debug locked making reading the device’s code problematic. Undaunted, he removed the decoupling capacitor from the DCOUPL pin and placed a MOSFET between it and the ground pin to perform a voltage glitch attack.

A Pi Pico was used to operate the MOSFET over PIO with the chip overclocked to 250 MHz to increase the precision and duration of the glitch. After some testing, a successful glitch pathway was found, but with only a 5% success rate. With two successive glitches in a row needed to read out a byte from the device, the process is not a fast one. Data pulled so far has shown to be valid code when fed into Ghidra, and this project page is being updated as progress continues.

If you want to delve further into hacking e-ink price tags, checkout this deep dive on the topic or this Universal E-paper Sniffer.

A 3D-printed teapot with an e-ink display

Top Up Your Teapot In Time With This E-ink Tea Timer

Whether you’re a tea aficionado or just a casual drinker, it’s important to pay attention to your brewing times: too short and you’re just drinking hot water, too long and your brew becomes bitter and astringent. [Bob] wanted to help his parents avoid the latter scenario, and made them a convenient little tea timer that displays the time when they last replenished the pot.

Operating the timer couldn’t be easier: just press down on the teapot’s lid and it will store the current time on its e-ink display. Inside is a Pimoroni Badger 2040 with a real-time clock daughter board, powered by a set of AAA batteries. The Badger is an RP2040-powered board with an integrated e-ink display that’s perfect for this use case: the display needs to be updated only once when the button is pressed, and doesn’t use any power after that.

Naturally, the tea timer is encased in a teapot-shaped enclosure. It has a clever mechanism inside that pushes one of the Badger’s buttons when you press down on the lid, and also provides the satisfying click that you hear in the video embedded below. It took more than thirteen hours to print on [Bob]’s Creality Ender 3, but the end result definitely looks the part.

Functionally, this tea timer is about as simple as it gets: most other designs focus on the initial brewing process, and include features to alert you when your tea is ready.

Continue reading “Top Up Your Teapot In Time With This E-ink Tea Timer”

Trigger Your Home Automation Routines With Home Buttons

Home automation systems are all well and good, so long as the person who built it all is around to drive it. Let’s face it, they’re quite often a complex web of interconnected systems, all tied to the specifics of one’s home — and someone less familiar with it all could get a little irritated if, on a chilly day, the interface to the boiler is via a Python script, and something won’t work. Just saying. Home Buttons by [Matej Planinšek] over on Hackaday.IO is a nicely polished project, which aims to take some of the hackiness out of such automation by providing a sleek front end to those automation routines, enabling anyone to rock on over and set one in action without hassle.

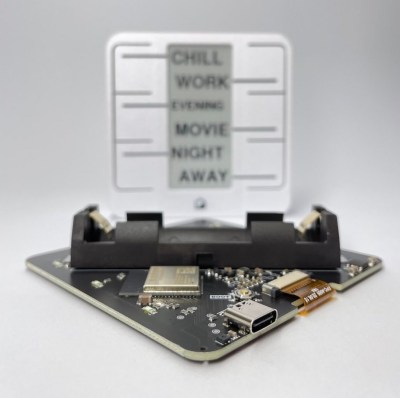
Internal PCB shown in the foreground, with the complete unit behind.The PCB is based around the ESP32-S2-mini which deals with WiFi connectivity and integration with Home Assistant using the usual MQTT protocol. We expect integration with other flavors of home automation would not be difficult to achieve. The center of the unit holds a simple E-Ink display, for that low-standby power. Specifically, the unit chosen is a Good Display GDEY029T94 2.9″ which this scribe can confirm is easy to interface and pretty cheap to purchase from the usual Chinese online vendors. This was matched up with six clicky Alps SKRB-series low-profile tact switches, which sit on either side of the display, and corresponds to a flexure-type affair on the 3D printed front casing. Neat and simple.

The PCB design was provided in Altium format, which you can find on the project GitHub page. This shows a straightforward design, with a few nice little details here and there. The internally mounted 18650 cell is reportedly good for at least a year of operation, but when time, it can be charged via USB. A Xysemi XB8608AF (PDF) protection chip provides appropriate limiting for the 18650 cell, shielding it from the perils of overcharging, discharging, and whatnot. Not that that is likely in this current setup. A Sensiron SHTC3 humidity and temperature sensor is also in there, hanging off the I2C bus, which makes sense for this application.

Home Automation hacks are plenty on these pages, like this scroll-wheel interface, for instance. If all this stuff is looking quite overbearingly complicated to get into, how about starting with a Pico W?

Infinitely Scrolling E-Ink Landscape Never Repeats

Traditional Chinese landscape scrolls can be a few dozen feet long and require the viewer to move along its length to view all the intricate detail in each section. [Dheera Venkatraman] replicated this effect with an E-Ink picture frame that displays an infinitely scrolling, Shan Shui-style landscape that never repeats.

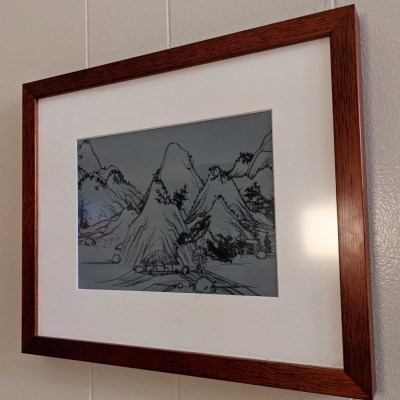
E-ink picture frame with infinitely scrolling landscape
A new landscape every time you look

The landscape never repeats and is procedurally generated using a script created by [Lingdong Huang]. It consists of a single HTML file with embedded JavaScript, so you can run it locally with minimal resources, or view the online demo. It is inspired by historical artworks such as A Thousand Li of Rivers and Mountains and Dwelling in the Fuchun Mountains.

[Dheera]’s implementation uses a 10.3″ E-ink mounted in an off-the-shelf picture frame connected to a Raspberry Pi Zero running a forked version of [Lingdong]’s script. It does a decent job of avoiding the self-illuminated electronic look and creates a piece of decor that you could easily just stand and stare at for a long time.

Computer-generated art is making a lot of waves with the advent of AI models like Dall-E and Stable Diffusion. The ability to bring original art into existence with a simple phrase will have an undeniably profound long-term effect on the art world.

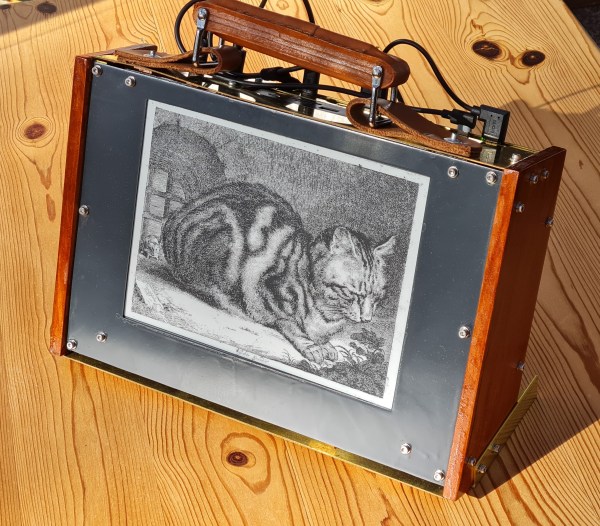
A retro-styled briefcase-shaped computer with an e-ink display

2022 Cyberdeck Contest: Steampunk Cyberdeck Is Made From Wood, Leather, Brass And E-Paper

Laptop screens have come a long way ever since the first LCD-equipped portables hit the market back in the 1980s. But even today’s high-resolution, full-color screens are not ideal for use in direct sunlight: limited contrast and annoying reflections can make reading awkward and working nearly impossible. Electronic-paper displays don’t suffer from those problems, but their low update speed and lack of color limit their use for general computing.

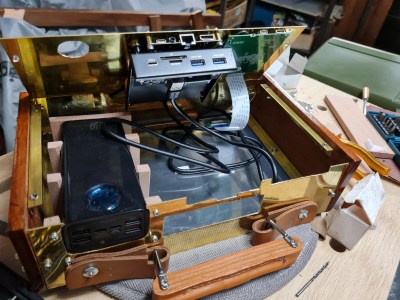
A retro briefcase computer, openedFor some people however, the limitations of e-ink are not a deal-breaker. One of them is [Alleycat], who built a portable computer specifically for use in direct sunlight and equipped it with a 10.3″, 1872×1404 resolution e-ink display. It’s powered by a LattePanda Alpha 800s that runs Windows 10, and is mainly used for text-based tasks.

The LattePanda and the display are mounted inside a beautiful hand-made wooden case with a brass cover and leather straps, which makes it look like a kind of steampunk attaché case. A beefy power bank makes it a truly mobile machine, even though it doesn’t come with a built-in keyboard: [Alleycat] is too much of an ErgoDox fan to include anything inferior with the Steampunk Cyberdeck.

With an update rate of 15 Hz the display is nowhere near as fast as a modern TFT screen, but it looks entirely usable when [Alleycat] demonstrates scrolling in a web browser and even the classic DOS game Alley Cat. In fact, it reminds us of those first-generation LCD screens that were fitted on 286-class laptops back in the day, although with a vastly higher resolution.

We’ve seen a few e-ink based computer designs before, such as this Macintosh Classic II and this e-ink laptop project. The steampunk theme would go well with a hand-crafted metal mouse or this tiny display.

Continue reading “2022 Cyberdeck Contest: Steampunk Cyberdeck Is Made From Wood, Leather, Brass And E-Paper”

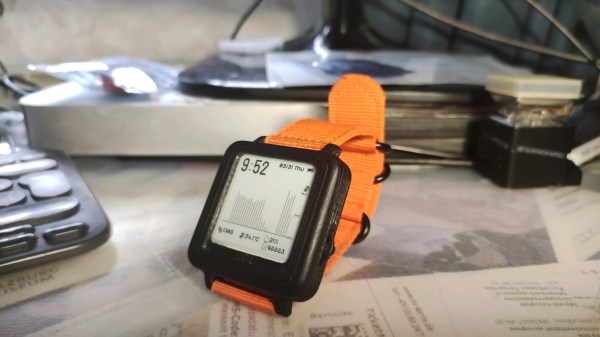
A Tshwatch on a table

TshWatch Helps You Learn More About Yourself

TshWatch is a project by [Ivan / @pikot] that he’s been working on for the past two years. [Ivan] explains that he aims to create a tool meant to help you understand your body’s state. Noticing when you’re stressed, when you haven’t moved for too long, when your body’s temperature is elevated compared to average values – and later, processing patterns in yourself that you might not be consciously aware of. These are far-reaching goals that commercial products only strive towards.

At a glance it might look like a fitness tracker-like watch, but it’s a sensor-packed logging and measurement wearable – with a beautiful E-Ink screen and a nice orange wristband, equipped with the specific features he needs, capturing the data he’d like to have captured and sending it to a server he owns, and teaching him a whole new world of hardware – the lessons that he shares with us. He takes us through the design process over these two years – now on the fifth revision, with first three revisions breadboarded, the fourth getting its own PCBs and E-Ink along with a, and the fifth now in the works, having received some CAD assistance for battery placement planning. At our request, he has shared some pictures of the recent PCBs, too!

Continue reading “TshWatch Helps You Learn More About Yourself”