Slack On The SNES Via Satellite

We love seeing hardware and software from bygone eras getting a new lease on life through modern hacks, as longtime readers can surely attest to. Why leave this stuff to rot in a closet somewhere when it can be pushed into service today? Granted it might not always be the most efficient way to accomplish a task in the 21st century, but at least you’ll net some precious Internet Points for originality.

As a perfect example, take a look at this project which lets you read Slack messages through a Super Nintendo game. If your first thought was that such a thing would involve an unreasonable amount of effort and hoop jumping…then you would be correct. [Bertrand Fan] really had to think outside the box to make this one happen, and even admits a bit of imagination is required on the part of the end-user to use it. But it’s undeniably an original approach, so we hereby bestow the customary Internet Points unto him.

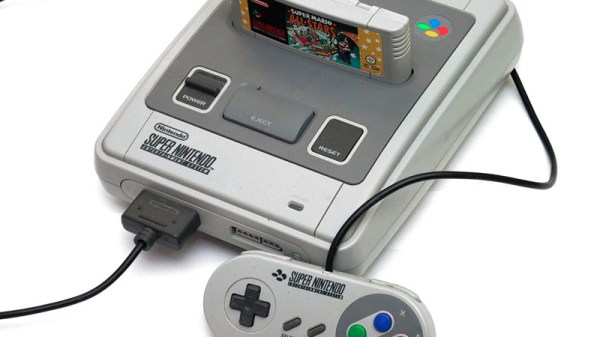
So how does this work, and where do the satellites come in? The key is in a fairly obscure Japanese SNES peripheral called the Satellaview, one of Nintendo’s early attempts at creating an online content delivery system for their consoles. Games designed with Satellaview support would be able to pull down new content from regular satellite broadcasts, not too bad for 1995. This means that if you have the hardware, and happen to own a satellite, you can push your own content into an unmodified SNES. No problem, right?

Alright, [Bertrand] didn’t really use a Satellaview modem plugged into an actual SNES. Plus we’re fairly sure he doesn’t have his own satellite network to broadcast Slack messages with anyway. But it turns out some SNES emulators have support for a virtual Satellaview modem, and there’s even software out there that will let you create new content “downloads” for the system’s included game: BS-X: The Story of The Town Whose Name Was Stolen. All he had to do was connect the dots.

[Bertrand] started by stripping the user interface out of SatellaWave, an open source tool for creating Satellaview content, so that it only need to be provided with an XML file of the content to be “downloaded” by the virtual satellite modem. Using the Slack API, he then came up with way to pull the last 10 messages from a server and push them into his modified version of SatellaWave. Each time somebody posts a new message his software kicks in to produce a new satellite download which automatically gets picked up by the SNES emulator and pops up in the game.

If this is still too practical for you, you can always go all in and run Slack on your Commodore 64.

Continue reading “Slack On The SNES Via Satellite”

Metroid, Zelda, And Castelvania Auto-Mapped With NES Emulation & Heuristics

The NES was one of the flagship consoles of the glorious era that was the 1980s. Many of the most popular games on the platform involved some sort of adventure through scrolling screens — Metroid, Super Mario, and Zelda all used this common technique. For many games, keeping track of the map was a huge chore and meant mapping by hand on graph paper or using the screenshots published in Nintendo Power magazine. These day’s there’s a better way. [Daniel] set out to automatically map these huge two-dimensional worlds, developing software he calls WideNES to do it.

WideNES is an add-on to [Daniel]’s own NES emulator, ANESE. As part of the emulator, WideNES can easily read the various registers of the NES’s Picture Processing Unit, or PPU. The registers of the PPU are used to control the display of the background and sprite layers of NES graphics, and by monitoring these, it is possible to detect and map out the display of levels in various NES games.

It’s an interesting piece of software that relies on a thorough understanding of the NES display hardware, as well as the implementation of some neat tricks to deal with edge cases such as vertical scrolling in The Legend of Zelda or room changes in games like Castlevania — the use of perceptual hashing is particularly genius. There’s source and more available on the project page, including a GitHub link, if you’re interested in getting down to brass tacks.

We’re impressed by the manner in which WideNES is able to so neatly map out these games of yesteryear, and can’t wait to see where the project goes next. [Daniel] notes that it should be possible to integrate into more popular emulators without too much trouble. If that’s not enough, check out this reverse-emulation Nintendo hack.

[Thanks to Michael for the tip!]

VCF East 2018: The Desktop ENIAC

The ENIAC, or Electronic Numerical Integrator and Computer, is essentially the Great Great Grandfather of whatever device you’re currently reading these words on. Developed during World War II for what would be about $7 million USD today, it was designed to calculate artillery firing tables. Once word got out about its capabilities, it was also put to work on such heady tasks as assisting with John von Neumann’s research into the hydrogen bomb. The success of ENIAC lead directly into the development of EDVAC, which adopted some of the now standard computing concepts such as binary arithmetic and the idea of stored programs. The rest, as they say, is history.

But ENIAC wasn’t just hugely expensive and successful, it was also just plain huge. While it’s somewhat difficult for the modern mind to comprehend, ENIAC was approximately 100 feet long and weighed in at a whopping 27 tons. In its final configuration in 1956, it contained about 18,000 vacuum tubes, 7,000 diodes, 70,000 resistors, 10,000 capacitors, and 6,000 switches. All that hardware comes with a mighty thirst for power: the ENIAC could easily suck down 150 kW of electricity. At the time this all seemed perfectly reasonable for a machine that could perform 5,000 instructions per second, but today an Arduino would run circles around it.

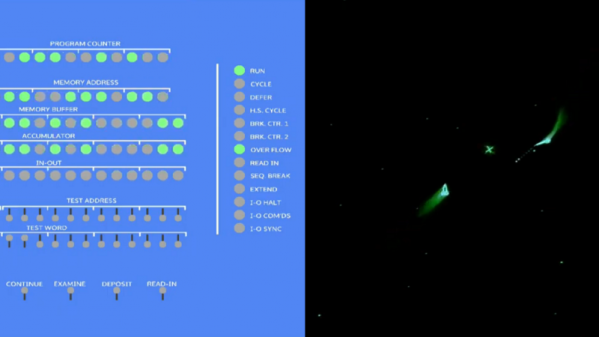
This vast discrepancy between the power and size of modern hardware versus such primordial computers was on full display at the Vintage Computer Festival East, where Brian Stuart demonstrated his very impressive ENIAC emulator. Like any good vintage hardware emulator, his project not only accurately recreates the capabilities of the original hardware, but attempts to give the modern operator a taste of the unique experience of operating a machine that had its heyday when “computers” were still people with slide rules. Continue reading “VCF East 2018: The Desktop ENIAC”

Commodore 64 To Raspberry Pi Conversion Is Respectful & Complete

We’re big fans of taking old computers and giving them a new lease on life, but only when it is done respectfully. That means no cutting, no hot glue, and no gouging out bits to make the new computer fit. It’s best if it can be done in a way that the original parts can be restored if required.

This Commodore 64 to Raspberry Pi conversion from [Mattsoft] definitely fits our criteria here, as it uses the old keyboard, joystick connectors and output portholes for the required authentic look. It does this through the clever use of a couple of 3D-printed parts that hold the Raspberry Pi and outputs in place, mounting them to use the original screw holes in the case.

Combine the Pi with a Keyrah V2 to connect the C64 keyboard and a PowerBlock to juice up all of the parts, and you’ve got a fully updated C64 that can use the keyboard, joysticks or other peripherals, but which also comes with a HDMI port, USB and other more modern goodies.

[Mattsoft] suggests using Combian 64, a C64 emulator for the Pi for the authentic look and feel. Personally, I might use it as a thin client to the big-ass PC with 16 CPU cores and 32GB of memory that’s hidden in my basement, but that’s just because I enjoy confusing people.

A Laser Cut Arcade Cabinet For Ants

Most of us would probably like to have an arcade cabinet at home, but it’s hard to justify the space they take up. Sure it’s an awesome conversation starter when friends are over, and you might even play it regularly, but at some point you’ll look over at the corner and realize there’s probably something more practical you could be doing with that particular section of the room.

Perhaps the solution is to just make a smaller one. You could do one at half scale, or even desktop sized. But why stop there? Why not make one so small that you could put the thing in a drawer when you don’t need it? While it might be more of an academic experiment than a practical entertainment device, [RedPixel] has managed to create just such an easily concealable arcade cabinet out of a Pi Zero and laser cut wood. At only 83 mm high, this may well be the smallest functional arcade cabinet ever made (at least for now).

All of the cabinet parts were drawn in Inkscape and cut out of 3 mm plywood. The buttons and joystick are wired directly to the Pi Zero’s GPIO pins and configured with Adafruit-retrogame. The display is a SPI ILI9163, which [RedPixel] previously documented on his site.

The Pi is running the ever-popular RetroPie, which allows this tiny arcade cabinet to emulate 1000’s of console and arcade games, assuming you can deal with the controls anyway. While [RedPixel] has uploaded a video of his lilliputian cabinet running an emulator, there’s no video of him actually playing the thing. While we don’t doubt that it functions as advertised, gameplay on such a tiny array of inputs must be very difficult.

This may be the smallest functional arcade cabinet to date, but it isn’t without challengers. We’ve covered a number of very impressive builds that manage to invoke the look and feel of a hulking coin-up despite fitting neatly on your desk.

Continue reading “A Laser Cut Arcade Cabinet For Ants”

Emulating A Forgotten UNIX Box

The AT&T 3B2 series of computers are historically significant, being the main porting platform for System V Release 3 UNIX. Unfortunately, the documentation for these computers has been nearly lost to the sands of time. They are, however, architecturally interesting machines, and [Seth Morabito] has been working for some time on reverse engineering them. Now, [Seth] is calling it: his AT&T 3B2/400 emulator is almost complete, resurrecting an ancient machine from the dead by studying UNIX source code.

The architecture of this computer is unlike anything you’ve seen before, but well-suited to a UNIX machine. The chipset is built around the WE32100 manufactured by Western Electric, and includes a WE32101 MMU for all the fancy memory-mapped I/O. The implementation of this computer is fairly complex, with oodles of glue logic, over a dozen PALs, and various support chips for a PLL and DRAM controllers. This is computer architecture the way it was intended: inscrutable, baroque, and with a lot of fancy custom chips.

The emulator for this system is a bit simpler: you can just download and run it with simh. This emulator simulates 1, 2, or 4MB of system memory, one 720KB floppy diskette, and either one or two 30MB, 72MB, or 161MB MFM hard disk drives. Not everything is implemented so far — [Seth] is still working on an 8-port serial card and a network card — but this is a minimum viable system for developing and analyzing the history of UNIX.

Pi Handheld With A Mindblowing Enclosure

The Raspberry Pi is possibly the world’s most popular emulation platform these days. While it was never intended to serve this purpose, the fact remains that a small, compact computer with flexible I/O is ideally suited to it. We’ve featured a multitude of builds over the years using a Pi in a mobile form factor to take games on the go. [Michael]’s build, however, offers a lot more than a few Nintendo ROMs and some buttons from eBay. It’s a tour de force in enclosure design.

The build starts with the electronics. In 2017 it’s no longer necessary to cobble together five different accessory boards to handle the controls, battery charging, and display. Boards like Kite’s Super All In One exist, handling everything necessary for a handheld game console. With this as a starting point, he then set out to recreate Nintendo’s classic Game Boy, with a few tweaks to form and function.

It’s a textbook example of smart planning, design, and execution. We are taken through the process of creating the initial CAD drawings, then combining 3D printed parts with wood and carbon fibre for a look that is more akin to a high-end piece of hi-fi gear than anything related to gaming. The attention to detail is superb and the write-up makes it look easy, while [Michael] shares tips on how to safely cut carbon fibre to make your own buttons.

The final results are stunning, and it’s a great example of why a fine piece of wood is always a classy way to go for an enclosure. For another great example, try this walnut keyboard, or check out the roots of the Raspberry Pi Game Boy movement.