Simple Jig Gives Plastic Homes To Orphaned Projects

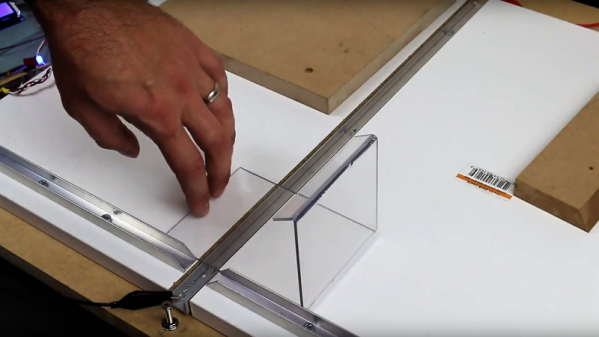
Look around your bench and chances are pretty good that there’s a PCB or scrap of perfboard or even a breadboard sitting there, wires and LEDs sprouting off it, doing something useful and interesting. Taking it to the next level with a snazzy enclosure just seems too hard sometimes, especially if you don’t have access to a 3D printer or laser cutter. But whipping up plastic enclosures can be quick and easy with this simple acrylic bending outfit.

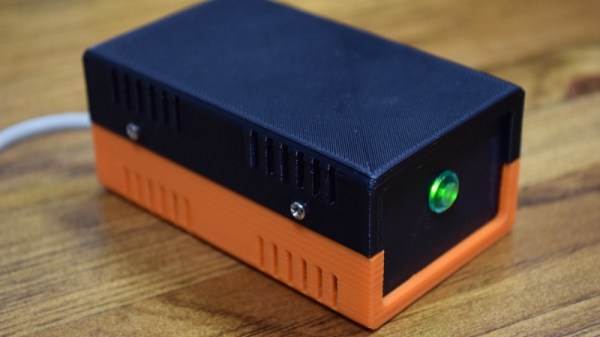
At its heart [Derek]’s bending rig is not much different from any of the many hot-wire foam cutters we’ve featured. A nichrome wire with a tensioning spring is stretched across a slot in a flat work surface. The slot contains an aluminum channel to reflect the heat from the wire upward and to protect the MDF bed; we wonder if perhaps an angle section set in a V-groove might not be more effective, and whether more vertical adjustment range would provide the wider heating area needed for wider radius bends. It works great as is, though, and [Derek] took the time to build a simple timer to control the heating element, for which of course he promptly built a nice looking enclosure.

We can imagine the possibilities here are endless, especially if you use colored acrylic or Lexan and add in some solvent welding. We’ve covered acrylic enclosure techniques before; here’s a post that covers the basics.

Continue reading “Simple Jig Gives Plastic Homes To Orphaned Projects”

Pi Handheld With A Mindblowing Enclosure

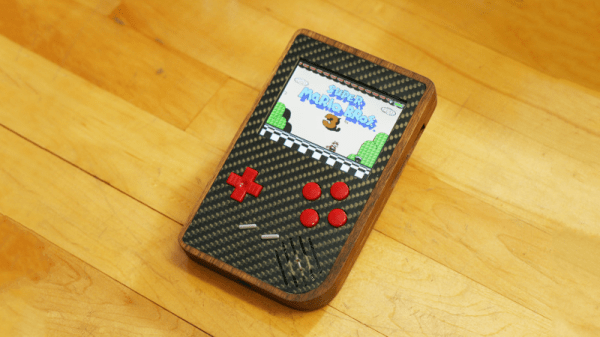
The Raspberry Pi is possibly the world’s most popular emulation platform these days. While it was never intended to serve this purpose, the fact remains that a small, compact computer with flexible I/O is ideally suited to it. We’ve featured a multitude of builds over the years using a Pi in a mobile form factor to take games on the go. [Michael]’s build, however, offers a lot more than a few Nintendo ROMs and some buttons from eBay. It’s a tour de force in enclosure design.

The build starts with the electronics. In 2017 it’s no longer necessary to cobble together five different accessory boards to handle the controls, battery charging, and display. Boards like Kite’s Super All In One exist, handling everything necessary for a handheld game console. With this as a starting point, he then set out to recreate Nintendo’s classic Game Boy, with a few tweaks to form and function.

It’s a textbook example of smart planning, design, and execution. We are taken through the process of creating the initial CAD drawings, then combining 3D printed parts with wood and carbon fibre for a look that is more akin to a high-end piece of hi-fi gear than anything related to gaming. The attention to detail is superb and the write-up makes it look easy, while [Michael] shares tips on how to safely cut carbon fibre to make your own buttons.

The final results are stunning, and it’s a great example of why a fine piece of wood is always a classy way to go for an enclosure. For another great example, try this walnut keyboard, or check out the roots of the Raspberry Pi Game Boy movement.

This 3D Printer Enclosure Takes Ventilation Seriously

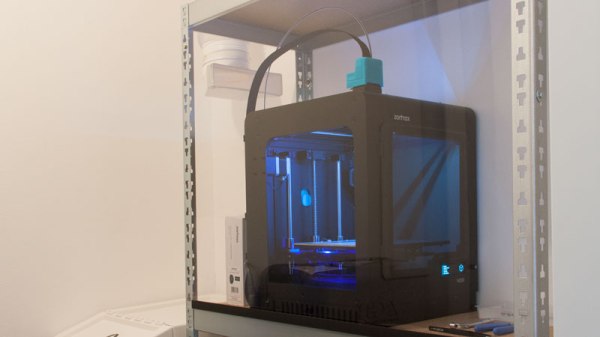
A lot of work has gone into hacking common items (like IKEA Lack tables) into useful and effective 3D printer enclosures, but [Stefan.Lu] has taken a harder look at the whole business. He decided to start with some specific goals that were unmet by current solutions. In particular, he wanted to allow for proper ventilation and exhaust. Not only do some filaments smell bad, but there is ongoing research around UFP (ultra-fine particles) emitted from the 3D printing process. Just in case UFPs turn out to be this generation’s asbestos or something equally terrible, [Stefan.Lu] felt that a bit more work and expense up front would be worth it to meet his goals of a ventilation-friendly enclosure.

In addition to ventilation and exhaust, [Stefan.Lu] wanted to locate the printer at a comfortable working height, and preferred not to build things entirely from scratch. He did it for well under $200 by using a common storage rack shelf as the foundation and acrylic panels for the sides, and a few thoughtful uses of basic hardware. The angled metal supports made for easy attachment points and customization, and a combination of solid shelf plus anchoring to the wall put an end to vibrations. The side panels are secured by magnets, and [Stefan.Lu] points out that if you don’t have access to a laser cutter, cast acrylic withstands drilling and cutting better than extruded acrylic.

The final touch was a fire alarm, which is an excellent precaution. 3D printers are heating elements with multiple moving parts and they often work unattended. It makes sense to have a fire alarm around, or at least not enclose the device in highly flammable material in the first place.

Finishing A Mini PS One: SLA Vs Extruded

One of the biggest lessons learned by first time 3D printer users is that not everything can be replicated and a printer is a machine and not a miracle worker. It has limitations in terms of what it can print as well as the quality of the output. For teeny tiny objects, the 0.8 mm nozzle will just not do and with resin printers on the rise, the question is, ‘are extruder printers obsolete?’

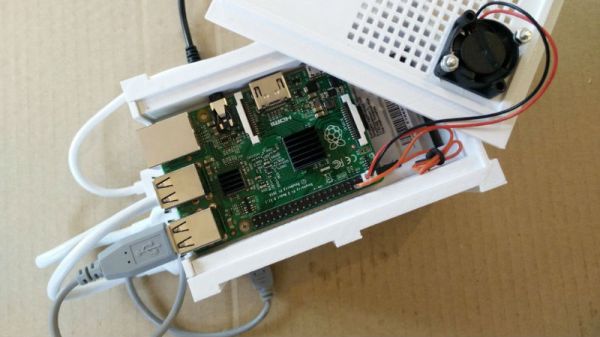
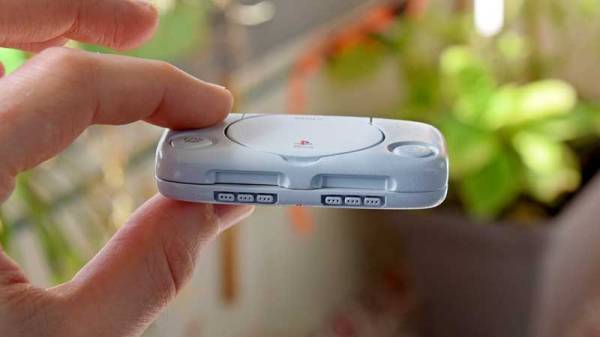
[Dorison Hugo] has made a mini version of the PS One using a Raspberry Pi which you can play games one. The kicker is that in his video, he does a comparison of an SLA printer and a cheaper extruder one for his enclosure. He goes through a laundry-list of steps to print, file, fill, repair, sand paint, sand, paint etc to try to get a good model replica of the original PS One. He then proceeds to print one with an SLA printer and finishes it to compare with the first model. The decals are printed on an inkjet for those who are wondering, and there is a custom cut heatsink in there as well that was salvaged from an old PC.

Spoiler alert! The SLA wins but in our view, just slightly. The idea is that with enough elbow grease and patience, you can get pretty close to making mini models with a cheaper machine. The SLA print needs work too but it is relatively less and for detailed models, it is a much better choice. We really enjoyed watching the process from start to finish including the Dremel work, since it is something that is forgotten when we see a 3D print. Creating something of beauty takes time and effort which stems from a passion to make.

Take a look at the video below of the time lapse and for  SLA printer fans, have a look at the DIY SLA printer which is a Hackaday Prize Entry this year. Continue reading “Finishing A Mini PS One: SLA Vs Extruded”

Laser Cut Enclosures From Eagle Files

Once a project is finished, it might still need a decent enclosure. While it’s possible to throw a freshly soldered PCB in a standard enclosure, or piece of Tupperware, or cardboard box, these options don’t have the fit and finish of something custom-made. If you have a laser cutter sitting around, it’s a simple matter to cut your own enclosure, but now that process is much easier thanks to [Ray]’s latest project.

Since [Ray] was already using Eagle to design his PCBs, it seemed like a short step to using the Eagle files to design the enclosure as well. The script runs from those files and creates everything necessary to send to the laser cutter for manufacturing. Right now, [Ray] points out that the assembly time for each enclosure can be high, and this method might not be suited for large numbers of enclosures. Additionally, some of the calculations still need to be done by hand, but there are plans to automate everything in the future.

For single projects, though, this script could cut a lot of time off of designing an enclosure and building it from scratch, and could also help improve aesthetics over other options like 3D printed enclosures. Of course, if you have a quality 3D printer around but no laser cutter, there are options for custom enclosures as well.

This Way To The Ingress: Keeping Stuff Dry And Clean With IP And NEMA

When designing a piece of hardware that has even the faintest chance of being exposed to the elements, it’s best to repeat this mantra: water finds a way. No matter how much you try to shield a project from rain, splashing, or even just humid air, if you haven’t taken precautions to seal your enclosure, I’ll bet you find evidence of water when you open it up. Water always wins, and while that might not be a death knell for your project, it’s probably not going to help. And water isn’t the only problem that outdoor or rough-service installations face. Particle intrusion can be a real killer too, especially in an environment where dust can be conductive.

There’s plenty you can do to prevent uninvited liquid or particulate guests to your outdoor party, but it tends to be easier to prevent the problem at design time than to fix it after the hardware is fielded. So to help you with your design, here’s a quick rundown of some standards for protection of enclosures from unwanted ingress.

Continue reading “This Way To The Ingress: Keeping Stuff Dry And Clean With IP And NEMA”

Wooden Laptop Enclosure: New Life For Old Thinkpad

Technology is designed to serve us and make our lives better. When a device gets outdated, it is either disposed of or is buried in a pile of junk never to be seen again. However, some individuals tend to develop a certain respect for their mechanical servants and make an effort to preserve them long after they have become redundant.

My relationship with my first laptop is a shining example of how to hold onto beloved hardware way too long. I converted that laptop into a desktop with a number of serious modifications which helped me learn about woodworking along the way. Maybe it’s more pragmatic to just buy new equipment. But you spend so much time each day using your devices. It is incredibly satisfying to have a personal connection that comes from pouring your own craftsmanship into them.

Why the Effort?

IBM Thinkpad R60 via Notebook Review

The laptop in question is an IBM R60 which I lugged around during the first three years after I graduated. It was my companion during some tough times and naturally, I developed a certain attachment to it. With time its peripherals failed including the keyboard which housed the power switch and it was decided that the cost of repair would outweigh its usefulness.

Then came the faithful day when I was inspired to make something with the scrap wood that had accumulated in my workshop. This would be my second woodworking project ever and I did not have the professional heavy machinery advertised in most YouTube videos. Yet I had two targets in mind with this project.

  1. Make the R60 useful again.
  2. Learn about woodworking for creating enclosures for future projects.

Armed with mostly hand tools, a drill and a grinder that was fitted with a saw blade, I started with the IBM R60 to all-in-one PC mod. Following is a log of things I did and those I regret not doing a.k.a. lessons learned. Read on.

Continue reading “Wooden Laptop Enclosure: New Life For Old Thinkpad”