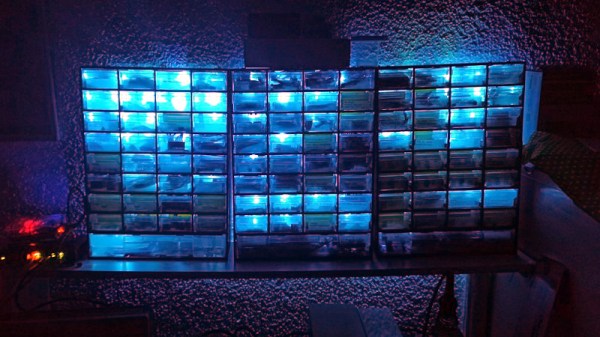
Today’s tale of being in the right place at the right time comes from [fabe1999], who was doing an intern gig at the airport when the controller on their split-flap display bought a one-way ticket going south. They were just going to throw away thousands of these letters and replace them with monitors, but the intern intervened.
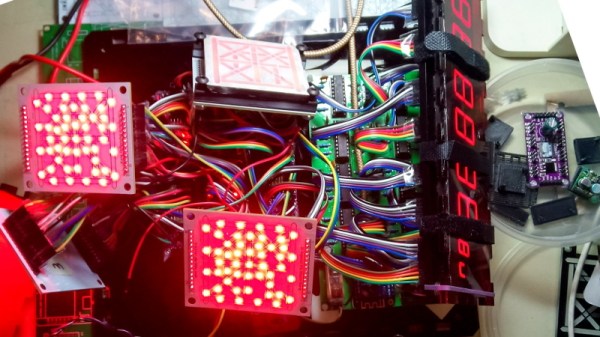
[fabe1999] grabbed an armload, took them home, and set about making them flap again, one letter at a time. An ATtiny worked okay, but it wasn’t really fast enough to flip them at their full clacking potential, so [fabe1999] switched to an ESP8266. So now there is one ESP for each of the 20 characters, and another that runs a web server where text can be directly entered for immediate display.
Each letter uses two sensors to flap to the right letter. The first one acts as a start sensor, detecting the blackness of a blank character. Another sensor counts the letters and makes the ESP stop the motor on the right one. So far, [fabe1999] hasn’t figured out how to recognize when a blank character can stay blank, so they flap all the way around back to blank for now. It certainly adds to the rich, flappy sound, but that can’t be good for the long-term life of the letters. Your flight is now departing for Post Break Island, where the letters are spending part of their retirement showing song titles from Spotify.
No chance of split flaps falling into your lap? Here’s a tip: you can fab your own flip.
Continue reading “Airport Split-Flap Letters Carry On As Spotify Display”