Trials And Tribulations In Sending Data With Wires

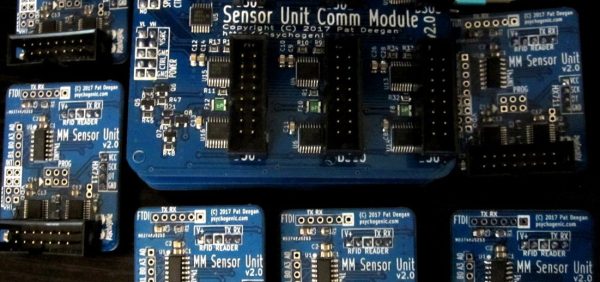
When working on a project that needs to send data from place to place the distances involved often dictate the method of sending. Are the two chunks of the system on one PCB? A “vanilla” communication protocol like i2c or SPI is probably fine unless there are more exotic requirements. Are the two components mechanically separated? Do they move around? Do they need to be far apart? Reconfigurable? A trendy answer might be to add Bluetooth Low Energy or WiFi to everything but that obviously comes with a set of costs and drawbacks. What about just using really long wires? [Pat] needed to connect six boards to a central node over distances of several feet and learned a few tricks in the process.
When connecting two nodes together via wires it seems like choosing a protocol and plugging everything in is all that’s required, right? [Pat]’s first set of learnings is about the problems that happen when you try that. It turns out that “long wire” is another way to spell “antenna”, and if you happen to be unlucky enough to catch a passing wave that particular property can fry pins on your micro.

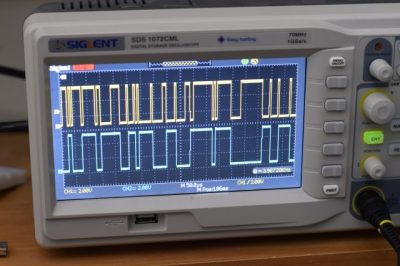
Plus it turns out wires have resistance proportional to their length (who would have though!) so those sharp square clock signals turn into gently rolling hills. Even getting to the point where those rolling hills travel between the two devices requires driving drive the lines harder than the average micro can manage. The solution? A differential pair. Check out the post to learn about one way to do that.

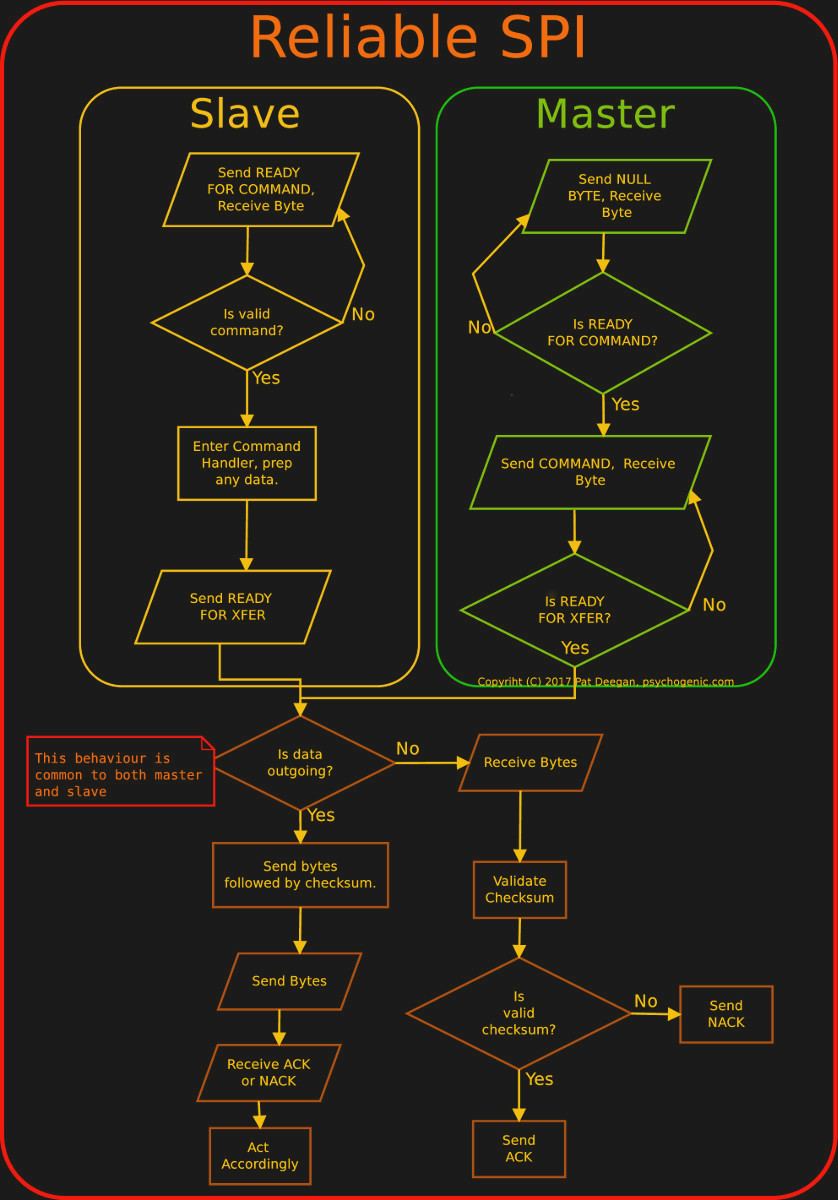
It looks like [Pat] needed to add USB to this witches brew and ended up choosing a pretty strange part from FTDI, the Vinculum II. The VNC2 seemed like a great choice with a rich set of peripherals and two configurable USB Host/Peripheral controllers but it turned out to be a nightmare for development. [Pat]’s writeup of the related troubles is a fun and familiar read. The workaround for an incredible set of undocumented bad behaviors in the SPI peripheral was to add a thick layer of reliability related messaging on top of the physical communication layer. Check out the state machine for a taste, and the original post for a detailed description.

Silicon Bugs In The FTDI FT232R, And A Tidy RF VCO Project

[Scott Harden] wrote in to tell us of some success he’s having using the FT232 chip to speak SPI directly from his laptop to a AD98850 digital signal generator. At least that was his destination. But as so often in life, more than half the fun was getting there, finding some still-unsolved silicon bugs, and (after simply swapping chips for one that works) potting it with hot glue, putting it in a nice box, and putting it up on the shelf.

In principle, the FTDI FT232 series of chips has a bit-bang mode that allows you to control the individual pins from a fairly simple API on your target computer, using their drivers and without installing anything on basically any platform. We wrote this feature up way back in 2009, and [Scott] was asking himself why he doesn’t see more hacks taking advantage of bit-bang mode.

“Square” waves

Then he answered his own question the hard way, by spending hours “debugging” his code until he stumbled on the FTDI errata note (PDF), where they admit that bit-bang mode doesn’t get timings right at all on the FT232R and FT232RL parts. FTDI has made claims that they fixed the bug in subsequent chip revisions, but the community has not been able to confirm it. If you want to use bit-bang mode, which is plenty cool, steer clear of the FT232R chips — the ones found in the ever-popular FTDI cables and many adapter dongles.

The good news here is twofold. First, now you know. Second, bit-bang mode is tremendously useful and it works with other chips from the vendor. Particularly, the FT232H and FT230X chips work just fine, among others. And [Scott] got his command-line controlled digital VCO up and running. All’s well that ends well?

We’ll wrap up with questions for the comment section. Do other manufacturers’ cheap USB-serial chips have an easily accessible bit-bang mode? Are any of you using USB bit-bang anyway? If so, what for?

3D Printed ESP8266 Programming Jig

The various development boards such as the NodeMCU or Wemos D1 make working with the ESP8266 an absolute breeze. If they have a downside, it is that they are larger than the bare ESP2866, and of course cost a bit more. Just as with the Arduino, once you have the wiring sorted out and the code more or less finalized, your best bet is to ditch the unnecessary support hardware and use the bare module to save space and money in your final design.

The design took a few revisions to get right

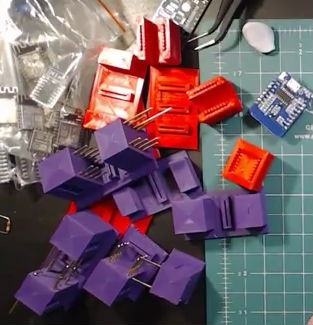
Unfortunately, the ESP8266 form factor isn’t terribly forgiving when it comes time for hooking up a programmer. Rather than having to solder a serial adapter to the chip to flash it, [Ryan] came up with a slick 3D printed programming jig that uses pogo pins. If you have to program these boards in bulk, a jig like this can save a massive amount of time and aggravation.

Beyond the 3D printed holder for the pogo pins, this programmer uses a FTDI USB-to-serial adapter, a couple passive components to smooth out the power going into the chip, and a couple buttons.

In the video after the break, [Ryan] walks through the many iterations it took to get the 3D printed aspect of the jig worked out. The design went through a few rather large revisions, including one that fundamentally changed the whole form factor. Even with the jig now working, he mentions that he might circle back around and try it from a different angle.

Programming jigs are a staple of electronics manufacturing, and we’ve covered quite a few that have helped transformed a proof of concept into a small scale production runs.

Continue reading “3D Printed ESP8266 Programming Jig”

USB To Quad Serial Port Adapter Offers TTL, Isolated Ports

[Felipe Navarro] wanted to add a few serial ports to his computer, but couldn’t find an adapter that suited his needs. So, he built his own.

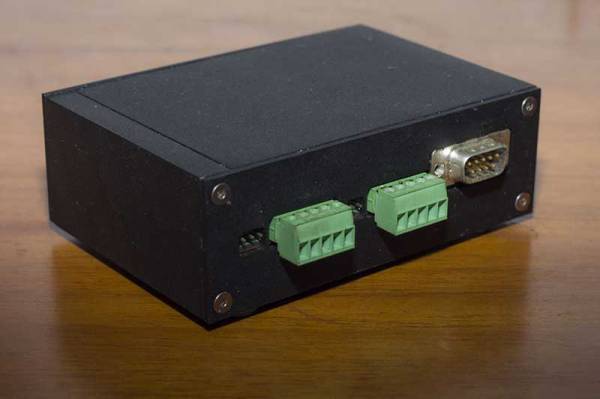
His Quad Serial device is a nicely designed converter that offers four serial ports, two of which are isolated to avoid blowing up too much stuff if things go wrong. The other two are TTL ports, but with an interesting twist: feed them any voltage between 1.8 V and 5 V, and they will happily work with it, which is a lot easier than messing about with TTL to RS-232 converters.

It’s all built around an FTDI FT4232H chip, which has drivers available for most OSes, so it should work with pretty much anything. And, as [Felipe] notes, this chip has not been cloned, so you won’t have to worry about the FTDI drivers disabling your device without warning.  Well, not at the moment, anyway. We did cover a similar quad serial port adapter last year, but this one is a bit more developed, with both DE-9 and screw terminal connectors available.

Distributed Air Quality Monitoring Via Taxi Fleet

When [James] moved to Lima, Peru, he brought his jogging habit with him. His morning jaunts to the coast involve crossing a few busy streets that are often occupied by old, smoke-belching diesel trucks. [James] noticed that his throat would tickle a bit when he got back home. A recent study linking air pollution to dementia risk made him wonder how cities could monitor air quality on a street-by-street basis, rather than relying on a few scattered stations. Lima has a lot of taxis, so why wire them up with sensors and monitor the air quality in real-time?

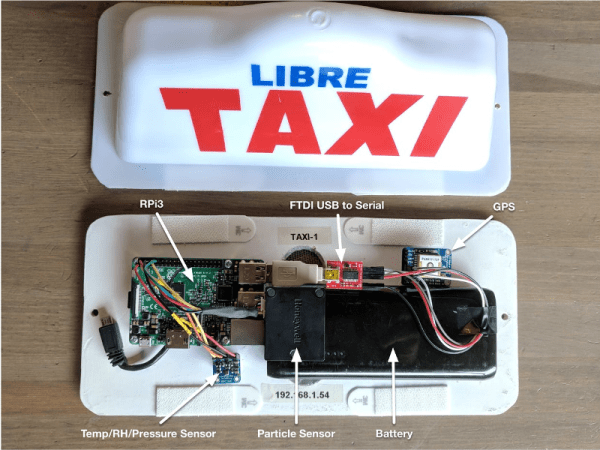
This taxi data logger’s chief purpose is collect airborne particulate counts and illustrate the pollution level with a Google Maps overlay. [James] used a light-scattering particle sensor and a Raspi 3 to send the data to the cloud via Android Things. Since the Pi only has one native UART, [James] used it for the particle sensor and connected the data-heavy GPS module through an FTDI serial adapter. There’s also a GPS to locate the cab and a temperature/humidity/pressure sensor to get a fuller environmental picture.

Take a ride past the break to go on the walk through, and stick around for the testing video if you want to drive around Lima for a bit. Interested in monitoring your own personal air quality? Here’s a DIY version that uses a dust sensor.

Continue reading “Distributed Air Quality Monitoring Via Taxi Fleet”

Pogo Pin Serial Adapter Thing

A few weeks ago, I was working on a small project of mine, and I faced a rather large problem. I had to program nearly five hundred badges in a week. I needed a small programming adapter that would allow me to stab a few pads on a badge with six pogo pins, press a button, and move onto the next badge.

While not true for all things in life, sometimes you need to trade quality for expediency. This is how I built a terrible but completely functional USB to serial adapter to program hundreds of badges in just a few hours.

Continue reading “Pogo Pin Serial Adapter Thing”

Fixing Fake FTDIs

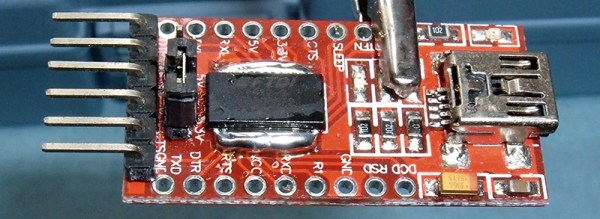
If you know where to go on the Internet, you can pick up an FTDI USB to Serial adapter for one dollar and sixty-seven cents, with free shipping worldwide. The chip on this board is an FTDI FT232RL, and costs about two dollars in quantity. This means the chips on the cheap adapters are counterfeit. While you can buy a USB to serial adapter with a legitimate chip, [Syonyk] found a cheaper solution: buy the counterfeit adapters, a few genuine chips, and rework the PCB. It’s brilliant, and an excellent display of desoldering prowess.

Why is [Syonyk] replacing non-genuine chips with the real FTDI? The best reason is FTDIgate Mk. 1, where the official FTDI driver for Windows detected non-genuine chips and set the USB PID to zero. This bricked a whole bunch of devices, and was generally regarded as a bad move. FTDIgate Mk. 2 was a variation on a theme where the FTDI driver would inject garbage data into a circuit if a non-genuine part was found. This could also brick devices. Notwithstanding driver issues, the best reason for swapping out fake chips for real ones is the performance at higher bit rates; [Syonyk] is doing work at 3 Mbps, and the fake chips just don’t work that fast.

To replace the counterfeit chip, [Syonyk] covered the pins in a nice big glob of solder, carefully heated both sides of the chip, and slid the offending chip off when everything was molten. A bit of solder braid, and the board was ready for the genuine chip.

With the new chip, the cheap USB to serial adapter board works perfectly, although anyone attempting to duplicate these efforts might want to look into replacing the USB mini port with a USB micro port.