Hands On With The Smallest Game Boy Ever Made

The PocketSprite is the tiniest fully-functional Game Boy Color and Sega Master System emulator. Not only is it small enough to fit in your pocket, it’s small enough to lose in your pocket. It’s now available as a Crowd Supply campaign, and it’s everything you could ever want in a portable, WiFi-enabled, fully hackable video game console. It also plays Witcher 3. And probably Crysis, because of the meme.

This has been a year and a half in the making. The first hardware version of the PocketSprite was revealed at the 2016 Hackaday Superconference by hardware engineer extraordinaire [Sprite_TM]. As [Sprite] has a long list of incredibly impressive hardware hacks like installing Linux on a hard drive and building a Matrix of Tamagotchis, he always has to keep pushing deep into the hardware frontier.

In 2016, [Sprite] showed off the tiniest Game Boy ever, powered by the then brand-spankin’ new ESP32. This was released as Open Source, with the hope that a factory in China would take the files and start pumping out mini Game Boys for everyone to enjoy. Now, a year and a half later, it’s finally happened. In a collaboration with manufacturing wizard [Steve K], [Sprite] is the mastermind behind TeamPocket. The pocket-sized Game Boy-shaped emulator is now real. This is our hands-on review.

Continue reading “Hands On With The Smallest Game Boy Ever Made”

Repairing A Sunburned Game Boy Screen

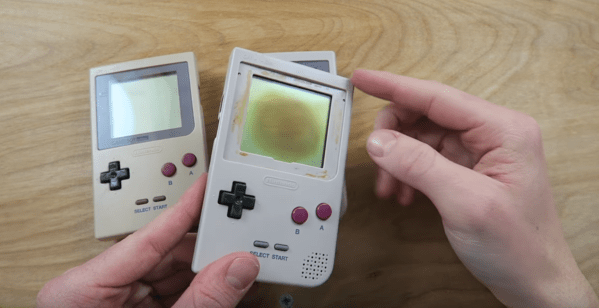
The original Game Boy is a classic. Sure, it had no backlight, but there is something special about playing on that classic green screen. Unfortunately, some of these older systems are suffering a terrible fate — screen burn. Game Boy’s played best with lots of light — especially out in the sun. But that same sun did terrible things to the screen. A black splotch in the center of the LCD is the telltale sign of a burned Game Boy. You might think that screen replacement is the only option, but [The Retro Future] shows us how to repair this issue.

A reflective LCD is a layer cake made up of polarizers, two panes of glass, and a reflector. The burns often seen on Game Boy screens usually are in the polarizer and the optically clear glue which attaches the plastic polarizer to the glass. We’re guessing these burns happen when someone leaves their Game Boy out in the sun. Between the sun rays directly striking the top polarizer and the rays bounced back from the reflector at the rear of the screen, that poor polarizer doesn’t stand a chance.

Repairing the burn is a delicate operation, as one false move could crack the thin LCD glass. The first step is to carefully peel off the burned polarizer. This leaves a mess of dried glue, which can be scraped off or dissolved with alcohol. A new linear polarizer can then be placed on the front of the screen. [The Retro Future] chose not to glue the polarizer, but we’re betting some UV cure LOCA (Liquid Optically Clear Adhesive) from a cell phone screen protector would do the trick.

If you love the look of the classic Game Boy, but want to play just about any classic game, grab a Raspberry Pi zero, and build a retro Pi Boy.

Continue reading “Repairing A Sunburned Game Boy Screen”

Raspberry Pi Compute Module 3 In A GameBoy Original

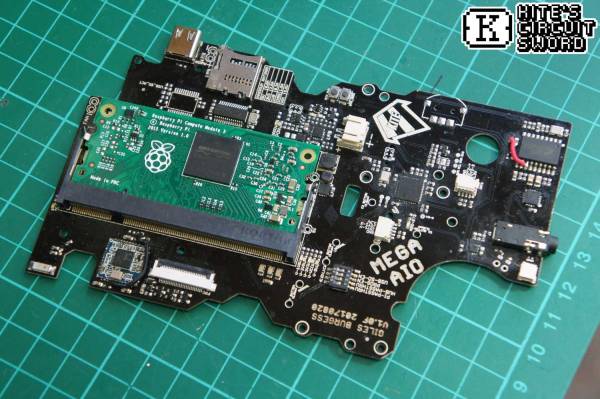
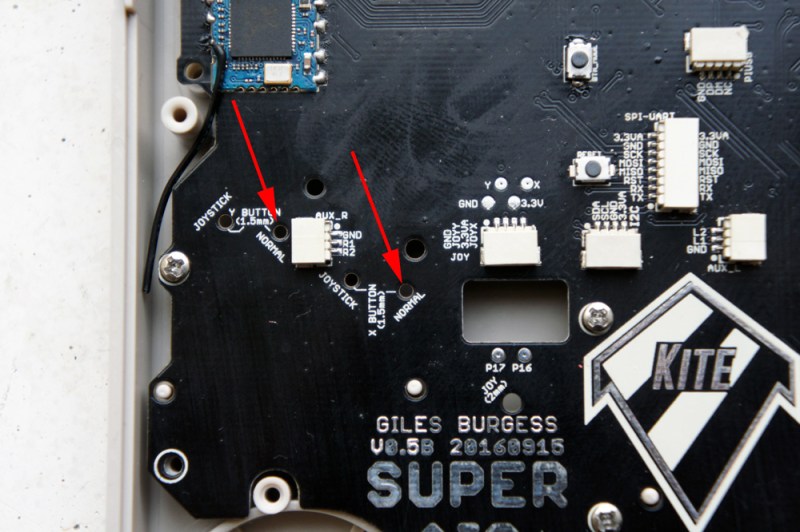
[Kite] has been making custom PCBs for GameBoys for a long time. Long enough, in fact, that other people have used his work to build even more feature-rich GameBoy platforms. Unfortunately some of their work had stagnated, so [Kite] picked it up and completed a new project: a GameBoy that uses a Raspberry Pi running on his upgraded GameBoy PCB.

At its core the build uses a Raspberry Pi 3, but one that has been shrunk down to the shape of a memory module, known as the Compute Module 3. (We featured the original build by [inches] before, but [Kite] has taken it over since then.) The upgrade frees up precious space in the GameBoy case to fit the custom PCB that was originally built by [Kite], and also eliminates the need to cut up a Raspberry Pi and solder it to the old version of his PCB. The build is very clean, and runs RetroPie like a champ. It has some additional features as well, such as having an HDMI output.

For anyone looking for that retro GameBoy feel but who wants important upgrades like a backlit color screen, or the ability to play PSP games, this might be the build for you. The video below goes into details about how it all fits together. If you’re looking for more of a challenge in your GameBoy hacks, though, there’s an ongoing challenge to build the tiniest GameBoy possible as well.

Continue reading “Raspberry Pi Compute Module 3 In A GameBoy Original”

Using A Logic Analyzer To Generate Screenshots From A Game Boy

Wouldn’t you like to go back to a dead handheld and extract the proof of your 90s-era high scores? Of course you would.

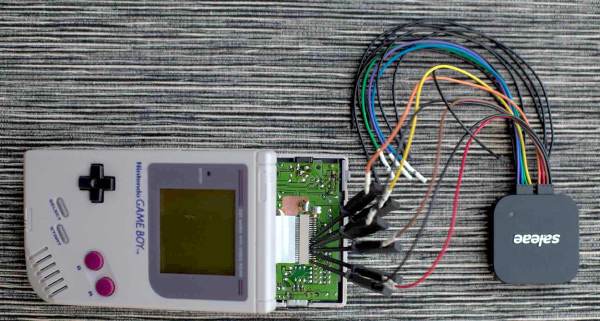
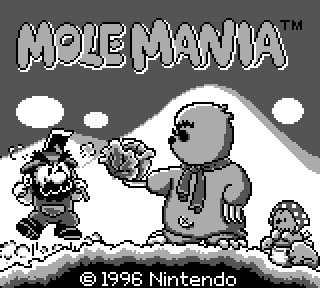
[svendahlstrand] bought his first logic analyzer, a Logic 8 from Saleae and decided to play around with an old Game Boy. He opened up the handheld with a tri-point screwdriver and hooked six wires up to the LCD data bus, generating screen shots from the logged data. He got screens from Solomon’s Club, Mole Mania, Kid Dracula, and more.

The first few attempts were fraught with mishap as [sven] worked to figure out the settings of his new analyzer. In one instance he had the DATA 0 and DATA 1 signals reversed, also reversing two of the gray values. After figuring it out he posted his LCD sniffing tutorial to GitHub, where he also has a C program for manually piecing together the screen shots, pixel by pixel.

Thanks to [sven] for posting this project to our recent Everything You Need to Know About Logic Probes post.


HDMI Out On The Gameboy Advance

The Gameboy line of handheld systems from Nintendo have been wildly popular, but lack one major thing – a video output. This can be troublesome if you’d like to view the games on a bigger screen, for more comfortable gaming sessions or detail work like producing chiptunes. One option is to use the Gameboy Player for the Gamecube, however that system’s age means you’re out of luck if you want a crisp, clear picture on a modern digital display. Wouldn’t it be great if you could get HDMI output from a Gameboy Advance Instead?

A family resemblance?

When it comes to working with video signals, FPGAs can’t be beat. [Stephen] leverages an FPGA in this project to read the GBA’s video signals and convert them to the modern digital format. Unfortunately, it’s not a seamless install – limited space means the GBA’s screen must be entirely removed, replaced with the adapter in a manner resembling the terrifying Facehugger.

Packaging aside, the output from the device is nothing short of stunning – the graphics are absolutely crystal clear when displayed on a modern HDMI television. This is because the FPGA is capturing the exact digital output from the GBA, and piping it out as HDMI – there’s no analog fuzziness, conversions or noise to spoil the image. Output is a tasty 1280×720, upscaled from the GBA’s original resolution. For more details, check out the forum thread where [Stephen] runs through the build.

The only thing missing  is details – we’d love to know more about the exact hardware used, and any trials and tribulations during the build! As far as we can tell, the build doesn’t stop at just video – a SNES controller is used instead of the original buttons, and we have a feeling sound is being passed over the HDMI channel as well sound is piped to the TV from the GBA’s headphone port.

It’s great to see these projects for old hardware come out – modern hardware has the muscle to achieve things previously unthinkable on retro consoles. We’ve seen similar projects before – like adding VGA to an original Game Boy.

Continue reading “HDMI Out On The Gameboy Advance”

Go Portable With GameCube Advance SP

Off the hop, we love portable consoles. To be clear, we don’t just mean handhelds like the 3DS, or RetroPie builds, but when a maker takes a home console from generations past and hacks a childhood fantasy into reality — that’s amore. So, it’s only natural that [Bill Paxton]’s GameCube re-imagined as a Game Boy Advance SP has us enthralled.

Originally inspired by an early 2000’s imagined mockup of a ‘next-gen’ Game Boy Advance, [Paxton] first tried to wedge a Wii disk drive into this build. Finding it a bit too unwieldy, he opted for running games off of SD cards using a WASP Fusion board instead. Integrating the controller buttons into the 3D printed case took several revisions. Looking at the precise modeling needed to include the L and R shoulder buttons, that is no small feat.

Sadly, this GameCube SP doesn’t have an on-board battery, so you can’t go walking about with Windwaker. It does, however, include a 15 pin mini-din VGA-style port to copy game saves to the internal memory card, a switching headphone jack, amp, and speakers. Check it out after the break!

Continue reading “Go Portable With GameCube Advance SP”

Hackaday Prize Entry: WiFi Game Boy Cartridge

[DaveDarko] has entered a unique project into this years Hackaday Prize a WiFi Game Boy Cartridge. If you are active over at Hackaday.io I’m sure you’ll have run across Dave at some point or other, maybe we need to start charging him rent.

The aim of this project is to create a WiFi enabled Game Boy cartridge using an ESP32 which would then enable the user to do a number of different things. For example, it could be used as a portable war driving device. You could drive around scanning local WiFi networks all from the comfort of a classic Game Boy bringing back fond memories of your childhood.

This WiFi Game Boy cartridge may even be capable of some extremely light web browsing or be used as a unique controller for all your Internet connected things. Either way this project looks promising, We look forward to seeing how this progresses in the coming months.