Pac Man On The Colour Computer 3

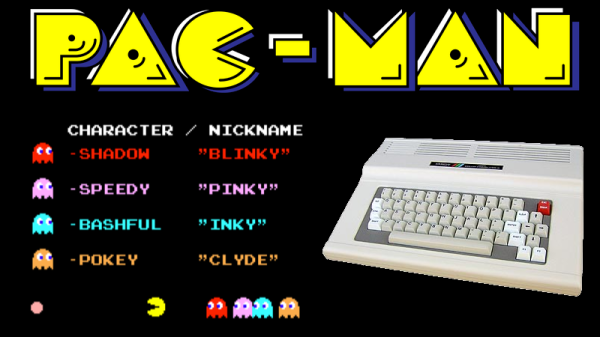
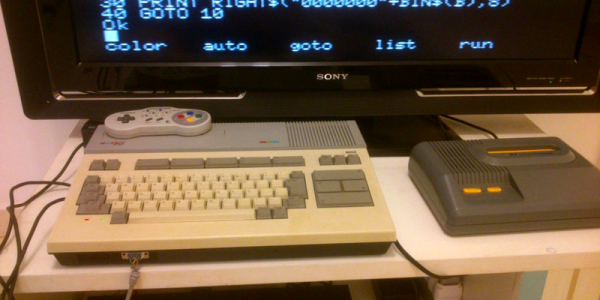
The 1980s were the heyday of the venerable Z80, a processor that found its way into innumerable home computers, industrial systems, and yes — arcade machines. However, not everyone had a Z80 based machine at home, and so sometimes porting is required. [Glen] is tackling this with a port of Pac Man to the Radio Shack Colour Computer 3.

The key to any good arcade port is authenticity – the game should feel as identical to the real thing as possible. The Atari 2600 port got this famously wrong. Porting to the Colour Computer 3 is easier in theory – with more RAM, a Motorola 6809 CPU running at a higher clock rate, and a more powerful graphics subsystem, fewer compromises need to be made to get the game to run at a playable speed.

The way [Glen] tackled the port is quite handy. [Glen] built a utility that would scrape a disassembled version of the original Pac Man Z80 code, look up the equivalent 6809 CPU instruction, and replace it, while placing the original Z80 code to the side as a comment. Having the original code sitting next to the ported instructions makes debugging much easier.

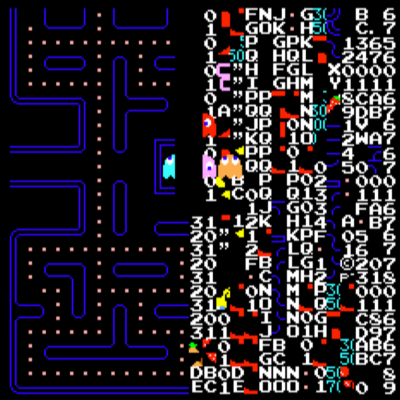
Level 256 as seen in [Glen]’s port.
There was plenty of hand tweaking to be done, and special effort was made to make sure all the data the original code was looking for was accessible at the same addresses as before. There was also a lot of work involved in creating a sprite engine that would reliably display the game video at a playable frame rate.

Overall, the port is highly faithful to the original, with the game code being identical at the CPU level. [Glen] reports that the same patterns used on the arcade machine can be used to complete the mazes on the Colour Computer 3 version, and it faithfully recreates the Level 256 bug as well. It’s an impressive piece of work to create such an authentic port on a home computer from 1986.

For another classic port, but with the temporal vectors flipped, check out Portal 2 on the Apple II.


Fabricate Your Own Tabletop Gaming Props

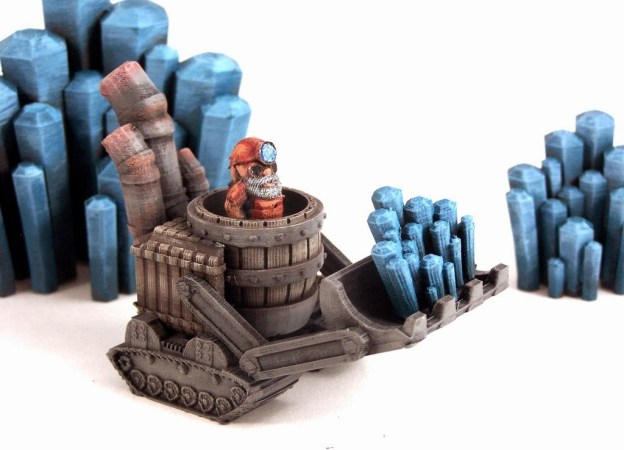
Delve into the mysterious world of tabletop roleplaying games. Warhammer Fantasy Roleplay, Shadowrun, Pathfinder, Ars Magica, Vampire, whatever gets your dice rollin’ — metaphorically in the case of a diceless system. This might very well be your daddy’s D&D. If you’re not a gamer, you’re certainly familiar with the concept. People sit around a table pretending to have an epic adventure, often adding a random element with the help of dice. A map is often displayed on the table, sized for figures that show the various heroes and villains.

As a person with access to a variety of CNC machines I find myself wanting to create things to make gameplay more fun. I want to build a scale castle and have a siege. I want to conduct a ship-to-ship battle with wooden ships built to scale. But I also think smaller. What is something I could make that would help us every day? Say, a box for dice. Not every project needs to be the dragon’s lair.

It turns out a lot of other folks have been thinking about the same thing.

Continue reading “Fabricate Your Own Tabletop Gaming Props”

Hackaday Prize Entry: Gaming Done Tiny With Keymu

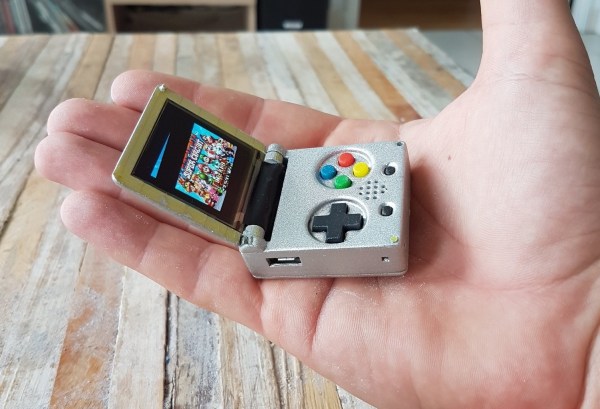
The world’s tiniest Game Boy Color, introduced at the 2016 Hackaday SuperConference, is a work of art. This microscopic game console inspired [c.invent] to create how own gaming handheld. His Keymu project on hackaday.io describes an open source, keychain-sized gaming handheld that its builder claims is really the world’s tiniest. How did he make it smaller? It’s a miniature Game Boy Advance SP, and it folds up in a handy clamshell case.

While he’s a Pi fan, [c.invent] felt the Pi Zero was too big and clunky for what he had in mind–a keychain-sized handheld. Only the Intel Edison was compact enough. He began with a custom PCB with a connector for the Edison’s fragile ribbon cable, then added an 1.5″ OLED display and an 11.7mm speaker, all powered by a 220 mAh lithium battery. [c.invent] also created inside a custom folding 3D-printed case that protects the Keymu’s electronics from keys and pocket lint.

Unlike the mini Game Boy Color, [c.invent] aims to create a fully fledged emulation console. The Edison incorporates a Linux distribution that allowing it to install emulators for GameBoy Color, GBA, NES, and SNES.

Nintoaster: The Next Generation

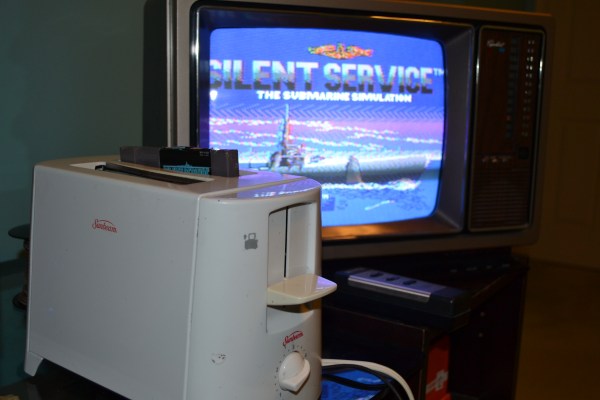
The original Nintendo Entertainment System is affectionately called “the toaster” due to the way the cartridge is inserted. [MrBananaHump] decided to take things a bit literally and installed a NES inside an actual toaster. This isn’t [MrBananaHump’s] design, the Nintoaster comes to us from [vomitsaw], who also built the SuperNintoaster. Since [vomitsaw] was kind enough to document his original build, [MrBananaHump] was able to build upon it.

The target toaster for this build was a plastic Sunbeam model found at a thrift store for $5. [MrBananaHump] gutted the toaster and cleaned out years of toast crumbs. The Nintendo mainboard would fit perfectly inside a toaster, except for two things – the RF Modulator and the expansion port. The expansion port was never used in the US version of the NES so it can be desoldered and removed. The RF also needs to be desoldered and relocated.

By far the biggest job in this casemod is hand-wiring each of the 72 pins for the cartridge port. It’s a tedious job, and it probably won’t look pretty. Keep your wires short, and things will probably work thanks to the relatively low clock speed of the NES.

The cartridge goes in one toast slot. [MrBananaHump] mounted his controller ports, power and reset buttons in the second slot. A bit of expanded metal grid completes the slot. Sure, it’s not exactly pretty inside, but with the case on, this becomes a rather nice looking build.

We’ve seen numerous Nintendo casemods over the years, just one other example is this N64 in an N64 controller.

Portable RetroPie Suitcase For Multiplayer On The Go!

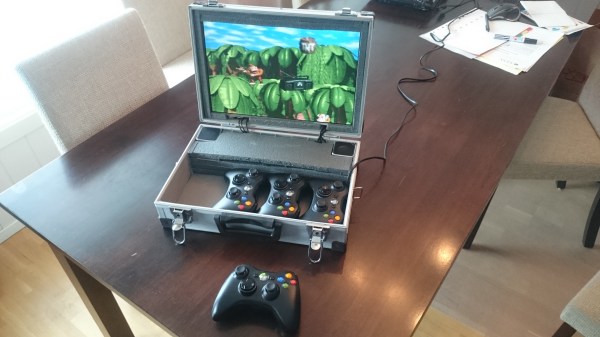
Portable gaming — and gaming in general —  has come a long way since the days of the original Game Boy. With a mind towards portable multiplayer games, Redditor [dagcon] has assembled a RetroPie inside a suitcase — screen and all!

This portable console has almost everything you could need. Four controllers are nestled beside two speakers. Much of the power cabling is separated and contained by  foam inserts. The screen fits snugly into the lid with a sheet of rubber foam to protect it during transport.

Tucked behind the monitor rests the brains of this suitcase console: a Raspberry Pi and the associated boards. [Dagcon] resorted to using a dedicated sound card for the speakers, diverting the output from the HDMI port. An LCD screen controller was also necessary as the screen had been re-purposed from its previous life as a laptop screen. [Dagcon] offers some tips on how to go about accomplishing this yourself and a helpful Instructables link.

Continue reading “Portable RetroPie Suitcase For Multiplayer On The Go!”

4-way or 8-way joystick mod

4-way Or 8-way Joystick Restrictor Mod

Having a restricted 4-way or 8-way digital joystick for an arcade game is fine if the joystick is built into a game cabinet that plays only one game — 4-way for Pacman and 8-way for Super Cobra. But [Tinker_On_Steroids] wanted a joystick that could be restricted as either 4-way or 8-way for a cabinet that could play a multitude of games, and it had to switch from one type of restriction to the other automatically based on the selected game.

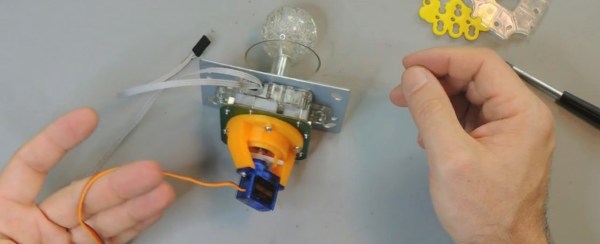
His digital joystick already came with a plate that can be mounted for either 4-way or 8-way restriction, but it has to be manually screwed in place for one or the other. He removed it and designed two 3D-printable parts, one that is to be mounted firmly to the bottom of the joystick and the other that rotates within the first one. Rotated in one orientation gives 4-way restriction and in the other orientation gives 8-way. That left only attaching a servo to do the rotation. The first video below shows mounting this all to the joystick and demoing the servo using a Teensy. The STL files for the parts are on his Thingiverse project page.

He also shows a simple circuit board he made that has two buttons and two LEDs on it for connecting to the Teensy and controlling the servo. And as an added option he shows how to talk to the Teensy from his desktop computer through USB and control the servo that way. In the second video below he details all that and also does a walk-through of the code he wrote for the Teensy. On the Thingiverse page he provides only the hex file but it’s likely you’d write your own software for interfacing with a game anyway.

Continue reading “4-way Or 8-way Joystick Restrictor Mod”

How To Add More Games To The NES Classic

The hype around the NES Classic in 2016 was huge, and as expected, units are already selling for excessively high prices on eBay. The console shipped with 30 games pre-installed, primarily first-party releases from Nintendo. But worry not — there’s now a way to add more games to your NES Classic!

Like many a good hack, this one spawned from a forum community. [madmonkey] posted on GBX.ru about their attempts to load extra games into the console. The first step is using the FEL subroutine of the Allwinner SOC’s boot ROM to dump the unit’s flash memory. From there, it’s a matter of using custom tools to inject extra game ROMs before reburning the modified image to the console. The original tool used, named hakchi, requires a Super Mario savegame placed into a particular slot to work properly, though new versions have already surfaced eliminating this requirement.

While this is only a software modification, it does come with several risks. In addition to bricking your console, virus scanners are reporting the tools as potentially dangerous. There is confusion in the community as to whether these are false positives or not. As with anything you find lurking on a forum, your mileage may vary. But if you just have to beat Battletoads for the umpteenth time, load up a VM for the install process and have at it. This Reddit thread (an expansion from the original pastebin instructions) acts as a good starting point for the brave.

Only months after release, the NES Classic is already a fertile breeding ground for hacks — last year we reported on this controller mod and how to install Linux. Video of this ROM injection hack after the break.

Continue reading “How To Add More Games To The NES Classic”