Linux Graphics Programming

There was a time when embedded system developers didn’t need to worry about graphics. When you have a PIC processor and two-line LCD, there isn’t much to learn. But if you are deploying Linux-based systems today, graphics are a real possibility. There are many options for doing Linux graphics including Wayland, X11, and frame buffers. Confused? This tutorial can help. The sections on Wayland and Mir are under construction, but that’s probably not what you are going to be using on a typical hacker project for the foreseeable future, anyway.

Of course, even inside those broad categories, you have multiple choices. If you are doing X11, for example, you can go low-level or pick any of a number of high-level libraries.

Continue reading “Linux Graphics Programming”

How An Amiga Graphics Business Ran In The 1990s

If you have ever used an eraser to correct a piece of pencil work, have you ever considered how much of an innovation it must have seemed when the first erasers were invented? It might seem odd to consider a centuries-old piece of stationery here on Hackaday, but there is a parallel in our own time. Digital image manipulation is such a part of everyday life these days as to have become run-of-the-mill for anyone with a mobile phone and the right app, but it’s easy to forget how recent an innovation it really is. Only a few decades ago your only chance of manipulating a photograph was to spend a lot of time in a darkroom with a photographic developer of exceptional skill, now children who have never known a world in which it wasn’t possible can manipulate their selfies with a few deft touches of the screen.

[Steve Greenfield] pointed us at a detailed description of the business he ran in the 1990s, offering digital and composite photography using an upgraded Amiga 3000.  It caught our attention as a snapshot of the state of digital image manipulation when these things still lay at the bleeding edge of what was possible.

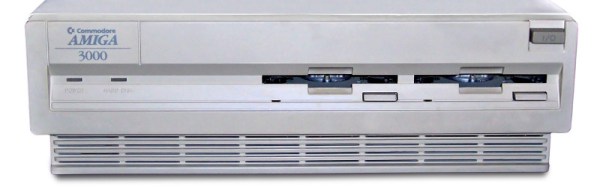
His 3000 was highly customised from the stock machine. It featured a Phase 5 68060 accelerator board, a Cybervision 64 graphics card, a then-unimaginably-huge 128MB RAM, and an array of gigabyte-plus Fast SCSI drives.  To that he had attached a Polaroid SCSI digital camera with a then-impressive 800×600 pixel resolution. The Polaroid had no Amiga drivers, so he ran the Shapeshifter Mac emulator to capture images under the MacOS of the day. The fastest 68000-series Mac only had a 68040 which the early PowerPC Macs could only emulate, so he writes that his 68060-equipped Amiga ran the Mac software faster than any Mac at the time.

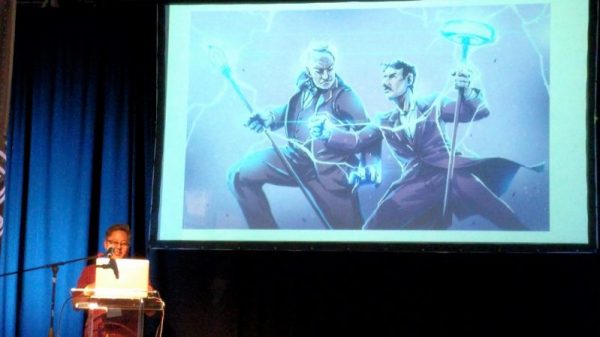
His stock-in-trade was attending sci-fi conventions and giving costumed attendees pictures with custom backgrounds, something of a doddle on such a souped-up Amiga. He writes of the shock of some Microsoft employees on discovering a 60MHz computer could run rings round their several-hundred-MHz Pentiums running Windows 95.

His business is long gone, but its website remains as a time capsule of the state of digital imagery two decades ago. The sample images are very much of their time, but for those used to today’s slicker presentation it’s worth remembering that all of this was very new indeed.

In a world dominated by a monoculture of Intel based desktop computers it’s interesting to look back to a time when there was a genuine array of choices and some of them could really compete. As a consumer at the start of the 1990s you could buy a PC or a Mac, but Commodore’s Amiga, Atari’s ST, and (if you were British) Acorn’s ARM-based Archimedes all offered alternatives with similar performance and their own special abilities. Each of those machines still has its diehard enthusiasts who will fill you in with a lengthy tale of what-if stories of greatness denied, but maybe such casualties are best viewed as an essential part of the evolutionary process. Perhaps the famous Amiga easter egg says it best, “We made Amiga …

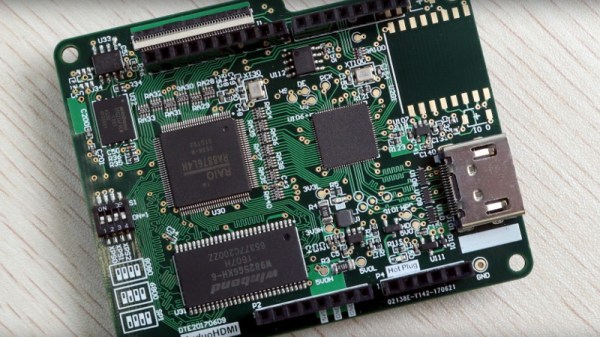
Here at Hackaday we’ve covered quite a few Amiga topics over the years, including another look at the Amiga graphics world. It’s still a scene inspiring hardware hackers, for example with this FPGA-based Amiga GPU.

Amiga 3000 image: By [Joe Smith] [Public domain], via Wikimedia Commons.

Amazing Oscilloscope Graphics

From what we can understand, [ompuco] has built a 2D audio output on top of the Unity game engine, enabling him to output X and Y values from his stereo soundcard straight to an oscilloscope in XY mode. His code simply scans through all the vertexes in the scene and outputs the right voltages into the left and right audio streams. He’s using this to create some pretty incredible animations. Check out the video “additives” below for an example. (See if you can figure out what’s being “added”.)

Continue reading “Amazing Oscilloscope Graphics”

Better 3D Graphics On The Arduino

There are cheap LCDs available from China, and when plugged into an Arduino, these displays serve as useful interfaces or even shinier baubles for your latest project. [Michael] picked up a few of these displays in the hope of putting a few animated .GIFs on them. This is an impossible task with an ATMega microcontroller – the Arduino does not have the RAM or the processing power to play full-screen animations. It is possible to display 3D vector graphics, with an updated graphics library [Michael] wrote.

The display in question uses the ILI9341 LCD driver, found in the Adafruit library, and an optimized 3D graphics driver. Both of these drivers have noticeable flicker when the animation updates, caused by the delay between erasing a previous frame and when a new frame is drawn.

With 16-bit color and a resolution of 320×240 pixels, there simply isn’t enough memory or the processing power on an ATMega microcontroller to render anything in the time it takes to display a single frame. There isn’t enough memory to render off-screen, either. To solve this problem, [Michael] built his render library to only render pixels that are different from the previous frame.

Rendering in 3D presents its own problems, with convex surfaces that can overlap themselves. To fix this, [Michael]’s library renders objects from front to back – if the pixel doesn’t change, it doesn’t need to be rendered. This automatically handles occlusions.

In a demo application, [Michael]’s LCD and Arduino can display the Stanford bunny, a low-poly 3D face, and geometric object. It’s not a video game yet, but [Michael] thinks he can port the classic game Spectre to this platform and have it run at a decent frame rate.

Video of the demo below.

Continue reading “Better 3D Graphics On The Arduino”

Better VGA On The STM32F4

[Cliff] is pushing VGA video out of a microcontroller at 800×600 resolution and 60 frames per second. This microcontroller has no video hardware. Before we get to the technical overview, here’s the very impressive demo.

The microcontroller in question is the STM32F4, a fairly powerful ARM that we’ve seen a lot of use in some pretty interesting applications. We’ve seen 800×600 VGA on the STM32F4 before, with a circles and text demo and the Bitbox console. [Cliff]’s build is much more capable, though; he’s running 800×600 @ 60FPS with an underclocked CPU and most (90%) of the microcontroller’s resources free.

This isn’t just a demo, though; [Cliff] is writing up a complete tutorial for generating VGA on this chip. It begins with an introduction to pushing pixels, and soon he’ll have a walkthrough on timing and his rasterization framework.

Just because [Cliff] has gone through the trouble of putting together these tutorials doesn’t mean you can’t pull out an STM Discovery board and make your own microcontroller video hacks. [Cliff] has an entire library of for graphics to allow others to build snazzy video apps.

Quantel

Retrotechtacular: The Early Days Of CGI

We all know what Computer-Generated Imagery (CGI) is nowadays. It’s almost impossible to get away from it in any television show or movie. It’s gotten so good, that sometimes it can be difficult to tell the difference between the real world and the computer generated world when they are mixed together on-screen. Of course, it wasn’t always like this. This 1982 clip from BBC’s Tomorrow’s World shows what the wonders of CGI were capable of in a simpler time.

In the earliest days of CGI, digital computers weren’t even really a thing. [John Whitney] was an American animator and is widely considered to be the father of computer animation. In the 1940’s, he and his brother [James] started to experiment with what they called “abstract animation”. They pieced together old analog computers and servos to make their own devices that were capable of controlling the motion of lights and lit objects. While this process may be a far cry from the CGI of today, it is still animation performed by a computer. One of [Whitney’s] best known works is the opening title sequence to [Alfred Hitchcock’s] 1958 film, Vertigo.

Later, in 1973, Westworld become the very first feature film to feature CGI. The film was a science fiction western-thriller about amusement park robots that become evil. The studio wanted footage of the robot’s “computer vision” but they would need an expert to get the job done right. They ultimately hired [John Whitney’s] son, [John Whitney Jr] to lead the project. The process first required color separating each frame of the 70mm film because [John Jr] did not have a color scanner. He then used a computer to digitally modify each image to create what we would now recognize as a “pixelated” effect. The computer processing took approximately eight hours for every ten seconds of footage. Continue reading “Retrotechtacular: The Early Days Of CGI”

Using Tetris Like MS Paint

Check out Samus looking boss in this pixelated image. Who would have thought of using Tetris as a canvas for these types of graphics? Coming up with the original idea of strategically clearing and leaving Tetris pieces to end up with what is shown above is hard enough. But how in the heck do you implement the algorithm that generated this programmatically?

First off, two thing should not be surprising about this. It wasn’t manually generated during normal gameplay. That would be beyond savant level. The other thing to note is that the order in which pieces occurred was not random, but strategically calculated by the algorithm. The challenge is not only to occupy and clear the correct pixels, but to make sure the correctly colored pieces remain.

You need to see the fast-motion video embedded after the break to fully appreciate the coding masterpiece at work. We’re not going to try to paraphrase how the algorithms functions, but get comfy with the link above which walks through all of the theory (in addition to supplying the code so you can try it yourself).

Continue reading “Using Tetris Like MS Paint”